Securing Audio Objects

Using the “LockUnlock” functionality you can secure audio objects. This will help you to safeguard Harman proprietary audio objects during collaboration. This feature encrypts Harman audio objects within the project, preventing unauthorized access by third parties. Additionally, you can hide the tuning data, ensuring sensitive information remains confidential when sharing the projects.

You can lock an audio object type or an audio object instance.  It is possible to lock a CAO instance as well. All the audio objects inside a CAO will get automatically locked.
You can even lock a part of the CAO signal flow. All the CAO instances will inherit the secure status.

Characteristics of secured audio object:

  • Secure audio objects will not allow any of their properties to be edited. The Properties window will be disabled.
  • New secure audio objects cannot be added to the signal flow.
  • There is no way to remove, duplicate, or copy a secure audio object.
  • Upgrade of secure audio objects is not possible. An error message will be shown to use the valid framework dll.
  • Native panels cannot be opened from the signal flow or custom panel.
  • If any secure audio object has been configured in the custom panel before locking, it will continue to work. However, after locking it is not possible to add a secure audio object native panel to the custom panel. Secure state variables will be disabled in the address assignment window.
  • Secure audio objects will be hidden in State Variables Explorer, MIPS, Memory, Memory Latency, Linking, Custom panel designer and Streaming window.
  • It will not be possible to export the DDF of the device which contains secure audio objects.
  • In the XTP viewer, the secure audio object’s tuning will not be decoded.

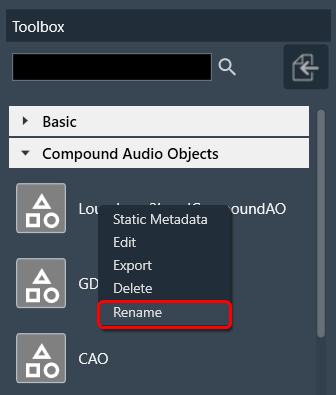
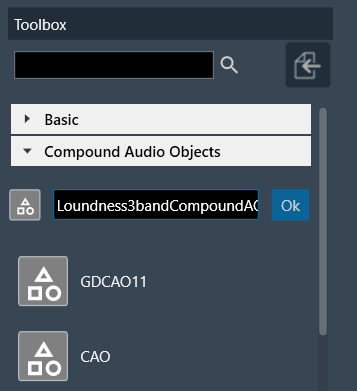
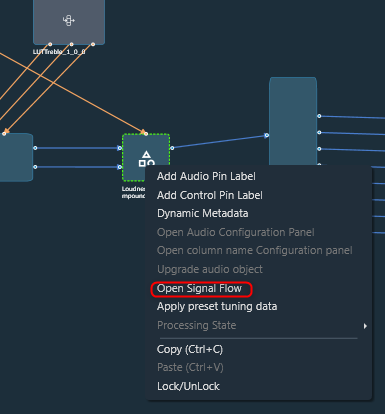
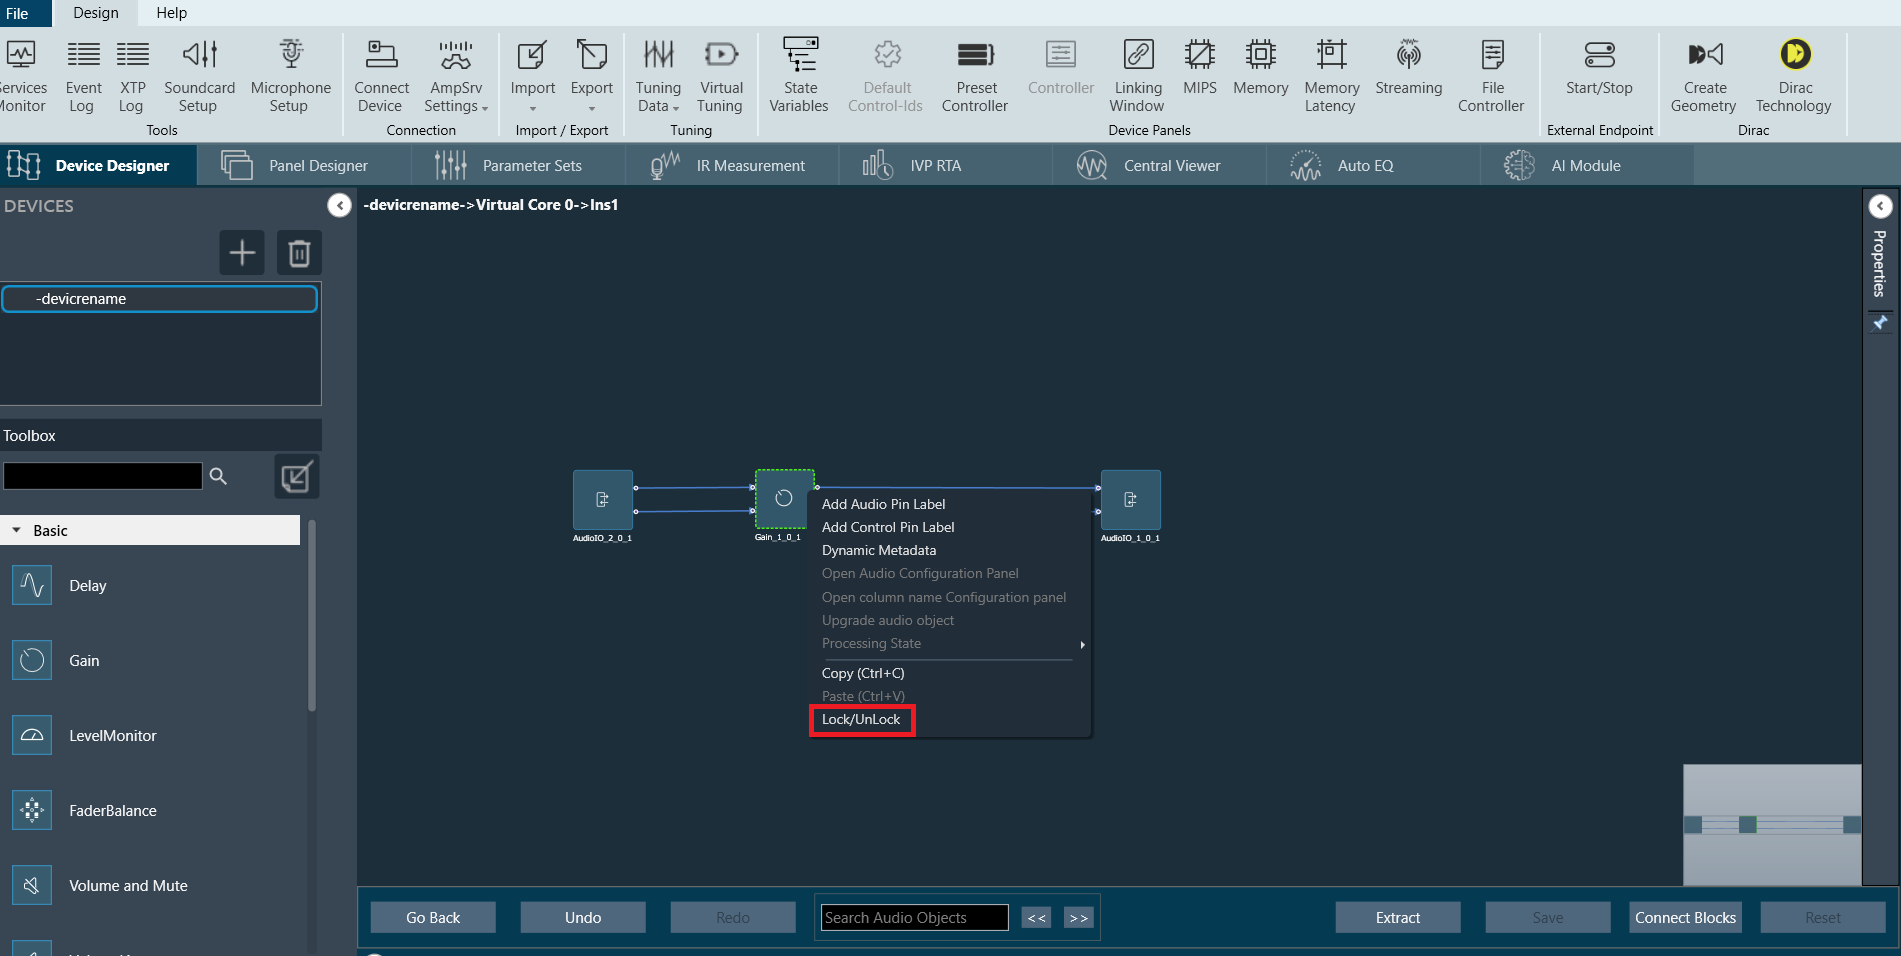
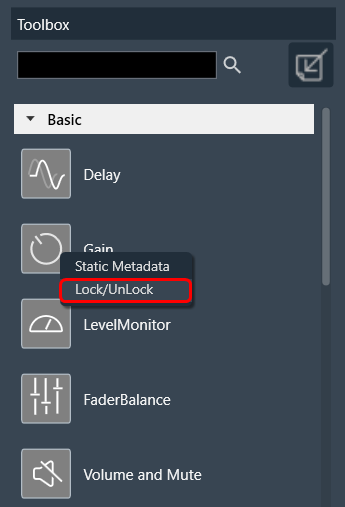
In the toolbox, you can use the “Lock/Unlock” option available on the right-click of any audio object to secure any audio object. Once the audio object type is locked (password protected), all the instances of that audio object type will be locked across all the projects. The locking of the audio object feature is audio library-specific.

Once the lock is applied to any audio object type, the following changes will take place in the system.

  • Locked audio objects are distinguishable from other audio objects with a lock symbol.
  • The lock is on all instances of the particular audio object type across all projects based on the selected audio library version (until the W+1 release). From X release instance locking is possible.
  • Audio objects will be locked in CAO instances. However, CAO types are excluded.
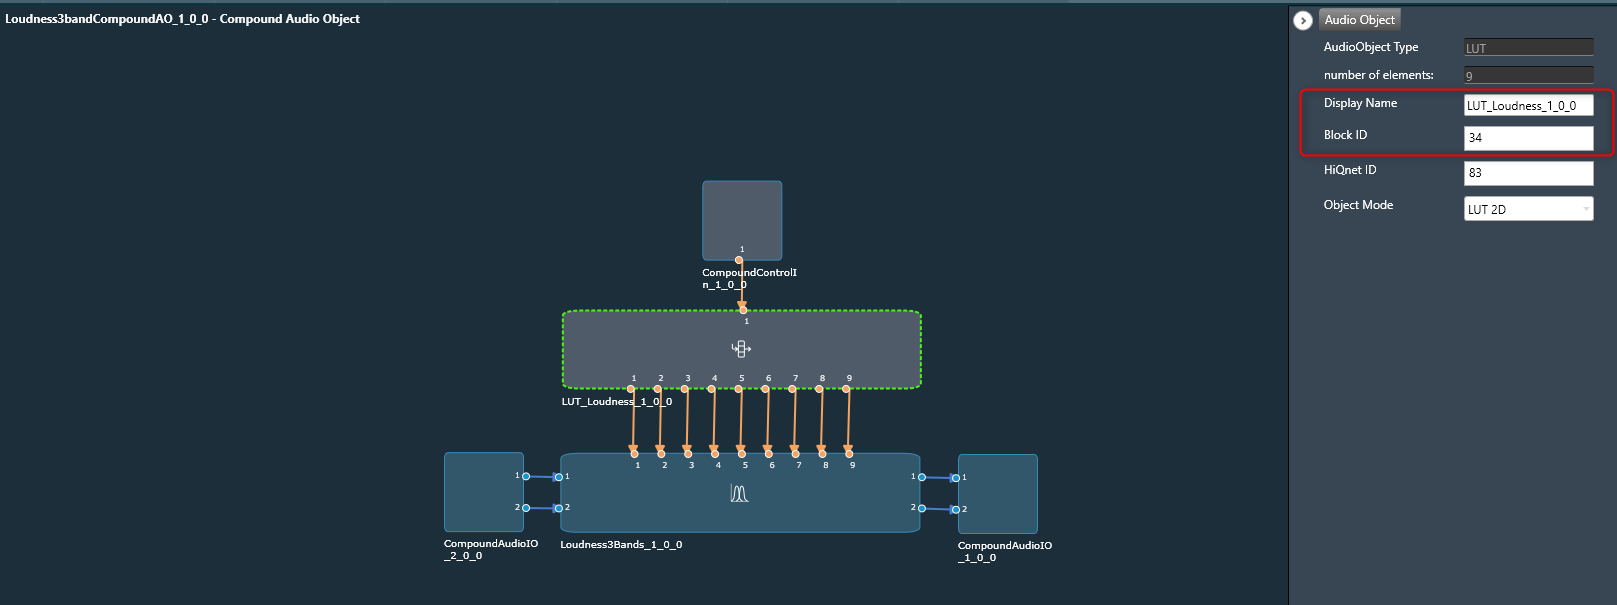
  • When “Open Signal Flow for Tuning” is clicked on the Instance, the audio objects will remain locked.
  • Audio objects remain locked in the  CAO instance signal flow
  • Undo and Redo history will be cleared from the Signal Flow Design.
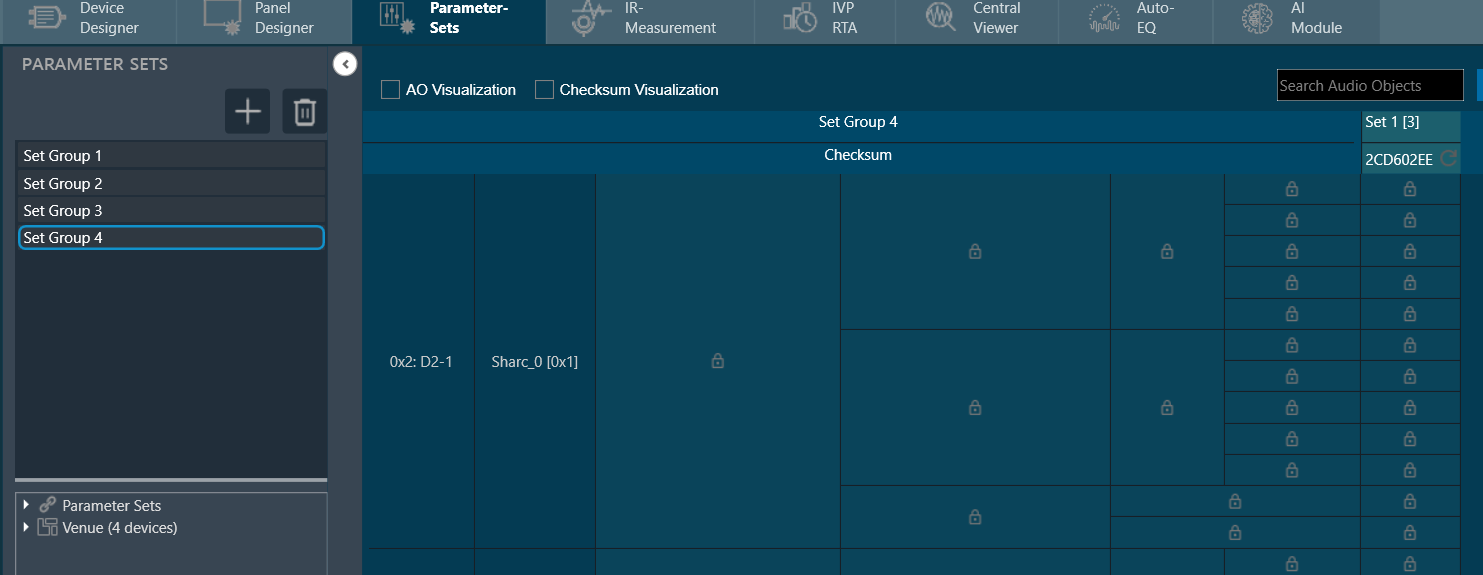
  • In Parameter sets, Secure audio objects will be masked with the lock icon in the parameter sets window, and presets cannot be changed.
  • You can export .set and .setr files from presets and import them back. There will be no change in .set files. However, secure audio objects will be excluded in the .setr file as it is human-readable. You cannot read the tuning data of secure audio objects in .setr files.
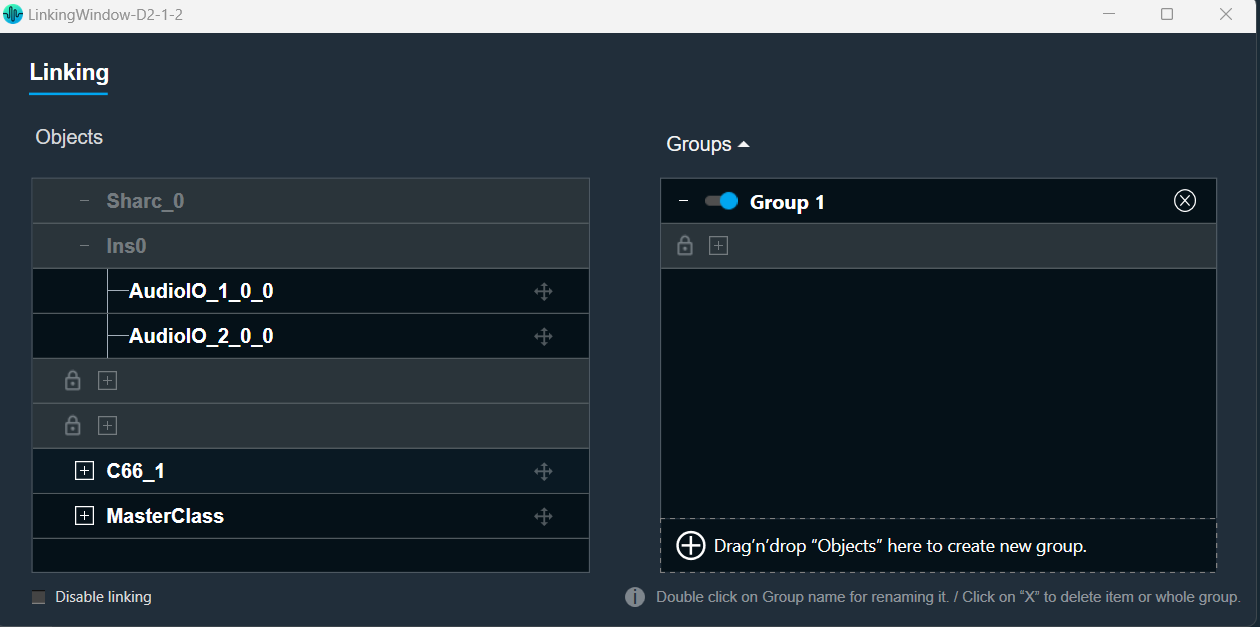
  •  If the audio object is locked, the secured audio objects will be masked with a lock icon in the linking window.
    After locking the audio object it will not be possible to add the secure audio objects for linking. The linking continues to function as intended.
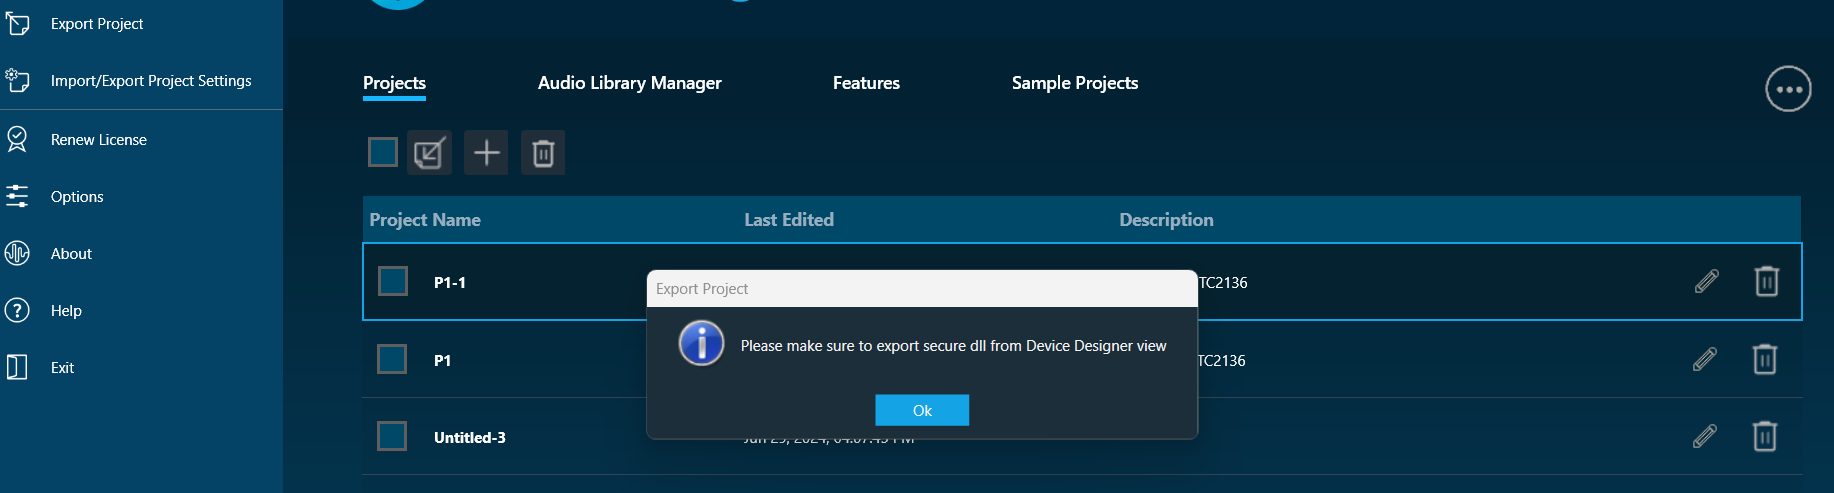
  • When you lock audio objects in a project, remember to also export the secure DLL before sharing the project with others. This DLL is required to use the locked audio objects.
    On export of a project with the secure audio object, a warning message will be displayed to export the secure dll from the device designer.
  • In the device designer, you can create an Xaf framework dll with the secure audio object information added to it.
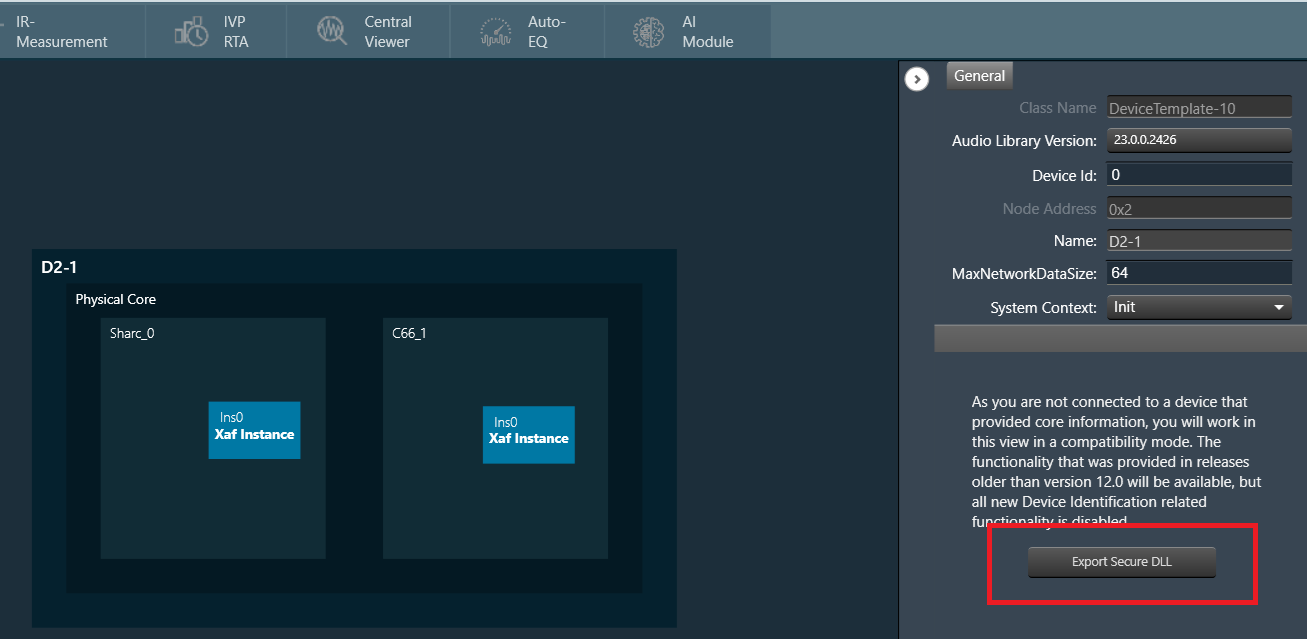
  • Exporting a secure DLL creates a copy of the specific audio framework version used in the project. This ensures compatibility between the project and the DLL.
    A project containing secure audio objects can only be imported if the corresponding secure DLL is available. This DLL provides the necessary security measures to access and use the locked audio objects.
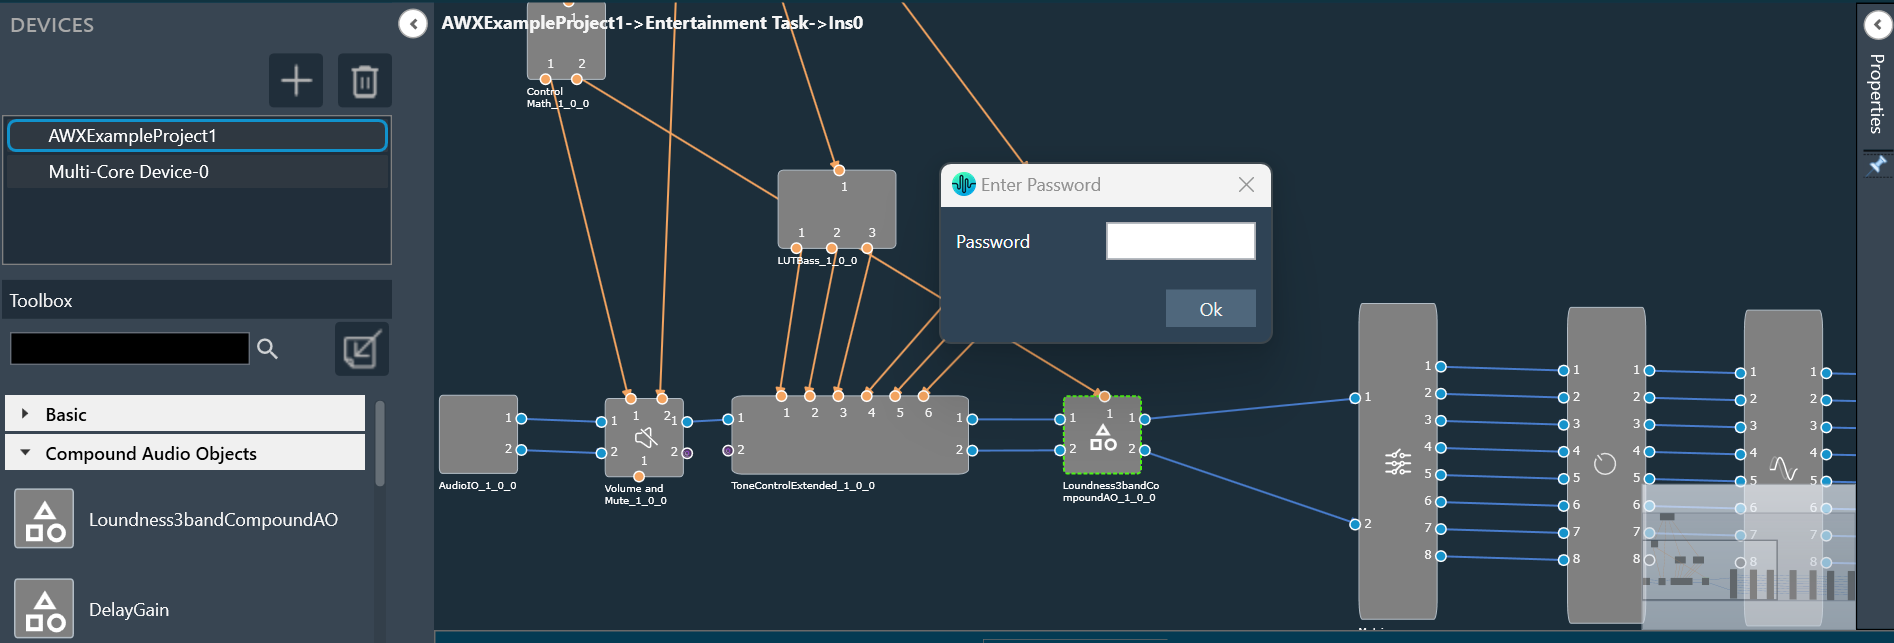
    If the project creator doesn’t export the secure DLL, the other user importing the project might need a password. This password would be required to unlock and use the secure audio objects.
  • The secure dll is the same as any other Xaf dll. It can be used for Integrated Virtual Processing (IVP). Also, all file properties of the dll will be retained.
  • During project export and import, all audio objects will retain their secure status, including any passwords set on them. When the project is closed or opened, it retains its secure status.

When exporting the project with secure DLLs, it is mandatory to export the secure DLL. If not, you need to share the password with other users who want to use the project.

The Compound Audio Object type cannot be secured in the W release.

Launching Native Panel from Signal Flow Designer

To launch a native panel from the Signal Flow Designer, it is assumed that you have already created a signal flow. For more information on how to create a signal flow, refer to Create a Signal Flow.

Steps to launch Native Panel from Signal Flow Designer

  1. On the Signal Flow Designer window, double-click on any audio object to open a Native Panel.

    Use the interactive widgets on the Native panel to make the desired changes to audio object properties.

    If there is any modification to Signal Flow Designer, a popup message will appear asking to save the changes.

    When Native Panels is open, you cannot make any changes to the Signal Flow Designer window.

  2. Select the free preset slot numbers, enter the name of the slot, and click Store preset. This saves and stores the current tuning data to the selected slot.

If you do not enter a name of the slot, then it will take the default named “New Preset”.

You can switch between presets and apply their values to the native panel by simply clicking on them. You can also change the values in the native panel and/or the preset name after you’ve clicked it to override the preset.

Launching Native Panels

To launch a native panel, a device must be added to the device list.

Steps to launch Native Panel:

  1. Create a new panel. For more information on how to create a panel, refer to the Create a New Panel.
  2. On the panel, add Button from the Basic controls tools.
    A screenshot of a computer Description automatically generated with medium confidence
  3. Select the Button to open the Properties view, and select the System Function tab.
  4. On the System Function tab, click on System Functions. This opens System Function Editor window.
    Graphical user interface, text, application Description automatically generated
  5. On the System Function Editor window, select the Function as Launch Native Panel from the drop-down list, and select the native panel type from the drop-down list. This opens a Configuration panel.
  6. On Configuration panel, select the device/project and audio object from the drop-down list which you want link, and click OK.
    Depending on the selection of device/project the list of audio objects is displayed in the drop-down list.

    If you want you can customize the Button appearance.
  7. Go the Properties view, select the Button tab, and change the button name, font style, text colour, fill colour, and border colour.
    A screenshot of a computer program Description automatically generated with medium confidence
  8. Click on Launch Current option from ribbon bar and click on button to open Native Panel.

    On the Native panel you can make the desire changes and store the changes.
  9. This feature helps you to set processing state when you doesn’t have license to SFD.

Multi dll support for CAO

The Compound Audio Object template can be shared across multiple audio library versions. Only the Compound Audio Objects associated with the current device version will be available under the Compound Audio Objects section of the Audio Object Toolbox.

  • Add new CAO to Toolbox: In Signal flow Designer, extract an audio object. To know more, refer to Create a Compound Audio Object.
    Newly created CAO will be added to Toolbox corresponding to device audio library version.
  • Add imported CAO to Toolbox: In Signal flow Designer, import a compound audio object. To know more, refer to Import a Compound Audio Object.
    Imported CAO will be added to Toolbox corresponding to device audio library version.
  • Port to different audio library version
    1. Create a project with a device for which CAO is existing. Add CAO instance in Signal-flow.
    2. Close Signal Flow Designer window, go to Device Designer, and change the device Audio Library Version to target dll version.
    3. Open Signal Flow Designer window, CAO template will be added to toolbox for target dll version.

If inner audio object incompatibilities are detected, delete CAO in Signal-flow > Edit CAO template and upgrade incompatible inner audio objects.

Ported CAOs remain mutually exclusive. Edit/Delete on CAO template in one dll version will not impact CAO template in a different dll version toolbox.

Common Operation in Native Panel

Passing pin labels to native panels

The native panels display the corresponding names of the pin labels assigned to an audio object in SFD, thereby ensuring visibility.
This feature applies to the listed native panels.

  • Delay
  • Gain
  • EQ/Biquad
  • FIR, FIRMIMO, FastConv
  • Limiter
  • Mixer
  • Router

On the Router panel first three characters of the out-pin labels will be displayed as a channel out names.

Look-up Table (LUT) panel has a separate mechanism to change the names of the channel.

Editing labels in native panels

You can modify Native panels pin labels. Double-click on a label, a text box will appear, enter the new name. The provided name will be updated both on the panel itself and on the corresponding pin in SFD.

For audio objects that have a configurable number of channels, the new value will be set for both the input and output pins. However, for other audio objects, the value will be updated separately for the input and output pins.

Depending on the panel, the displayed text may be trimmed if it exceeds the available space. This feature applies to all native panels except for the Biquad panel and the LUT panel.

Resizing Native Panel

When the native panel window is resized, the controls are resized to fit the window.
Following are the native panel which support resizing:

  • Parameter Biquad,
  • Crossover Biquad and
  • Tone Control Extended Panels

Native Panel Presets

Preset or Tuning sets can be used to store the tuning data set of the native panel. This control is available in every Native panel.

Creating a Preset

Follow the below steps to create a preset:

  1. On the native panel, tune audio objects signal flow.
  2. Select a free preset slot (numbers), enter a slot name in the text box.

    If you do not enter a preset name, it will take the default name of the New Preset.

  3. Click on Store Preset to save and store the preset.
    The preset will be stored in the slot you had chosen. The blue color indicates that the preset is applied to the respective native panel.

You can create several presets and switch between them to apply their values to the native panel by simply clicking on them. Once they are clicked, you can also override the preset by changing the tuning data of inner audio objects or the preset name.
Graphical user interface, application Description automatically generated

Resetting the Presets

Follow the below steps reset a preset:

  1. On the Preset section, select the slots, and then click on the settings icon.
  2. Click on Reset Selected to reset the selected preset slots.

If you want to reset all presets of the respective native panel, click Reset All.

Create a Compound Audio Object

Creating a Compound Audio Object is very simple. The designer has to select an audio object from an existing signal flow and extract audio objects into a Compound Audio Object. The application will replace the extracted audio objects with the Compound Audio Object in the signal flow.

To create Compound Audio Object:

  1. Open a project and go to Signal Flow Designer window.
  2. Select the audio objects in the Signal Flow Designer window and click on Extract. This opens the Compound Audio Object window.

    Extract can be performed only when valid audio objects are selected. Currently, the GTT Version does not support FIR MIMO, EOC, RNC, Audio IO, Control IN, and Compound Audio Object extraction.

    Extract functionality will be enabled only if Signal Flow is saved.

    On Compound Audio Object window the selected audio objects are surrounded with the interface objects like AudioIO and Control IO.

    The interface objects are used to configure Compound Audio Object’s pins (AudioIO, ControlIO). Also, you can tune inner audio objects just like basic audio objects.
    A screenshot of a computer Description automatically generated with medium confidence

  3. Click Save and enter the Compound audio object Name and Description.
  4. Select a free preset slot number, enter a name in the text box and then click on Store preset to save and store the preset.Graphical user interface Description automatically generated
    The preset will be stored in the slot you had chosen. The blue color indicates that the preset is applied to CAO inner audio objects.
  5. Click Go Back after creating the Compound Audio Object.In the Signal Flow Designer window, you will see that the selected audio object has been replaced with the new compound audio object and the same audio object is listed under the Compound Audio Object category in the Toolbox.

    Block Id cannot be assigned for Compound Audio Object instances.

Rename a Compound Audio Object

Once you added a Compound Audio Object in the Toolbox. You can rename the Compound Audio Object as per requirement.

To rename Compound Audio Object:

  1. Go to the Toolbox in Signal flow designer window, select the compound audio object under the Compound Audio Object category, and click Rename from the context menu.
  2. On the textbox, enter the desired name of the compound audio object, and click Ok.

A successful message will appear after the modifications have been made.

CAO renamed will update CAO type name in all devices and projects.

Export a Compound Audio Object

Import a Compound Audio Object

To Import Compound Audio Object

  1. On the Signal Flow Designer window, click on the Import Compound Audio Object option.
  2. Browse the location of Compound Audio Object and click Open. The imported Compound Audio Object added in the toolbox.

If the same Compound Audio Object is already in the toolbox, you can overwrite it or import it as a new Compound Audio Object.

The Compound Audio Object in the Toolbox can be dragged and dropped into the Device Signal Flow, just like a basic audio object.

If device signal flow is designed with Compound Audio Objects, it is carefully considered to bundle them in a project file (.gttd).

Export a Compound Audio Object

It is very convenient to share the Compound Audio Object by exporting it to a .cao file. Compound audio objects are just like any other audio object in the Signal Flow Designer toolbox. Except that they are complex and not part of the audio library.

To Export Compound Audio Object

  1. On the Signal Flow Designer window, select the compound audio object under the Compound Audio Object category in the toolbox and click Export through the context menu.
  2. On the dialog box, click Ok to export the Compound Audio Object.
    • If the “Editable on import“ option is checked, it means you can edit the Compound Audio Object on import.
    • If you uncheck the “Editable on import“ option, a new Compound Audio Object will be created while editing the Compound Audio Object on import.

  3. Navigate the location, and click Save the Compound Audio Object. The exported file is saved in .CAO format.

Create Preset for Compound Audio Object

Preset or Tuning sets can be used to store the tuning data set of a CAO template signal flow. These stored tuning sets can be applied on instances of CAO template.

Preset control feature is available for all saved CAO templates. It can be used to store the tuning data set of CAO template.

To create Preset

  1. On the Compound Audio Object editor, tune audio objects signal flow.
  2. Select a free preset slot (numbers), enter a slot name in the text box.
  3. Click on Store Preset to save and store the preset. The preset will be stored in the slot you had chosen. The blue color indicates that the preset is applied to CAO inner audio objects.
    Graphical user interface, application Description automatically generated

You can create several presets and switch between them to apply their values to the CAO template by simply clicking on them. Once they are clicked, you can also override the preset by changing the tuning data of inner audio objects or the preset name.

Only after Compound Audio Object is saved, the Preset control feature will be available for configuration.

If you do not enter a preset name, it will take the default name of the New Preset.

Set presets are available for application, only on exiting Compound Audio Object editor view.

Reset Presets

To Reset Presets

  1. On the Preset section, select the slots, and then click on the settings icon.
  2. Click on Reset Selected to reset the selected preset slots.

    If you want to reset all presets of the respective native panel, click Reset All.

Apply Presets on CAO Instances

If presets are available in CAO templates, you can apply these presets to CAO instances in the main signal flow.

  1. On the Signal Flow Designer window, right-click on compound audio object instance, go to Apply preset tuning data, and then select the required presets displayed in sub-menu.
  2. Click Ok to apply the tuning data of a preset to all inner audio-objects of the selected compound audio object. After applying the tuning data a successful message will be displayed.
    Graphical user interface, diagram Description automatically generated with medium confidence

 Apply preset tuning data option will be available only when signal-flow is in saved state.

Presets will be exported/imported along with a Compound audio object template.

Set password for Compound Audio Object

Adding a password to a compound audio object (CAO) can ensure its security. During the creation or modification of a CAO, it is possible to add a password, although this step is not mandatory.

It is important to remember the password in order to access and view the signal flow of the Compound Audio Object (CAO).

To enhance the security of the CAO, it is advisable to periodically change the password at specific intervals. This measure can help prevent unauthorized access and ensure the continued protection of the CAO. The signal flow should be saved after entering or updating the password.

Click on the edit CAO option to view the signal flow. If the CAO contains a password, an authentication dialog box will be displayed. Enter the valid password to view the CAO Signal flow.

Edit Compound Audio Object Instance

You can view or modify the Compound Audio Object instance using the “Open Signal Flow” option. The Open Signal Flow option enables to view signal flow of CAO instance that is added to Main Signal flow. The view allows you to customize and save the Block Id and Display names of inner audio objects in CAO instances.

Steps to open CAO instance signal flow:

  1. On the Signal Flow Designer window, right-click on CAO instance, and select Open Signal Flow option.

    When the Compound Audio Object version is updated, it will be highlighted in a different color in the Signal Flow Designer. In order to save the signal flow, the upgraded Compound Audio Object.

    Navigation to CAO instance Signal-flow will be allowed only if password validation is successful for password protected CAO templates and if CAO template is editable.

  2. On the CAO instance signal-flow window, select the respective audio object and edit the Display Name and Block Id, if required.

    Except for Display Name and Block Id, all audio object properties on the CAO instance signal-flow window are fixed.

    Customized Display name /Block ID will be assigned only if it is unique across Main signal-flow.

    Block Id cannot be assigned for Compound Interface objects – Compound Audio IO , Compound Control In, Compound Control Out.

  3. Click Save to save all updated Display Names and Block Ids.
  4. Double-click on audio objects to open the native panel (if available). The native panel allows to tune audio objects. Audio objects can be tuned for CAO instance without additional custom panel creation.
  5. Once you made all the changes in the CAO instance signal-flow window. Click Go Back to navigate to the primary Signal Flow Designer window.

Customized Display Name and Block Id will be updated in all device associated data, making it identifiable in DDF/State Variable Explorer/ Venue Explorer/ Custom Panel address editor.