The Probe Point functionality facilitates the streaming of data from any stage of the signal flow to GTT, enabling the analysis, recording, or reuse of the data within IVP. The primary purpose of this feature is to provide the capability to receive data from an audio object and perform real-time analysis of audio input using the Real-time Analyzer view.

Related Topics
To enable probe points per core:
- Open the Device View and select the Virtual core layer of the device.
- Go to the Virtual core properties, select the Streaming checkbox, and set a number of probe points per core.
Only the configured number of probe points can be enabled in signal flow per core.
The configured probe points will be sent to the device using the “Send Device Config” feature. This configuration can be fetched from the device using the “Load Device Config” feature.
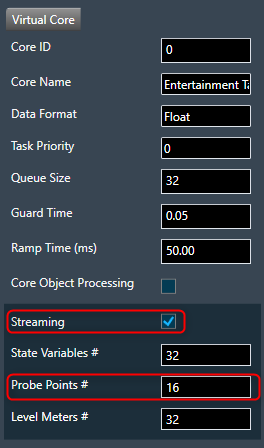
In order to utilize streaming for state variables, it is necessary to enable this feature. However, considering its resource-intensive nature, this high configuration feature can be skipped to ensure optimal utilization of MIPS and memory. The count of probe points specifically pertains to audio streams and a maximum of 16 probe points are supported for a core.
If Streaming is disabled for the core, the number of probe points input field will be disabled, and streamable state variables will be excluded for that core in the streaming window.
Add Probe Point
The Probe Point context menu for selected connections has the below options:
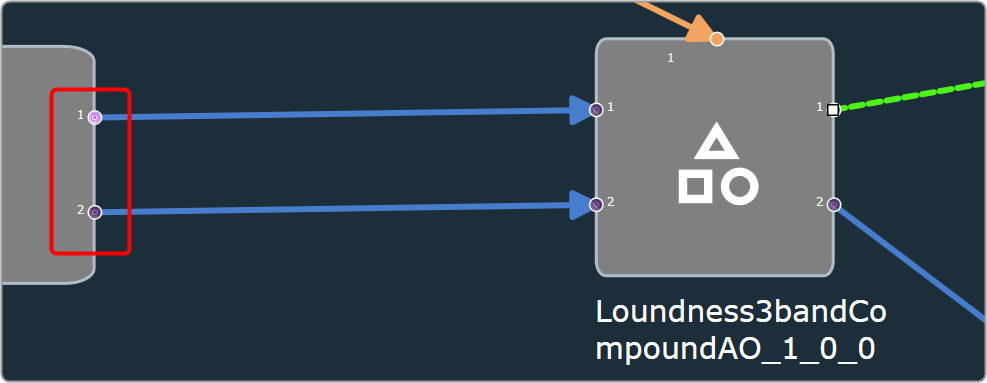
- Add: The feature allows you to add a probe point on a selected connection source point. Additionally, the default state of the probe point is set to the enabled state.
To add a probe point on the virtual connection:
- Right-click on the virtual connection > Probe Point > select Add.
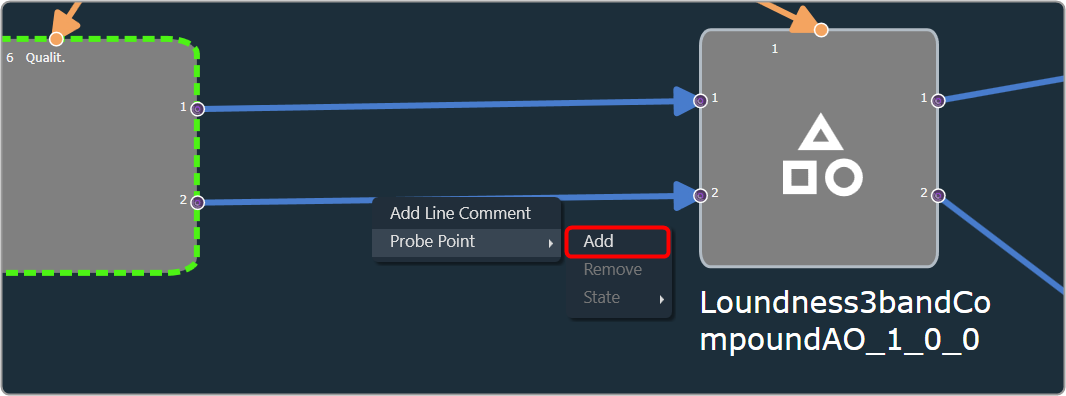
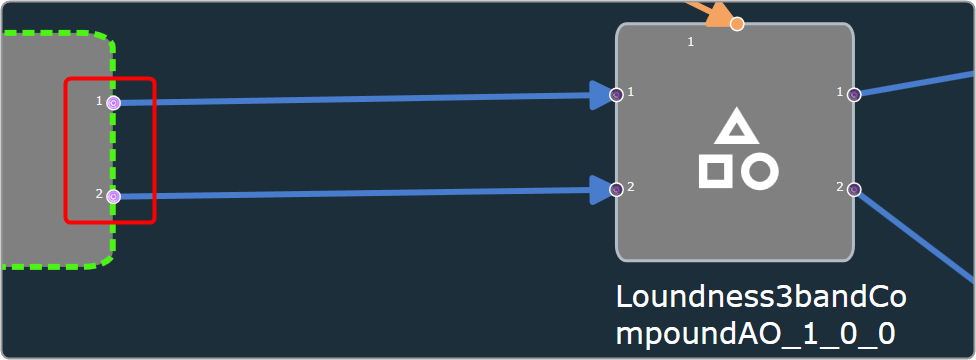
After adding probe points, the source point pin connection will be visually highlighted with a bright purple-colored icon.
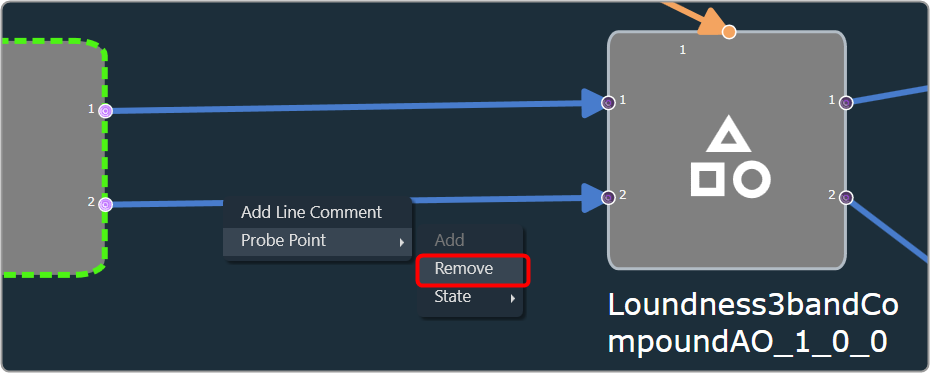
Remove Probe Point
- Remove: You can remove a probe point from the selected connection.
To remove the probe point from the virtual connection:
- Right-click on the virtual connection > Probe Point > select Remove.
- State: You can alter the state of the probe point on a selected connection.
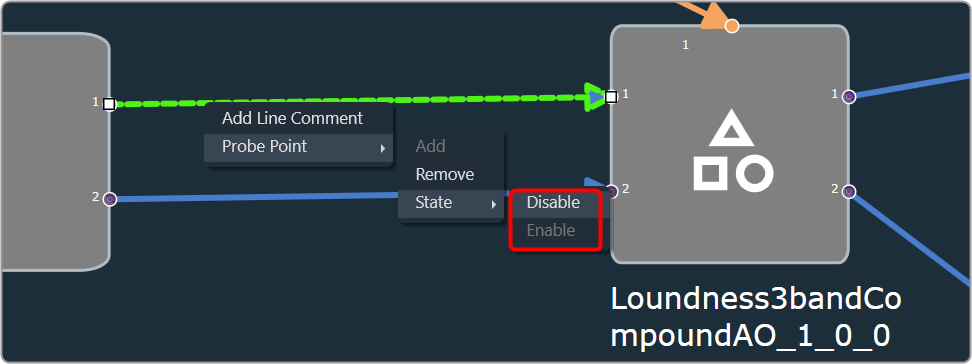
| Enable | Change the probe pin state to enable and the pin will be highlighted with a bright purple color icon. |
| Disable | Change the probe pin state to disable and the pin will be highlighted with grey dark purple color icon. |
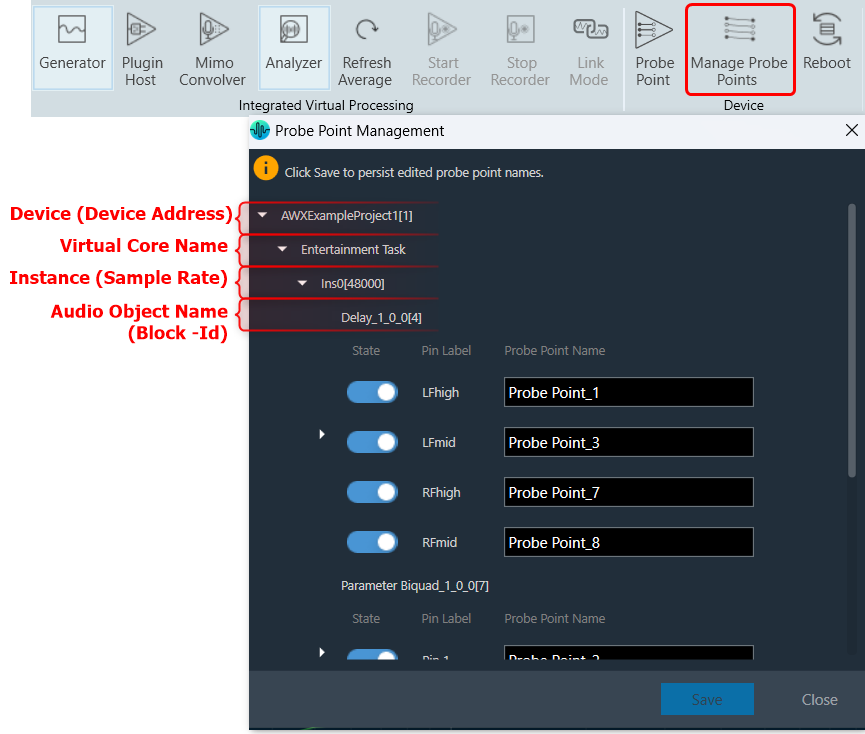
Open the Probe point management window through the ‘Manage probe Points’ ribbon button.

The Manage Probe Points allows you to enable or disable probe points and edit probe point names in the Probe Point Management window.
In the Probe Point Management window, the probe points are organized in the following order.
- Device [Device address]
- Virtual Core name
- Instance [Sample Rate]
- Audio Object Name [Block- Id]
Additionally, the State, Pin Label, and Probe point names are displayed for each probe point.
This window will consistently stay synchronized with the probe point states in the Signal Flow Designer.
After making all the necessary modifications, click Save to persist edited probe point names.
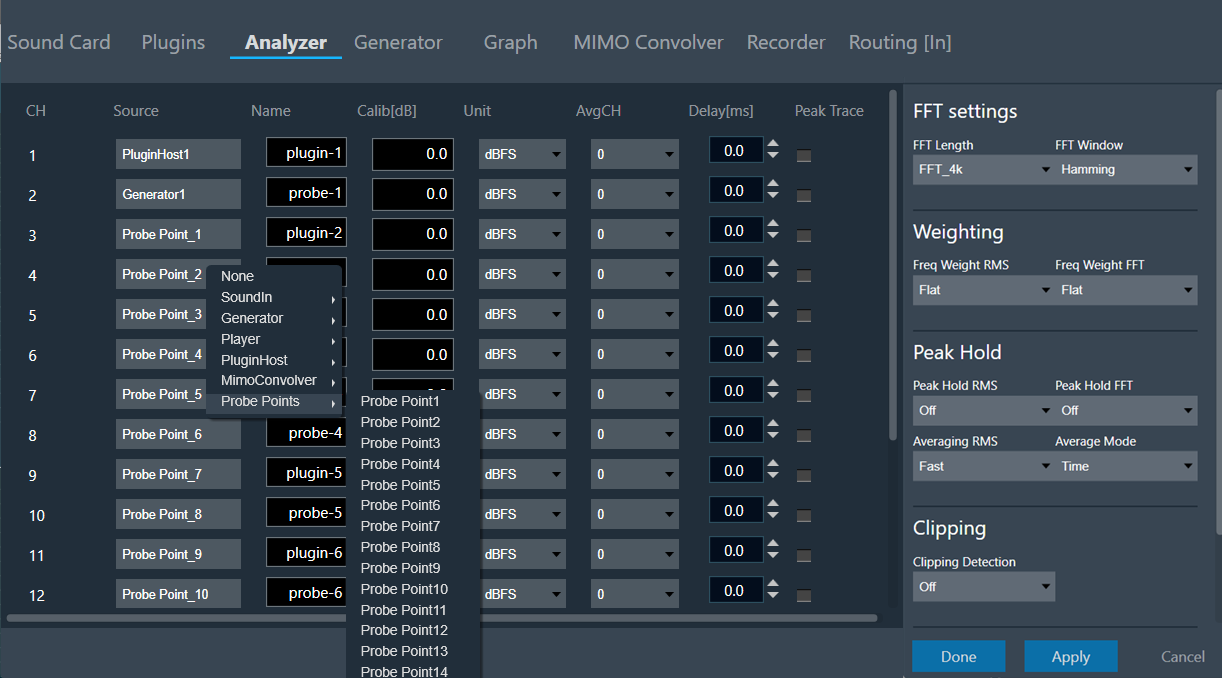
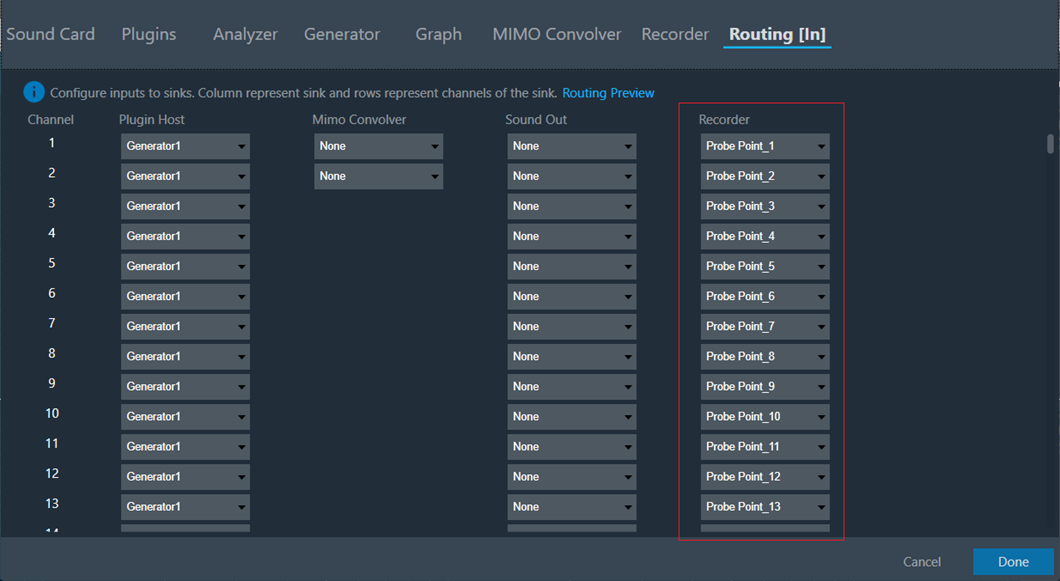
Configure probe points in RTA/IVP
- Open the Advanced Settings window
- Select Probe Points as Analyzer / Recorder / Sound outsources.
- Click Done.
To record the probe point signal.
Start Probe Point Streaming
Pre-requisites:
- Make sure to enable the Probe Point feature for the core.
- Ensure that the number of active probe points is set correctly.
- Ensure that the Probe Points used in the IVP configuration are correctly configured as a source (Analyzer, Recorder, etc).
- Start Plugin Host and establish a connection with the device.
Use IVP Block Length <= 512 for probing to avoid frame dropping.
Once you have configured as per the above pre-requisites, click on the Probe Point to start.
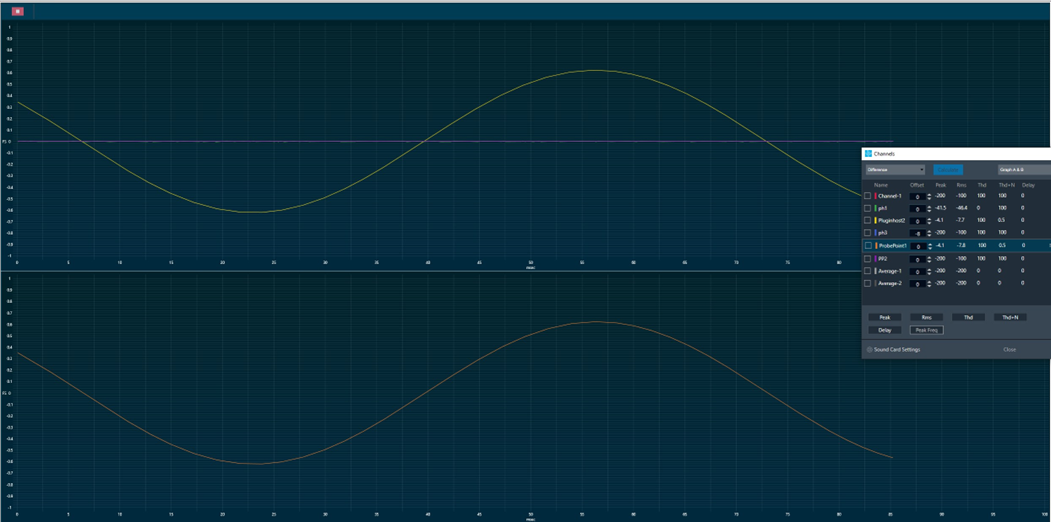
Example of Streamed data.
When you click on a “Reboot” button, the device will restart. During the reboot process, the plugin host will go through a shutdown sequence and then start up again.
After the reboot, the plugin host will return to its previous state.
