Memory latency shows the amount of time taken by the CPU from initiating a request for assessing memory to actual reading or writing data at the requested memory.

In AudioworX, the latency of the memory request is abstracted and only measured in relative levels.
- Level 1 – fastest memory available in the platform.
- Level 16 – slowest.
The Memory Latency Editor provides a way to configure latency levels for individual audio object memory records from GTT.
During design time, GTT retrieves memory records for audio objects from the audio library in the following cases:
- While adding an audio object.
- Modifying audio object i.e changing the number of inputs, outputs, number of elements, or selected mode.
- Modifying additional parameter value.
- Upgrading audio object.
- Import of project which defaults to a different dll other than the created one.
- Upgrading device framework to version 17 dll or above.
- The changing target type of Core.
- Changing Sample Rate or Block Length of instance.
GTT supports Memory Latency feature only if the xAF dll version is 17.x.x.xxx or above.
Editing Memory Latency
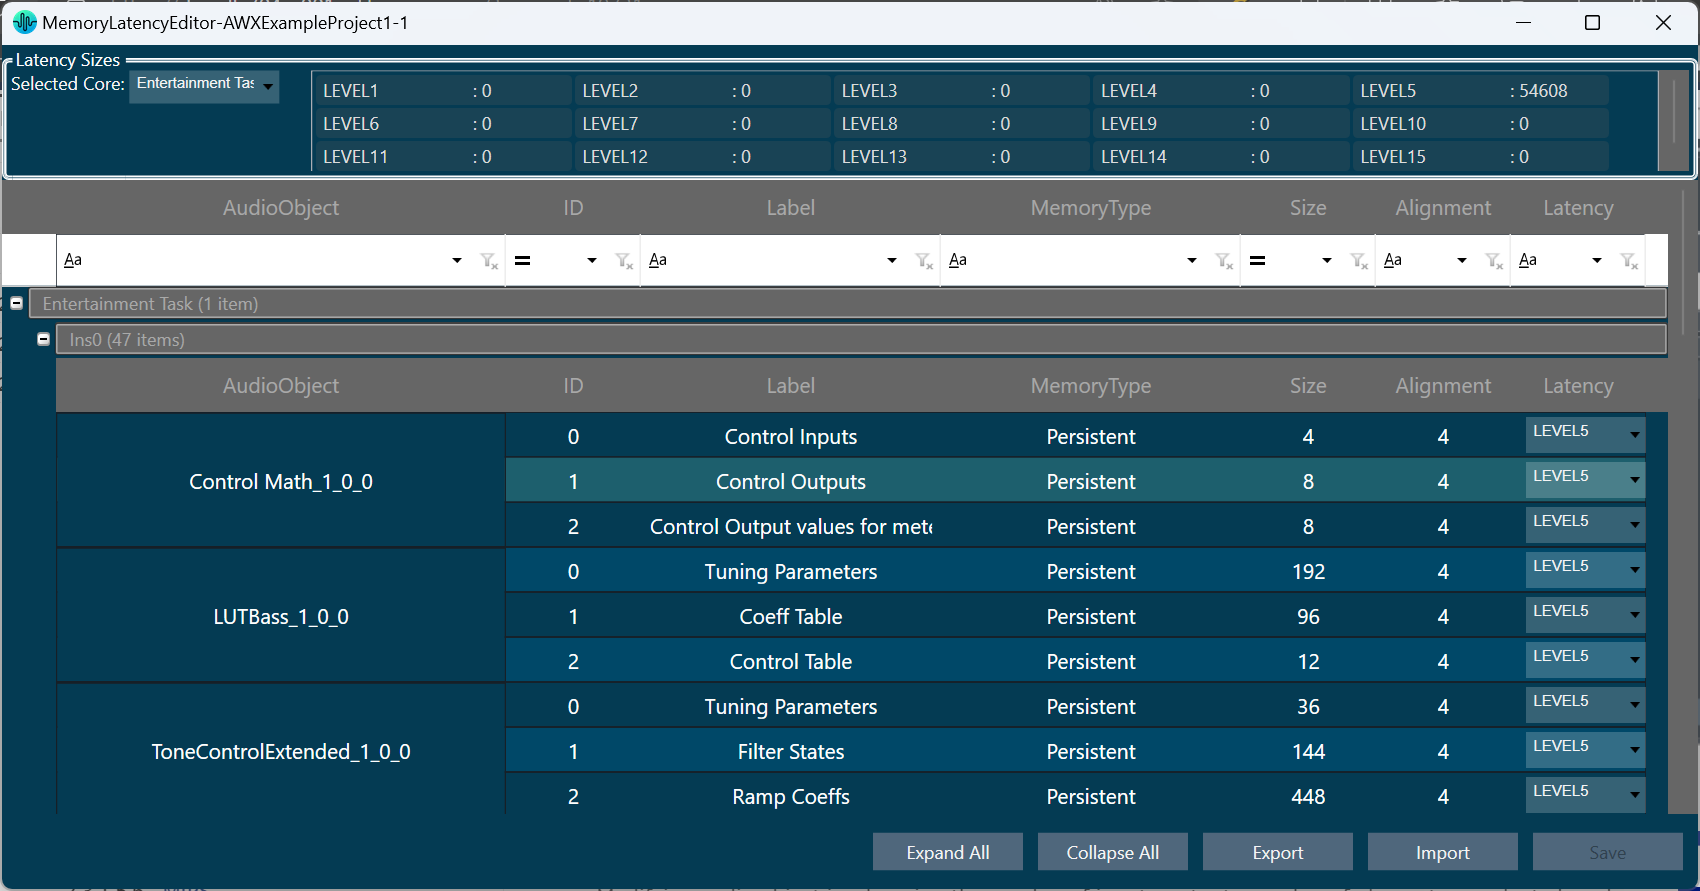
Memory records will have default latency selected by the Audio Object developer. GTT provides the option to set the latency for every memory record of the audio object in the Memory Latency Editor.
- Select the device node and click Memory Latency. This opens the Memory Latency window for the selected device. When the Memory window is launched, a multi-level collapsible grid with core, instance, and audio objects will be displayed.
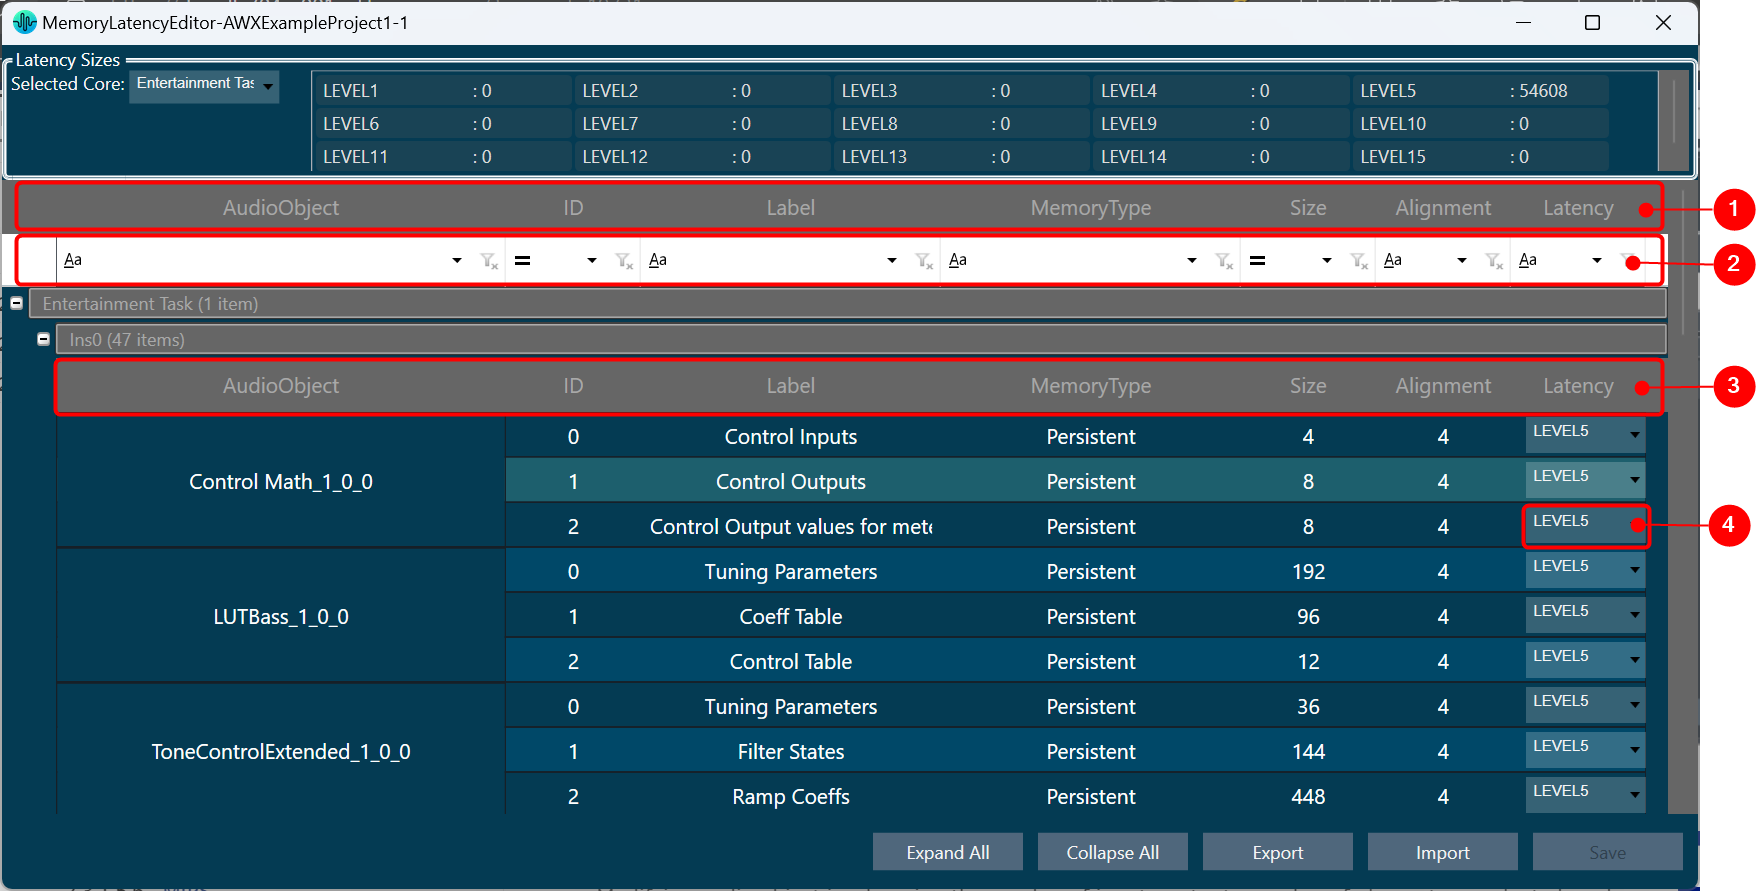
1 – Header, 2 – Column Filter, 3 – Header, 4 – Latency Sector
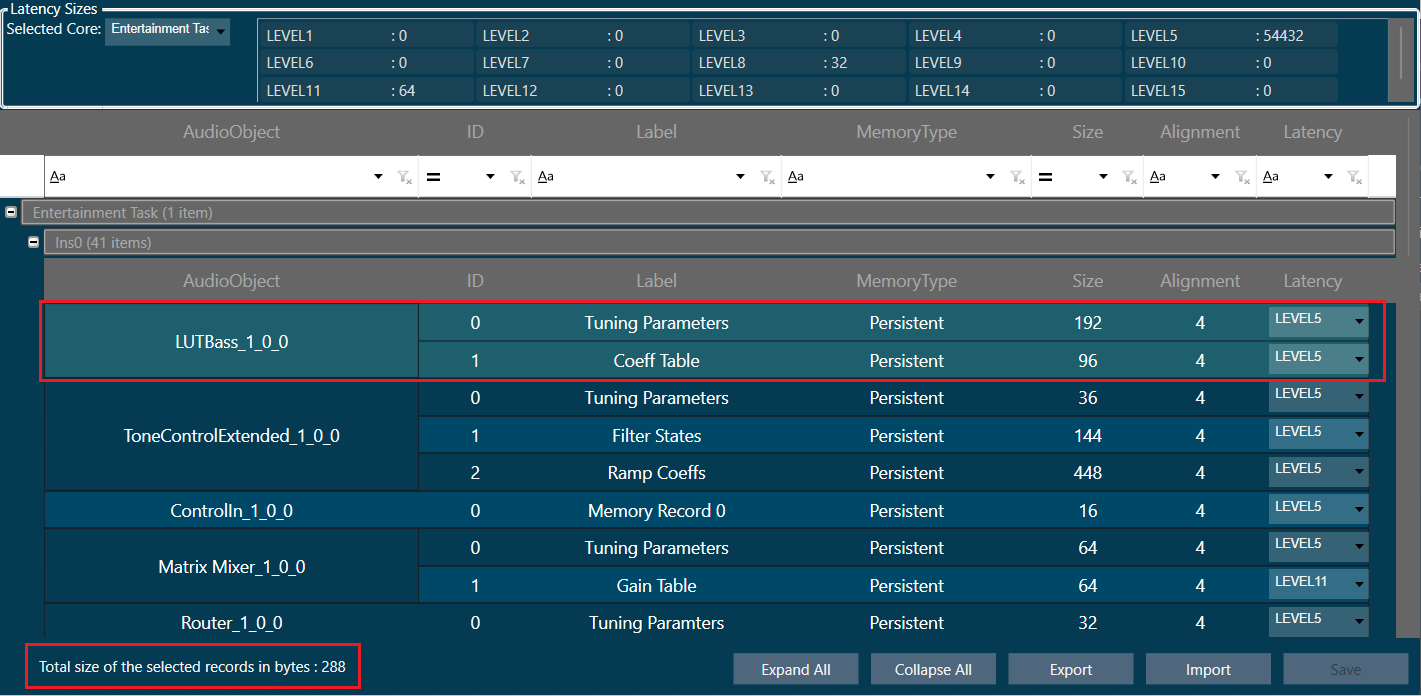
- Multiple memory latency record selection: You can select multiple records in the memory latency window.
- To select the specific rows – Hold Ctrl and click on the required rows. This method is useful when you want to preform action on specifics rows.
- To select a set of row – Click on the first row of the set, hold Shift, and then select last row of the set. This method is most useful when selecting a large number of rows in a range.
Sum of all the selected memory latency record size will be shown as “Total size of the selected records in bytes” in the memory latency window.
“Total size of the selected records in bytes” will be visible only on selecting any memory latency record in the window.
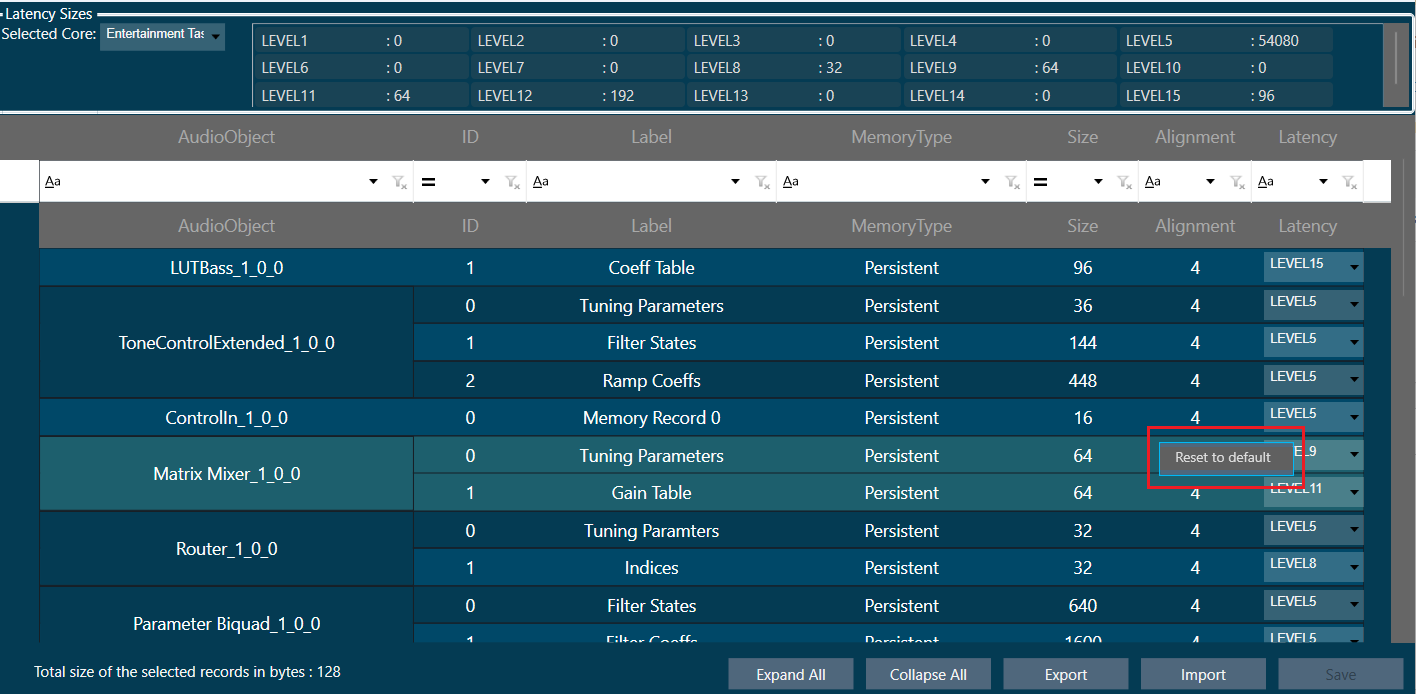
- Reset to default latency level: You can reset the selected records to its default latency level. Right click on selected records or anywhere on latency grid. A context menu “Reset to default” option will be displayed. Click on the “Reset to default” option, all the selected records of the latency level will be set to default value which is “LEVEL5”. Click on “Save” button and it will be saved into database.
- To reset records to default latency level for the specific rows – Hold Ctrl, select on the required rows, and then right-click on selected records. A context menu “Reset to default” option will be displayed. Click on the “Reset to default” option.
- To reset records to default latency level for a set of row – Click on the first row of the set, hold Shift, select last row of the set, and then right-click on selected records. A context menu “Reset to default” option will be displayed. Click on the “Reset to default” option.
- Saving Latency memory: Only Latency can be selected. Other attributes of memory records are read-only. When you click on Save, the Latency for the memory record will be saved.
The Save Button is disabled until a change in latency is detected.
- Send Memory Records to Device: Send Signal Flow will handle sending Memory records to the Device with a specified latency. When the signal flow send is successful, the device will boot up with the memory latency specified.
- Import Export of Project having Memory Record: Memory latency is preserved if the export and import occur on the same xAF dll by version.
If the dll version changes, Import will generate a new memory record based on the new target xAF dll version. - Copy Paste of Audio Object or Core Object Containing Memory Latency: If the properties of the source and targets are the same, memory latency is retained in the pasted object.
- CSV Import/Export: You can export and import of memory map to CSV files. The primary operation of this feature is to export memory latency to CSV, adjust memory levels, and then import the updated memory levels back into the GTT. When the memory map form file does not match the one in GTT, GTT will request permission to import only the items that match.