Table of Content


Devices and Template View
The Devices section allows you to perform the following actions:
- Add a new device to the project.
- The Discover Device option allows you to discover connected physical or virtual devices and GTT will interact with the target device to obtain the device information available on the device.
- Display lists all the devices in a project.
- Provides options to remove the device from the project.
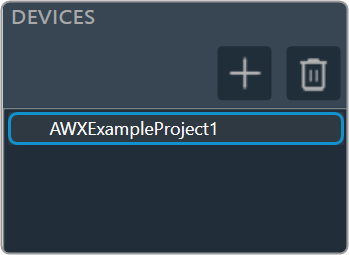
On the Device Designer tab, click on the (+) icon to add the device. This opens the Add Device dialog box.
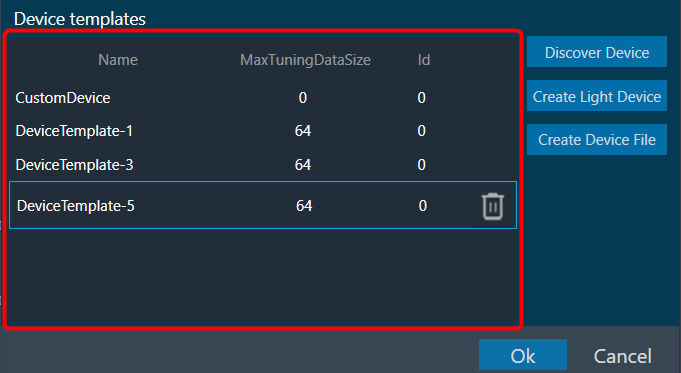
On the Add Device, you can perform the following operations.
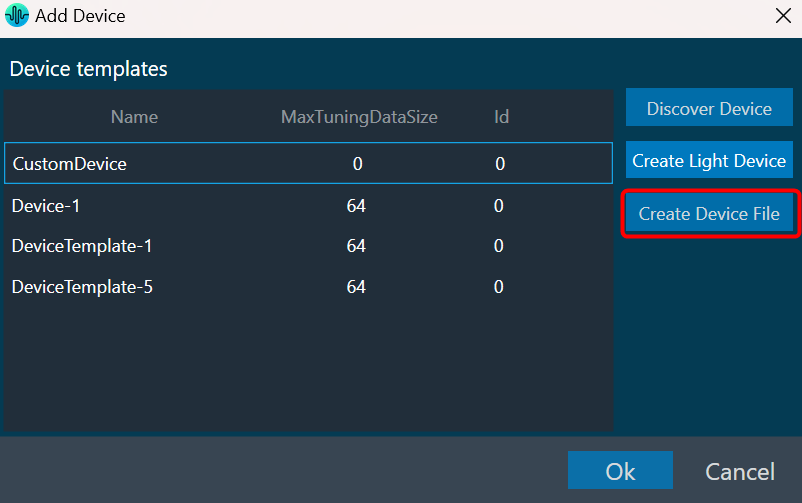
- The Add Device dialog box lists existing device templates available in GTT.
- You can add new device templates using any of the methods; Discover Device, Create Light Device, or Create Device File options.
- You can delete existing device templates if they are not used in a project.
- Custom Device is also listed in the Device template list as the first template. You can select a custom device and add it to the project like other templates.
GTT supports 1 custom device at a time as per the current design.
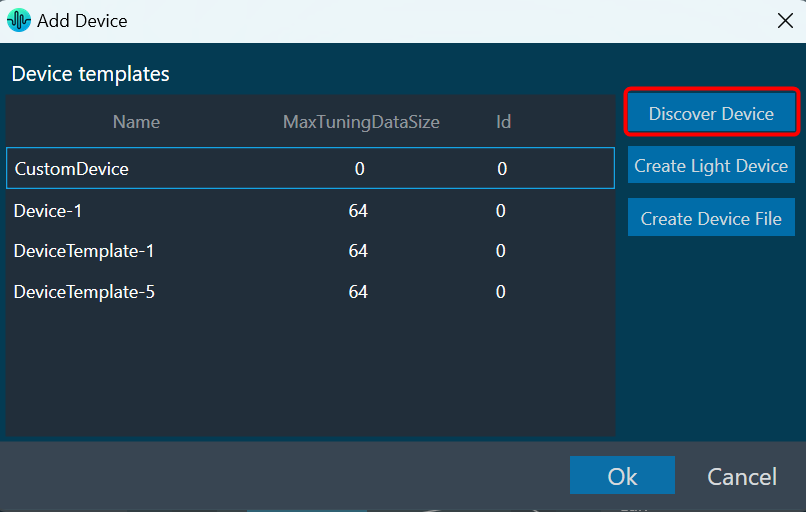
You can use any of the options to add a device template to the project.
- Discover Device: Click on Discover Device, if you have the preconfigured device template available and connected to the physical or virtual device.
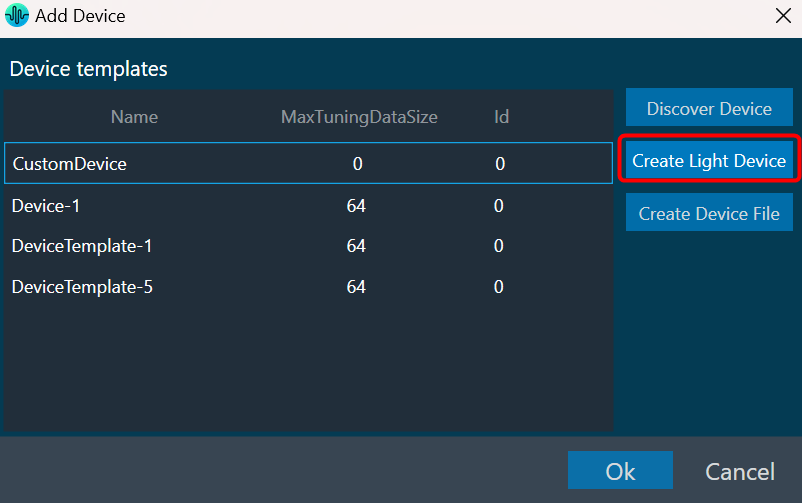
- Create Light Device: Click on Create Light Device, if you want to create a new template.
- Create Device File: Click on the Device file, if you want to create a device file.
- Device Template Rename: Rename the selected device template post creating a light device, discover the device template, create a device file, or any existing device template.
The Discover Device feature allows you to read and write the device configuration from or to the device.
This function allows you to read information from a device that is connected to the Global Tuning Tool. This information is used to create a device template that reflects the internal layout structure of the device, which includes its physical cores, virtual cores, and routing information from device input to virtual cores between virtual cores and core objects.
You can also write (download) your configuration to the device using this feature.
Below are the few details that GTT will get from the device to construct the inner layout.
- Physical cores information.
- Core information.
- Core objects information.
- Device and Virtual Core Routing (For more details refer to Device Routing)
Below are the prerequisites to start a Discover a Device.
- Copy the flash file (device.flash) and the audio library xAFVirtualAmp.dll file available in AWXInstalledLocation/HarmanAudioworX/AudioFrameworkDLLs to your working folder.
- Launch IVP, open to “Advanced” settings, go to the “Plugins” tab and select the correct path to the xAFVirtualAmp64.dll.

Before using this feature, delete all the *.flash files from the working folder. IVP may crash, if it has the old tuning flash files.
Follow the below steps to discover a device:
- On the Add Device window, click on Discover Device. The GTT will start to communicate with the target device, gather the device information, and add the device to the device templates.
The device identification feature is enabled for audio libraries version 13 and higher.
Only after you have completed the prerequisites the Discover Device feature function will work properly.
Using the Create Light Device option, you can create a new template.
Follow the below steps to create a device template:
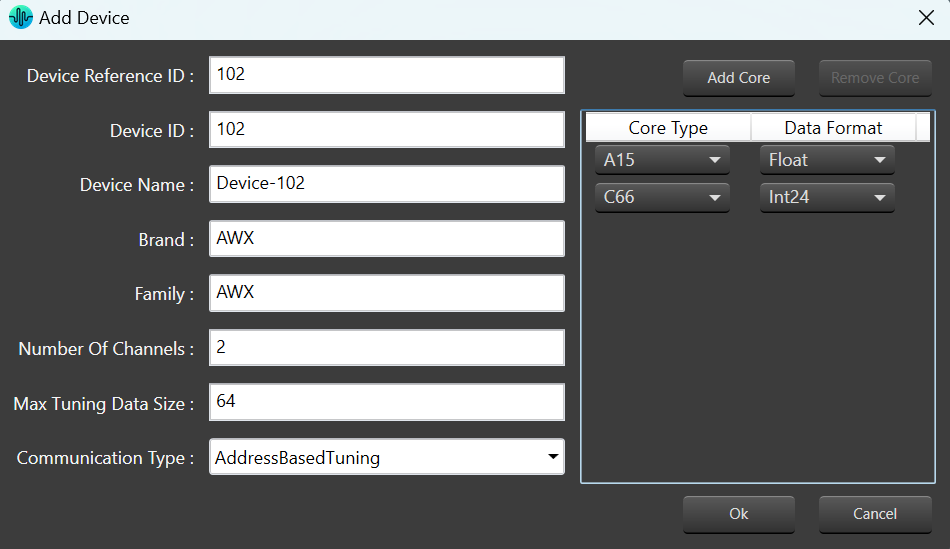
- On the Add Device window, click Create Light Device. This opens the Add Device dialog box.
- Enter the details in the following fields and configure the device core type.
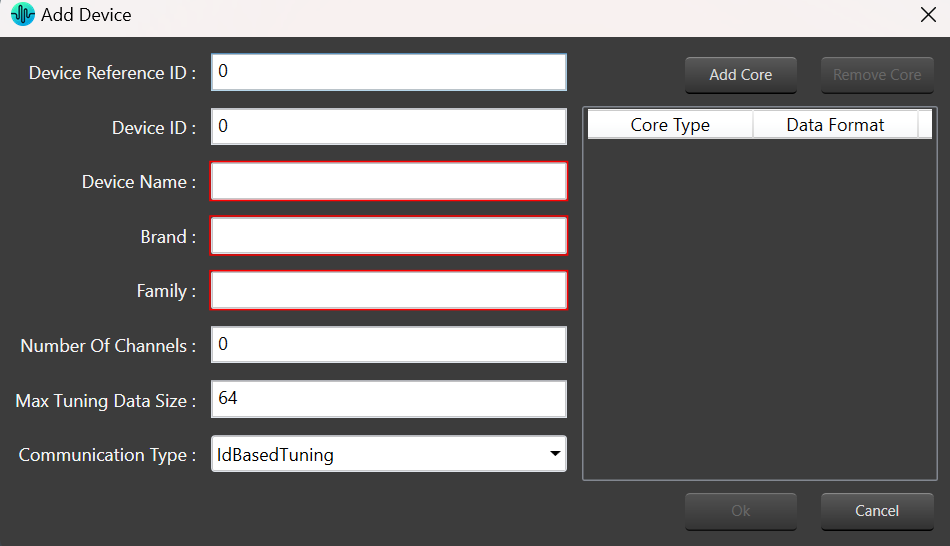
- Reference ID: Enter the reference ID of the template.
- Device ID: Enter the initial value of the Device ID field for the first device instance created out of that template Device template name.
- Device Name: Enter the device name.
- Brand: Enter the brand name required for legacy AA infrastructure.
- Family: Enter the family name required for legacy AA infrastructure.
- Number of Channels: Enter the number of channels supported by the device.
- Max Tuning Data Size: Enter the maximum count of bytes included in a single tuning data message.
- Communication Type: Select ID-based tuning or address-based tuning.
- IdBasedTuning –
- AddressBasedTuning –
- Core(s): Each device template exposes one or more physical cores.
For the xAF library before the O release: multiple cores from the given list can be selected.
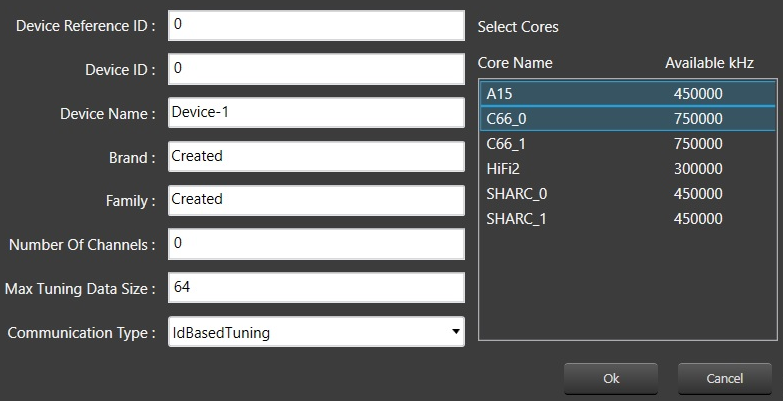
For the xAF library from O release: Cores can be added/removed. Core types and Data-formats supported by xAF will be listed for configuring the core.
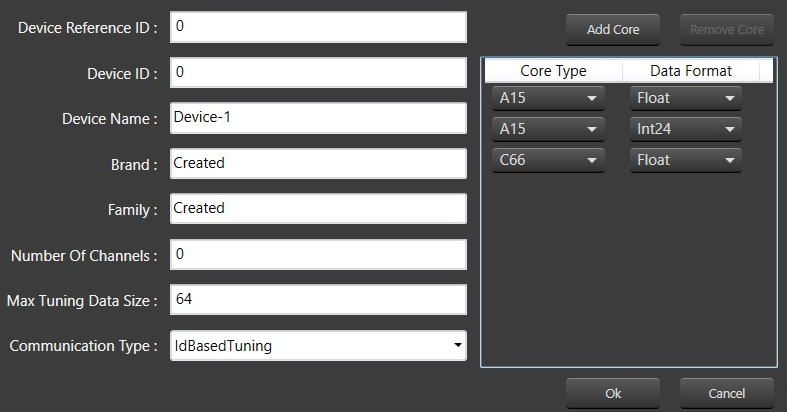
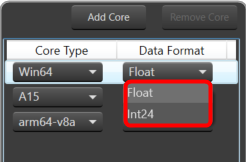
- Click Add Core, select core type and date format from the drop-down list, and then click Ok.
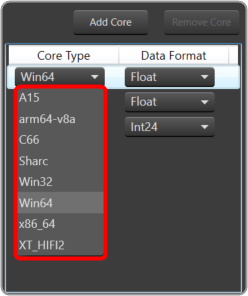
When the default xAF library version is < 15 (O dll), GTT displays a static set of core types with corresponding data formats.
Based on the default xAF library selected, you can add multiple cores, and two modes of core selections (Core Type and Date Formate) are available. Below is the example showing the available core type supported by respective xAF dll versions.
While configuring the core type of the device, if you want to remove any core, select the core, and click Remove Core.
- Click OK. The new template is added to the device templates list.
The GTT allows you to create a device flash file using Device File Editor (DFE) in a project. The device file is a combination of Physical Cores, Input Groups, and Output Groups.
Follow the below steps to create a device file:
- On the Add Device window, click Create Device File.
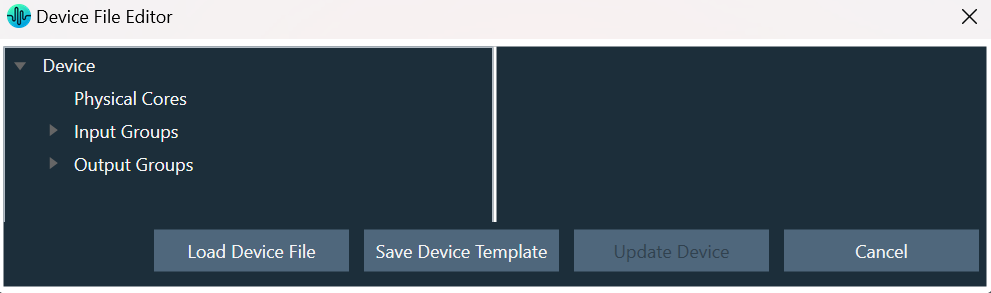
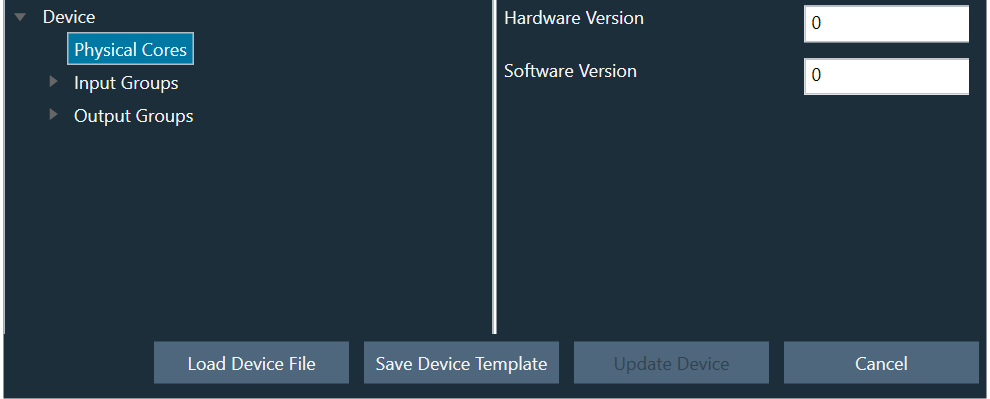
This opens the Device File Editor window. The editor interface uses a tree-like structure to display items at each level and this structure is defined in the xTP specification. Furthermore, a Virtual Core will have Input and Output Groups as defined by the xTP specification. Each Input Group and Output Group have one group added by default.
By right-clicking on each item, a context menu will appear that will allow you to add or remove subtree items.
- Select Physical Cores and enter the hardware and software version.
There could be one or more Physical cores under a Device and each Physical core can have more than one virtual core inside it.
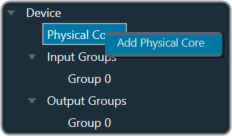
- Right-click Physical Cores and select Add Physical Core.
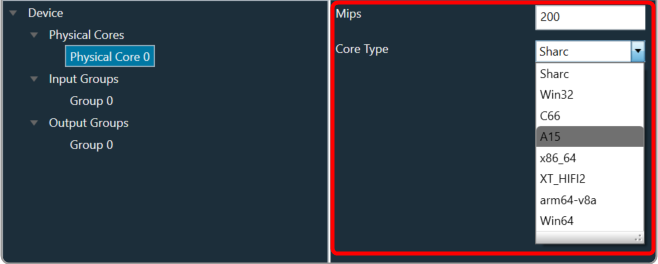
- Select Physical Cores 0You must specify the Core Type of Physical Core. When the default xAF library is set to O release or above, the supported xAF core-types will be listed or set the default value to ‘0’.
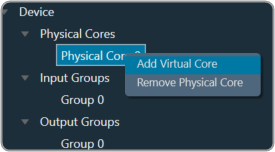
- Right-click on Physical Cores 0 and select Add Virtual Core.
- Select Virtual Core 0, enter the Task Priority, and select the Date Format.
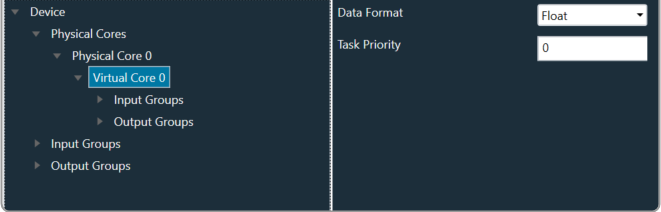
A Virtual Core is made up of Input and Output Groups. You can add one or more Physical Cores, and each Physical Core can have many Virtual Cores.It is important that you should specify the Core-type of the Physical Core, Data Format of the Virtual Core, Device Input, or Output Group.
When the selected default xAF library is “O” release or above, the xAF supported data formats will be listed or the default value set to ‘2’.
- Expand Input Groups, select Group 0, and configure the respective properties. Similarly, expand Output Groups, and configure Group 0. In order to allow routing from Device Input/Virtual Core to other Virtual Cores or Device Output Groups, select Connectable Cores and Connectable Device Output Groups.
You can add multiple Groups inside an Input Group.

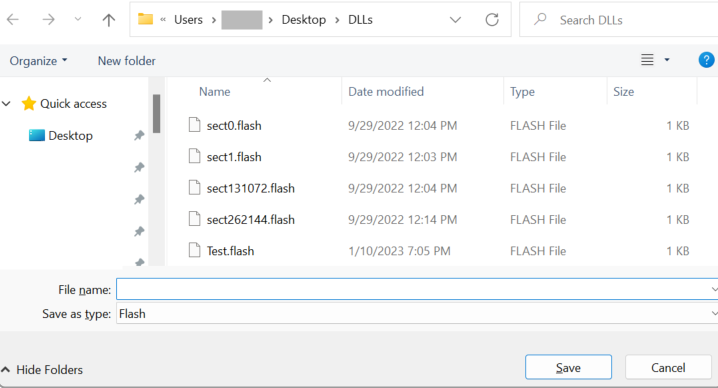
- Once all the configuration is done, click Save Device File. A save file dialog box appears, enabling you to save the flash file.
The flash file contains the information related to the structure of the device like Device ID, hardware version, software version, input groups count (No. of input pins), output groups count (No. of output pins), physical cores count,
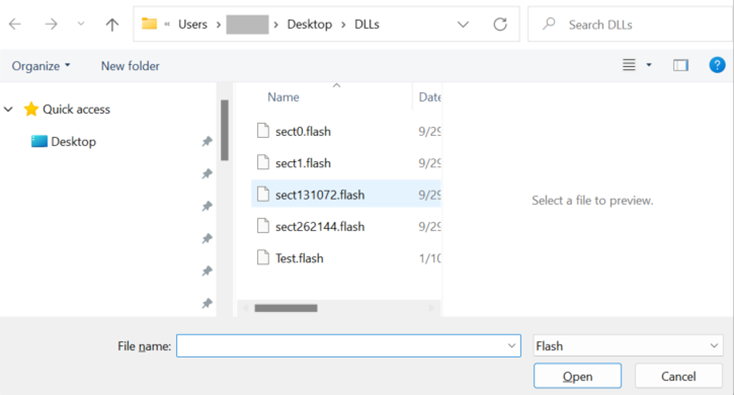
To view or modify an existing flash file, click Load Device File. The Device File Editor displays an Open file dialog box, selects the flash file, and clicks Open.
You can rename the selected device template post creating a light device, discovered device, or any existing device template.
Custom devices would not have the option to rename the template name.
Device name once edited, any device created using this template will have the appropriate name reflected in Class Name, reflecting the template on which the device is based.
To Edit the name, press the edit button, which will show an editable section with the selected device name in it.

Upon editing the name click on “Ok” and the template name will be applied. The device name allows only alphabet, numeric, and hyphen (-) and has a limit of min 1 character and max 55 characters.
When there is a validation error in the name, the “Ok” option will be disabled, and the edit box will be shown as red.

Device template name is also retained when exporting or importing the project. Name of imported device template would be based on existing uniqueness naming rules.