MM IR-Define Measurements

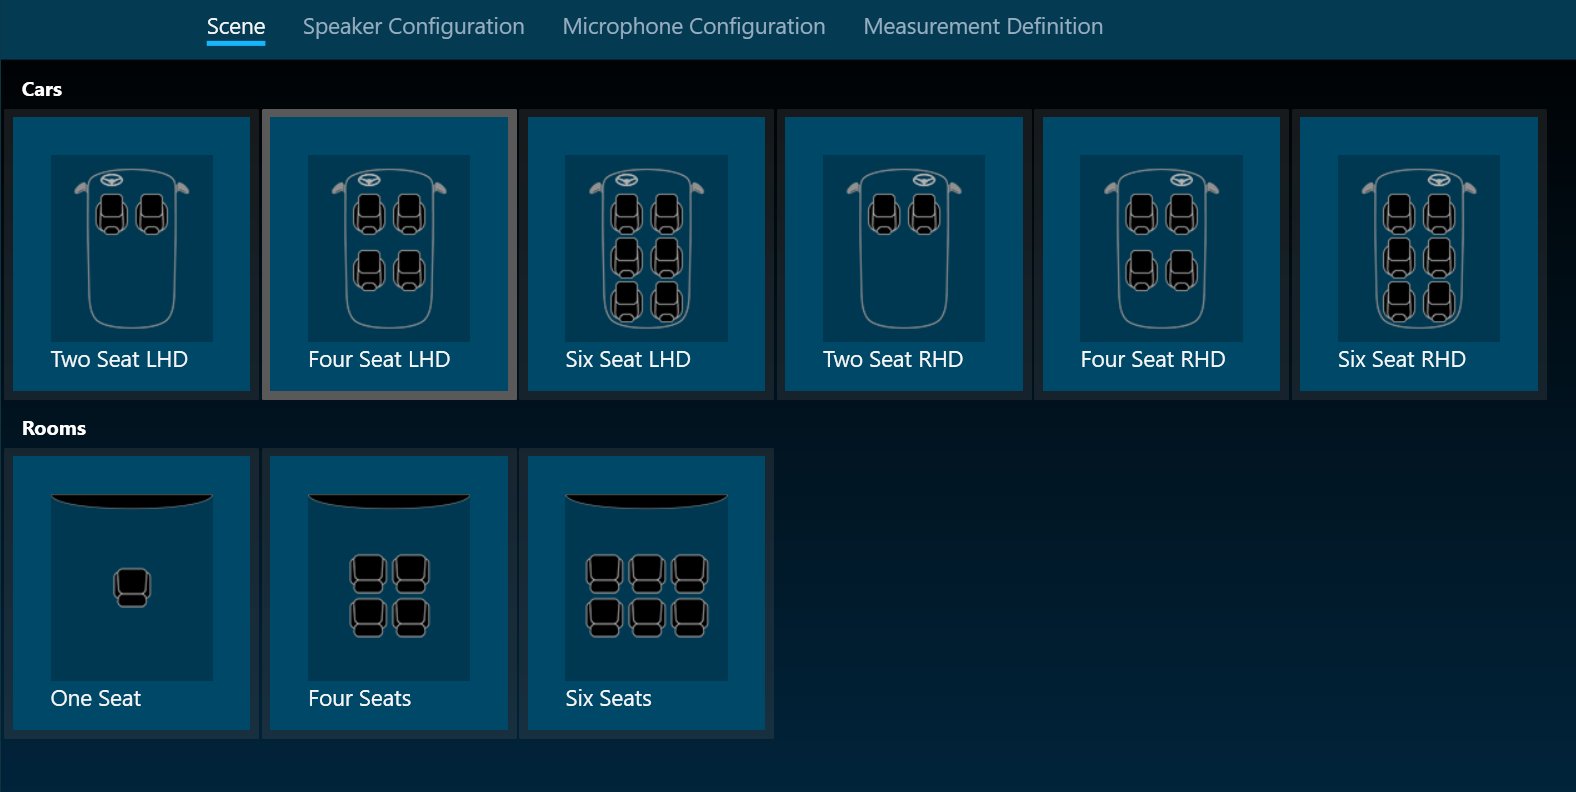
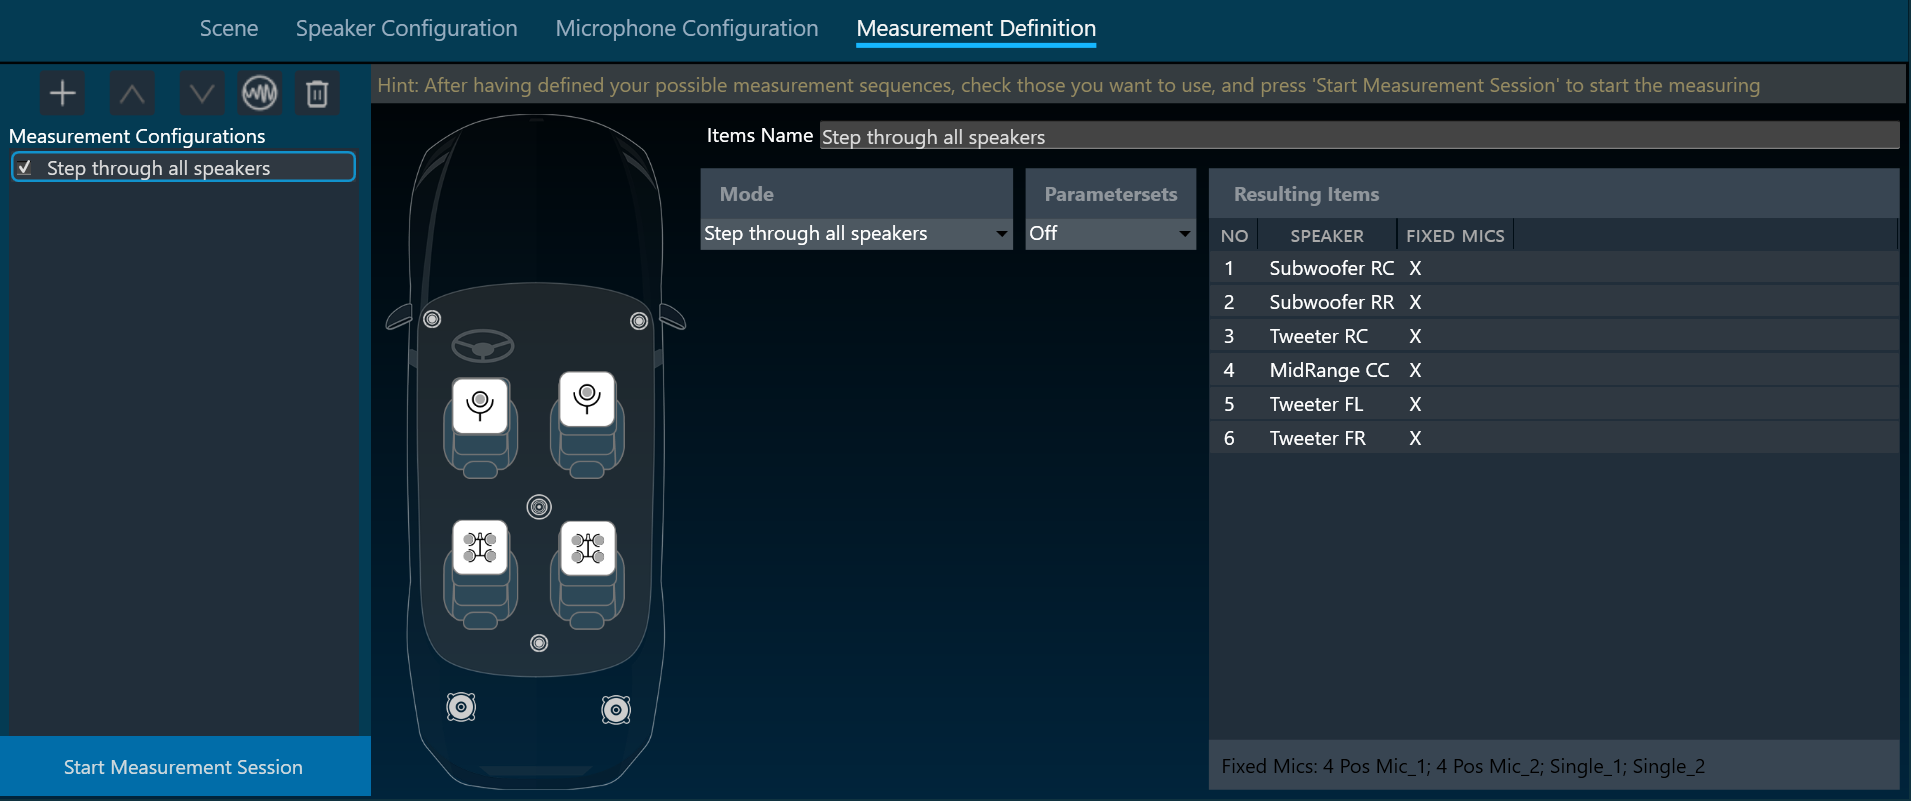
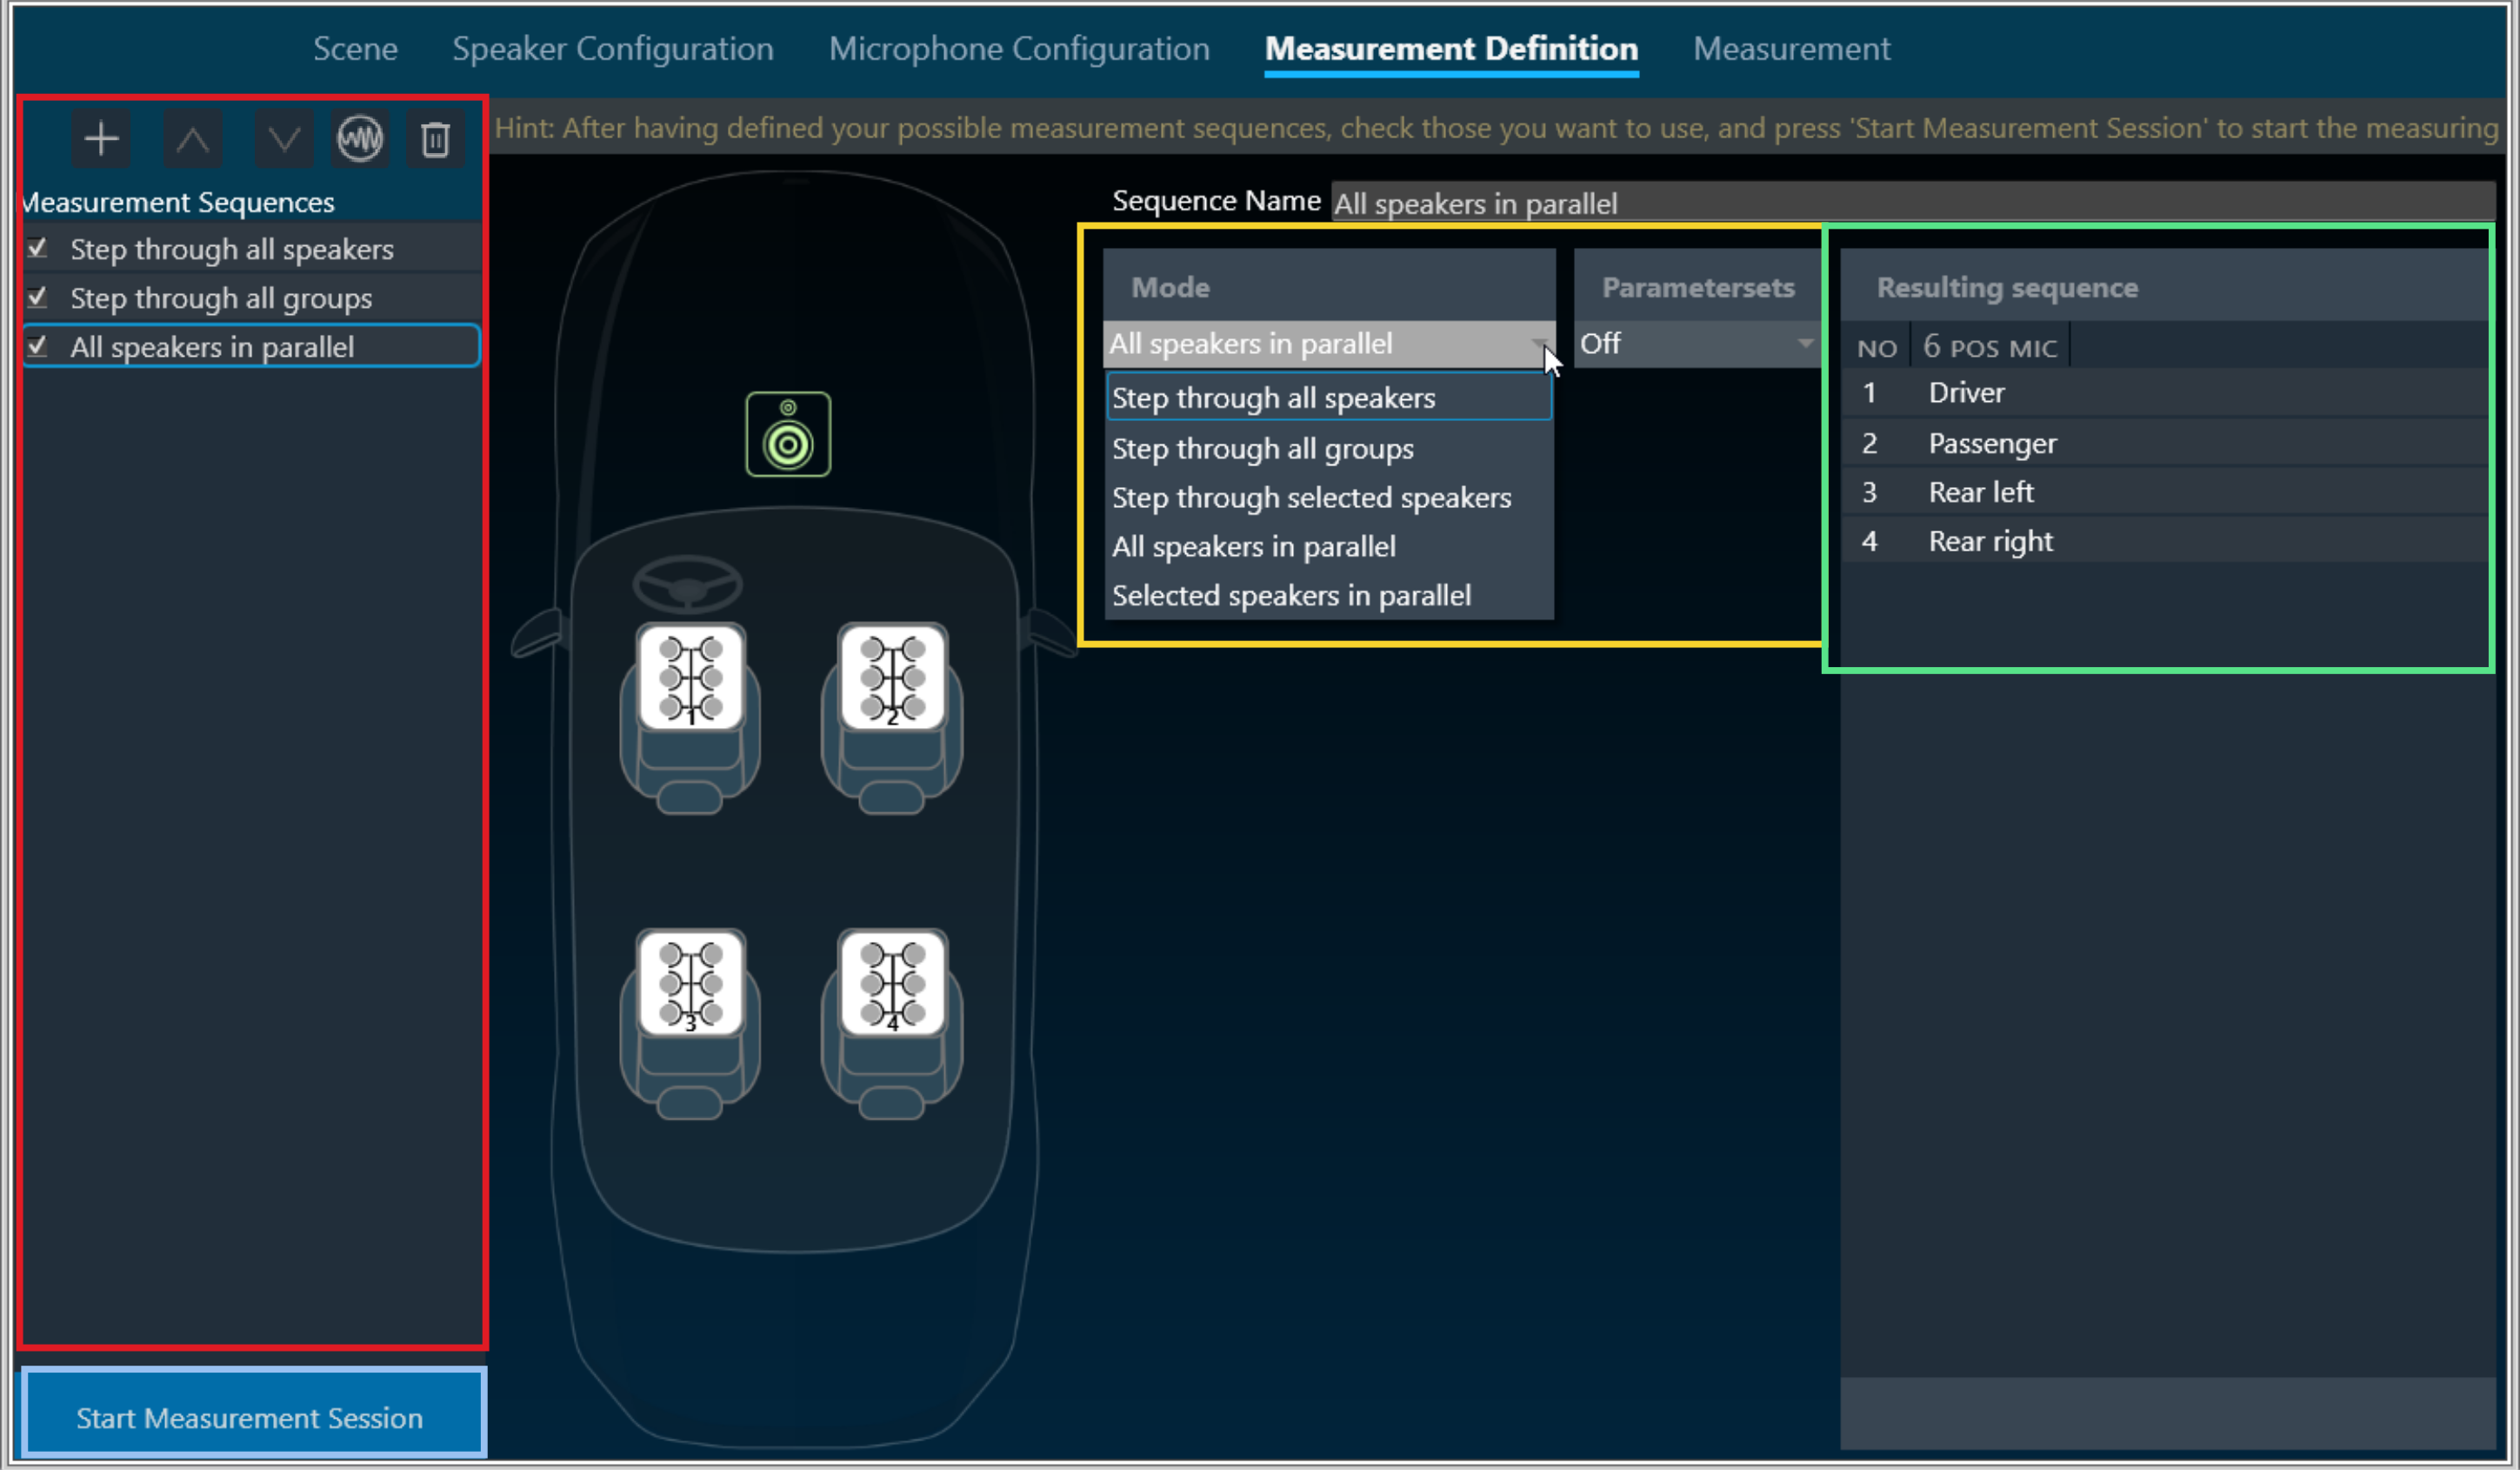
The Measurement Definition screen is the final preparatory screen before the actual measurement. This screen consists of list of Measurement Sequences (highlighted in red), Mode and Parameter configuration (highlighted in yellow), and list of Resulting Sequence measurement (highlighted in green).

Steps to configure Measurement Definition:

  1. On the Measurement Configuration screen, go to Measurement Sequences section and click on the (+) button.
    By default, project-specific Generator settings are assigned to each new Measurement Configuration, after which you can configure distinct Generator settings for each Measurement Configuration.
  2. On the Mode selection allows you to change the settings of the specified measurement.
    Possible measurement modes are:

    • Step through all speakers: play back signal through each speaker sequentially
    • Step through all groups: play back signal through all groups sequentially, parallel through all speakers in one group
    • Step through selected speakers: play back signal through each speaker or group selected in list
    • All speakers in parallel: play back signal through all speakers at once
    • Selected speakers in parallel: Play back signal in parallel through all speakers/groups selected in list.
      The resulting sequence of the currently select measurement is display on the right (green rectangle)
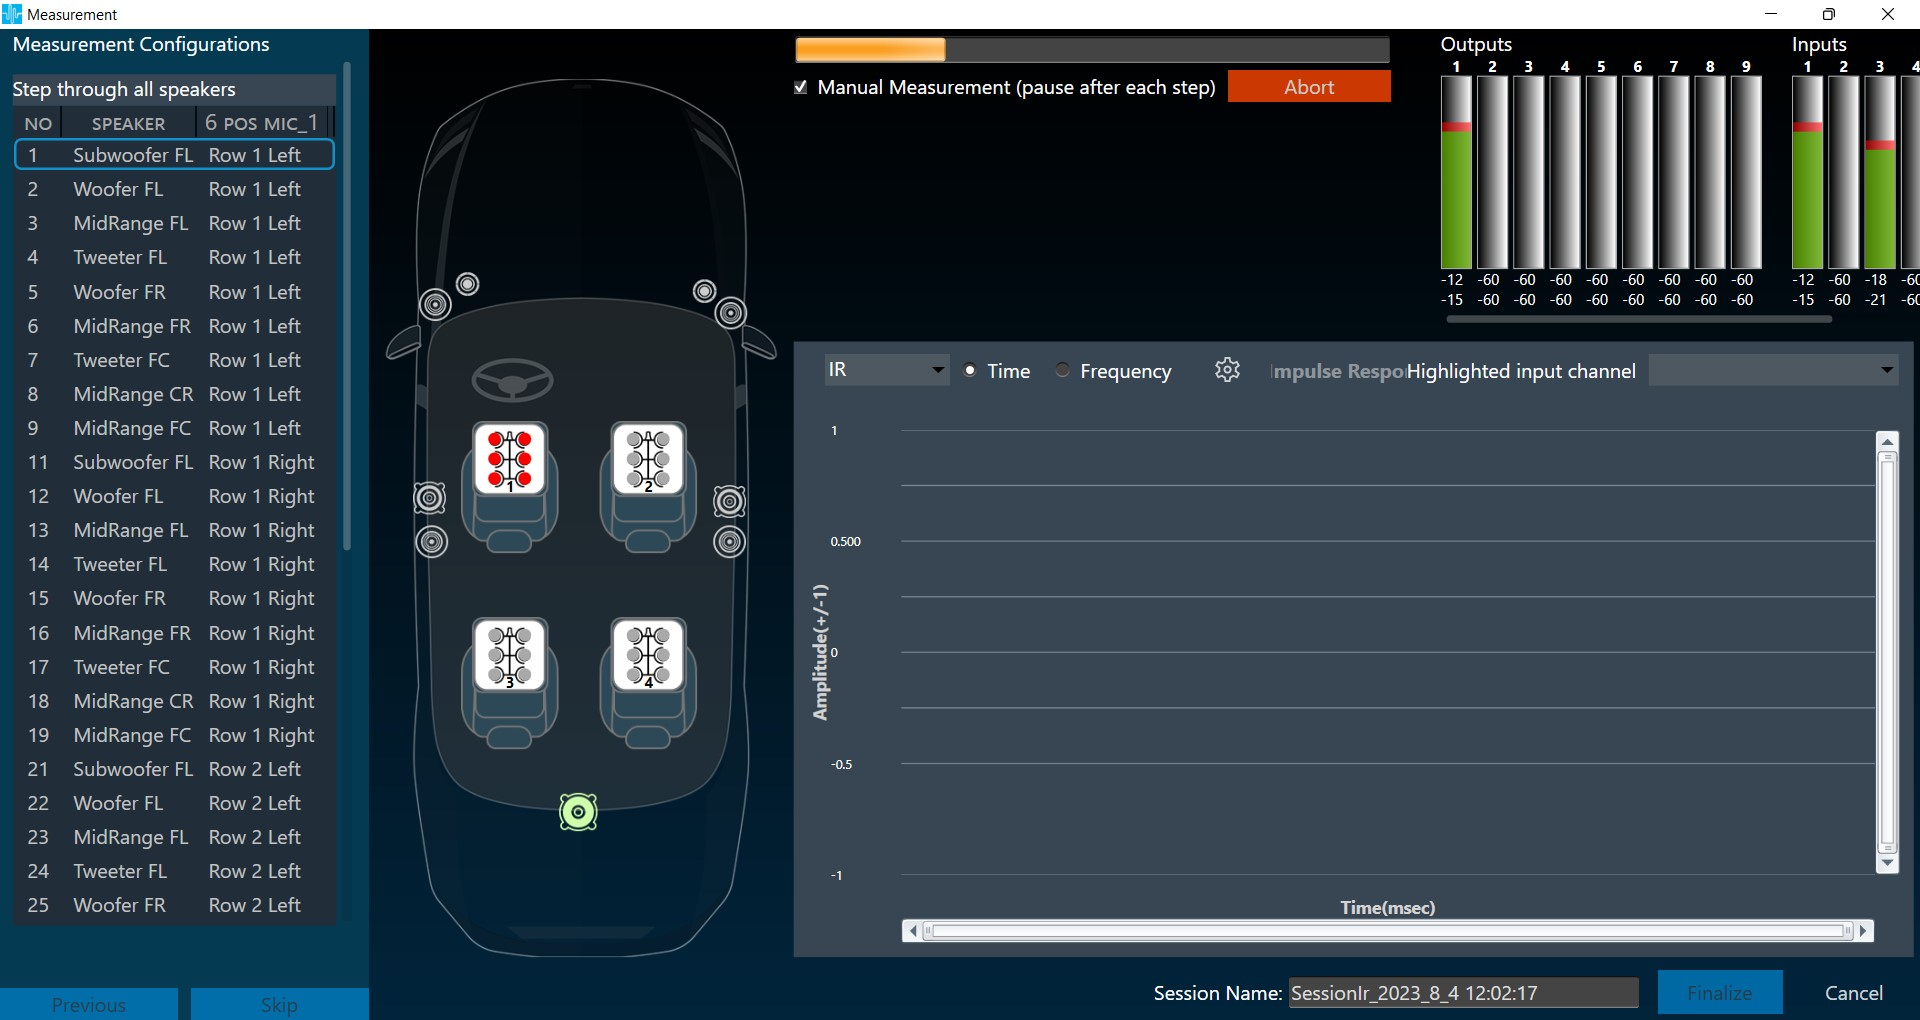
  3. Once you have configured all the measurements, click on Start Measurement Session to activate the measurement mode.
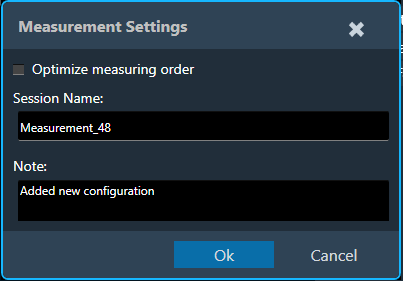
    This opens a new measurement window.
  4. On the Measurement Setting dialog box, enter the session name, add a Note (optional) and click Ok.
    If you want to optimize the measurement order select Optimize measuring order and enter the session name. The optimization of the measurement order applies when several sequences with different loudspeakers are defined for at least one rotating microphone.
    – If no optimization is applied, the measurement will be performed independently for each sequence, resulting in the rotation of the microphone over all the seats within each sequence.
    – When optimization is applied, all the measurements that are linked to a seat position are performed one after the other, regardless of the sequence to which they belong.

    For large numbers of sequences, this greatly minimizes the number of microphone repositioning.

Parameters set configuration is under development.

Even though you can configure different Generator Settings per Measurement Configuration, the Generator Mode will be same for all Measurement Configurations. Only at the project level, Generator Mode can be modified and same will be overwrite to all Measurement Configurations.

MM IR 2.0 – Walkthrough

The workflow of the Measurement Module is sequential.

  1. Scene Selection: Choose the scene for your measurement. This involves selecting a pre-defined scene.
  2. Speaker Configuration:  Select speaker type and arrange the speakers position within the chosen scene. Then configure the speakers.
  3. Microphone Calibration: Select microphone type and arrange the microphone position within the chosen scene. Then configure the microphones.
  4. Measurement Sequence Definition: Define one or more measurement sequences.
  5. Measurement Execution: Initiate the measurement based on the defined sequences. This might involve capturing audio data from the microphones.
    A computer screen shot of a computer Description automatically generated

In the current version, the inspection of the result of the measurement, as well as all the postprocessing has to be done in the legacy MM IR module.

MM IR 2.0 – Speaker Configuration

Once respective scene is selected, configure the speaker configuration.

  1. Speaker Selection: The “Speaker Configuration” screen displays the chosen scene. On the left side, you’ll find a list of available speaker types.
  2. Placing Speakers: Drag and drop the desired speaker types from the list onto the scene.
    Dragging a speaker far outside the scene will delete it.
  3. Speaker List: Once placed, speakers appear in the “Speakers” list.
    By default, all speakers belong to “Group_1”. Speakers dragged onto the scene are added to the currently active group.

    The “device” column of the list allows for the assignment of the following modes to a speaker:
    – Master:
    The stimulus will play through the master output channel (see soundcard configuration)
    – Soundcard: Allows for the free choice of a soundcard channel in the “Output” column
    – Device: Allows for the assignment of the speaker to a device output channel (see device output mapping) for (un-) muting. The stimulus will play through the master channel.
    A mix of the modes is allowed. If any speaker is assigned to the master or device mode, it is not possible to use the soundcard output channel defined as master channel for any speaker in “soundcard” mode.
  4. Managing Speakers List:

    • Play Sound: Use this option for quick functionality checks.
    • New Group: Click the “+” button above the list  to create new groups.
    • Move Up: Use the up arrows to move speakers within the list, which can also change their group assignment.
    • Move Down: Use the down arrows to move speakers within the list, which can also change their group assignment.
    • Delete: If you want to delete any speaker from the list.

Double-click on a speaker or group name in the list to rename it. (Speaker types cannot be changed here.)

Each speaker can have its own “start frequency” set. This high-passes any signal played through that speaker. The “start frequency” can also be adjusted in the generator menu, overriding this setting.

After setting up the speakers in the “Speaker Configuration” window, click on “Microphone Configuration” to set and configure the microphones in the scene.