Steps to configure preset controller slot:
- Go to the Standard toolbar and open Preset Controller.
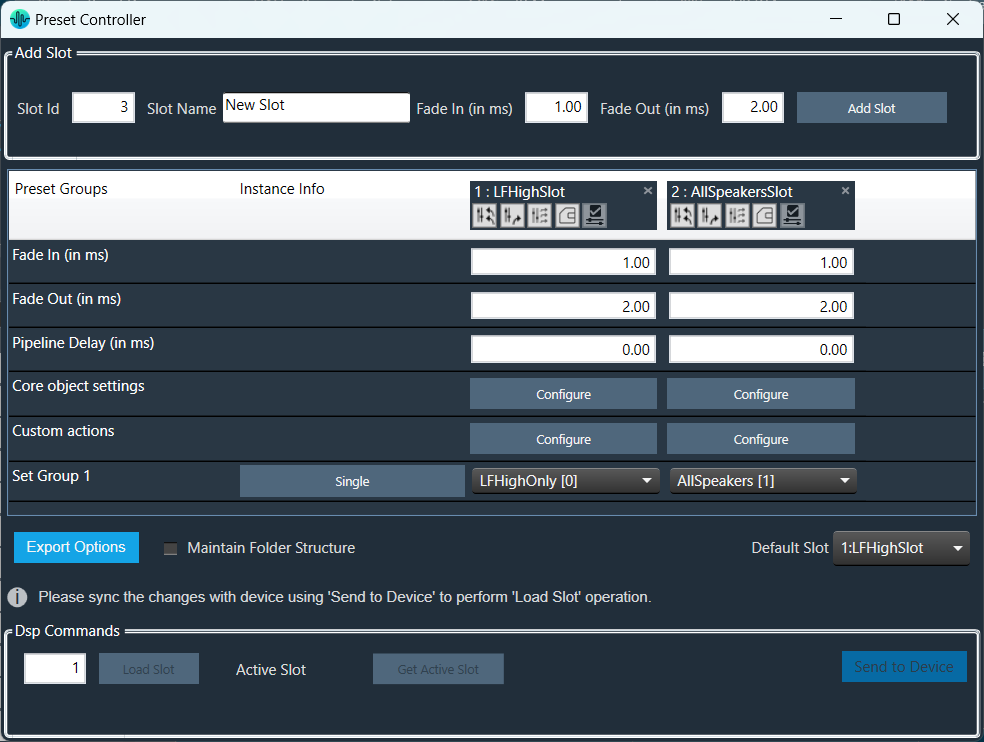
On the Preset Controller window you can see the following details:- In the Slot Id, the serial number starting from 1 (or the next available slot) will be displayed.
- The Slot Name, Fade In, and Fade Out will be filled in with default values.
- All the Set groups created in parameter sets screen containing the parameters of the device are displayed as rows in set map table.
- Enter the values in Slot Id, Slot Name, Fade In, and Fade Out, and click Add Slot.

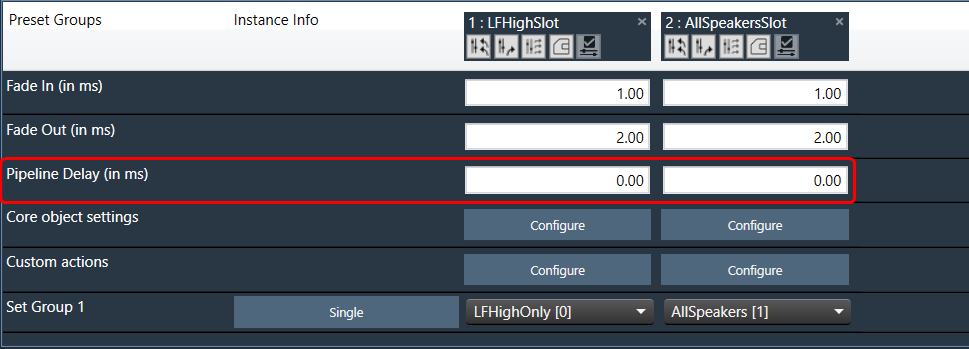
A new slot column added with entered details and default value (None) for set groups available in the table. - Enter the Pipeline Delay in the text box. The pipeline delay is used as a delay after applying the preset to the Load Slot operation and before starting to ramp up. The pipeline delay is the time required for the history buffers (which have already been cleared) to be filled with valid data before the start of the ramp-up. The value can be set from 0 to 65535 ms.
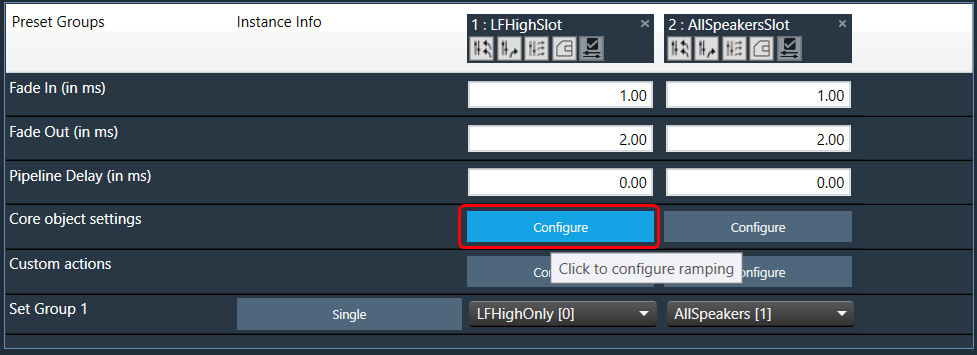
- In the Core object Setting row, click Configure. This opens the Core state configuration window.
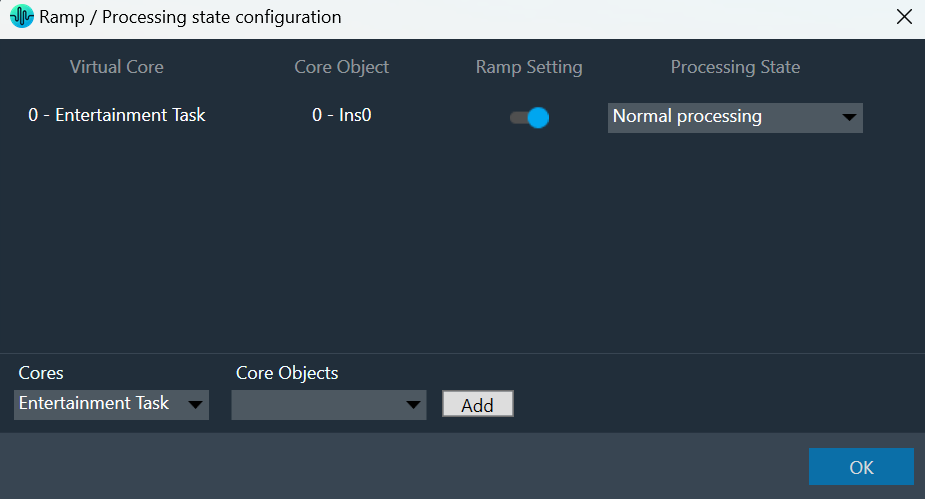
- On the Core object configuration window, Enable or Disable ramping for individual core objects using the toggle button.
Instances which have active set groups in this slot will automatically be added to this window and cannot be removed.
For more details about Core object configuration, refer to Core Object Settings
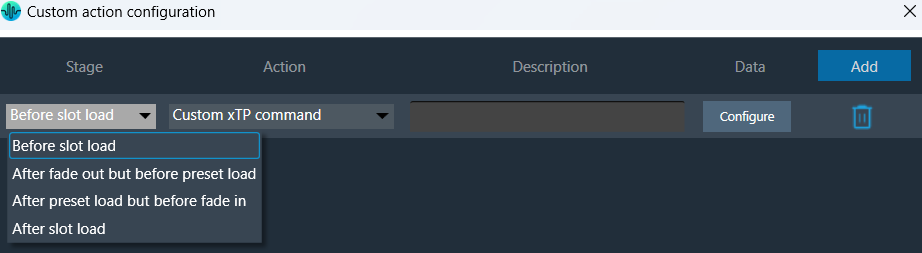
- (Optional) If you want to add custom actions, in the Custom actions row, click Configure. This opens the Custom action configuration window.
On this window you define custom actions. For more details about Core object configuration, refer to Custom Actions Settings
- In the Set Group row, click on the drop-down to set a group created in the parameter sets screen.
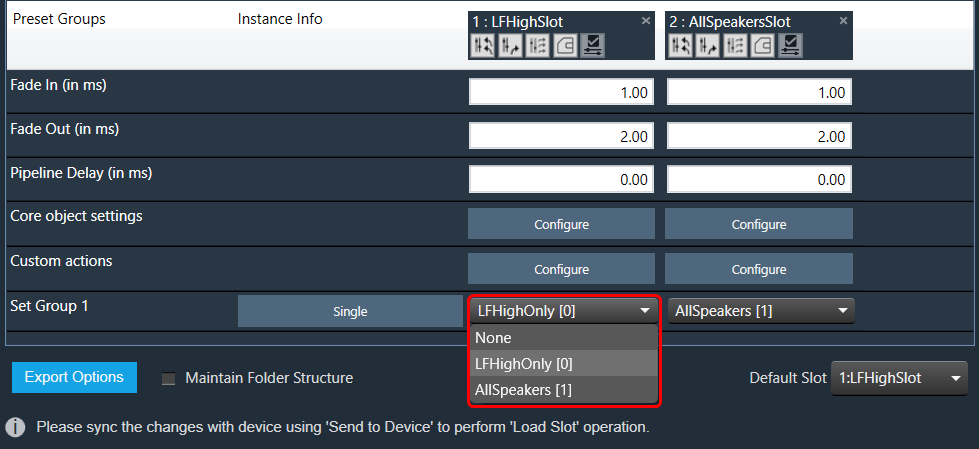
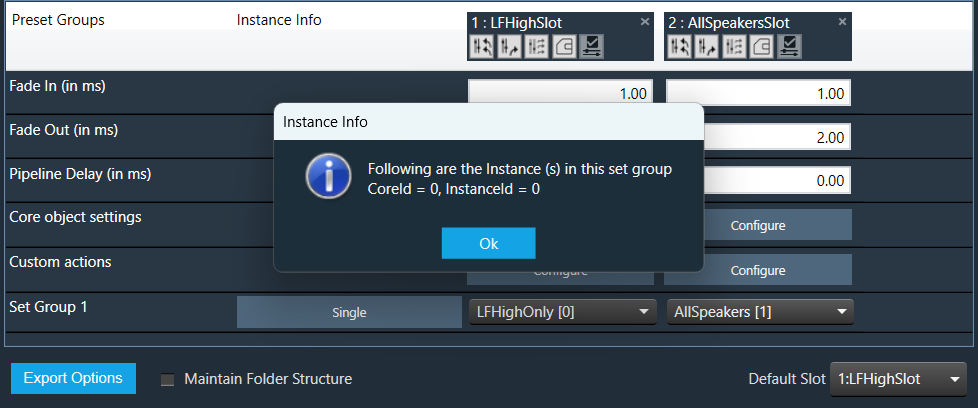
If the “None” value is selected for any set group no parameter set from that group is loaded for this slot. - Click on the Single to see the core and instance.
The instances associated with the set group are shown next to the set group. If the group contains parameters of only one instance, the instance info is “Single”, otherwise it will display “Multiple”.
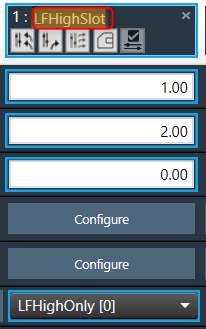
- Double-click on the table column header to edit the slot name.
Ramp Settings configuration is supported from S+2 device library version.
- Click on the “X” icon available on any column to delete the slot.
Slot Options
Retrieve Slot: The Retrieve Slot option in the generic sets window reads the state variable values of all the sets in a slot and updates them in the in the corresponding sets of Parameter Sets. Retrieve Slot button is available in the header of each slot.
Apply Delta Slot: The Apply Delta Slot feature only send tuning parameter present in the selected slot which are differing for the State variable tree. The tuning values of the presets are send to the device via XTP Tuning write messages. Apply Delta Slot option is available in the header of each slot.
Apply All Slot:The Apply All Slot feature sends all tuning values of the parameter irrespective of modified or not in the slot. The tuning values of the presets are send to the device via XTP Tuning write messages. Apply All Slot option is available in the header of each slot.
Export Slot: Once you have created a Set Map, click on the “Export Slot” option, and browse the desired path.
Flash file created in binary format. For virtual devices, use the file name as “sect262144.flash”.
Generic sets are persisted in the database, just like any other data in GTT.
Generic sets are also persisted in the .gttd file when the project is exported, and the same is available after importing. The selection of the default slots is dynamic and will not be persisted.
Verify Slot: This functionality is designed to compare the presets loaded on a device with those available in the GTT in order to ensure their accuracy.
This feature is available only in online mode. i.e. only when the device is connected.
To verify preset values, select a slot and then click the ‘Verify slot’ option. A read command is sent to the device for each state variable within of all presets under a slot. Once the value has been read, it will be compared with the corresponding value in the preset. If all values match, the verification process is considered successful. However, if any values do not match, an error message will be displayed, and an error report will be generated.
Sample error report is as attached here Set 1[2].