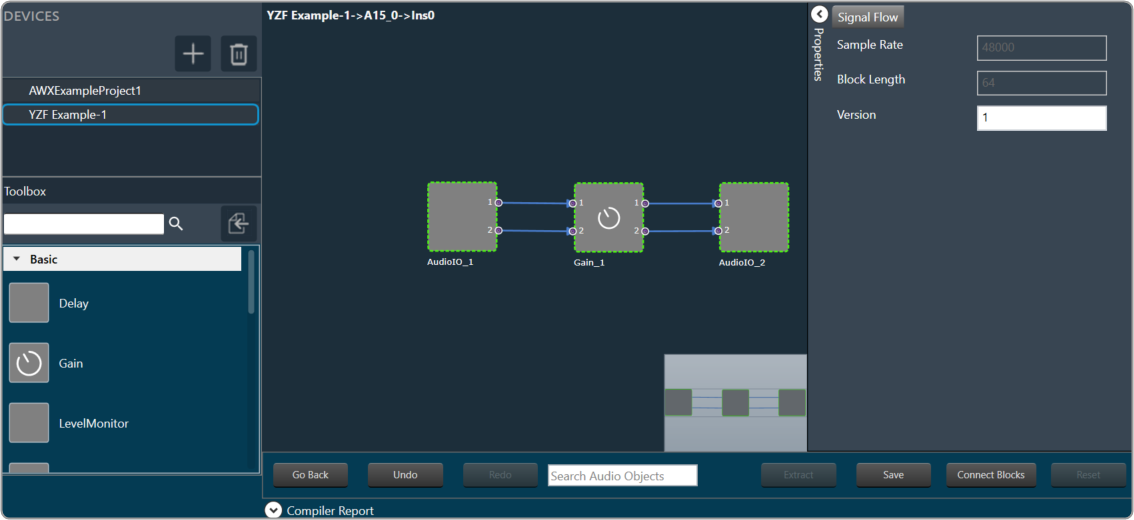
When you launch a project in GTT, the Device Designer screen appears, which includes the following elements:
- Parameter Set Ribbon: The ribbon is composed of six groups, each of which represents a subset of program functionality. In addition to these programs, there are also additional contextual programs that automatically appear depending on what is currently selected.
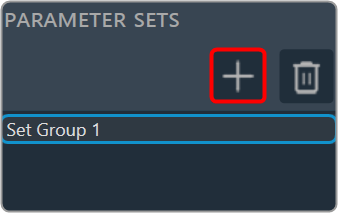
- Parameter Sets View: This section displays the list of projects. In addition, you can add and delete a parameter set group.
- Venue Explorer: This section displays core objects. Core objects that are part of the Audio Core (virtual core) and operate at a higher level than audio objects.
- Tuning Panel: The workspace is used to add audio object/ xAF instance and program the device core.
Parameter Set Ribbon

| Clipboard |
You can select either a single value or multiple values from a set to copy.
To select a single value, click on the cell. If you want to select multiple values, hold down the Shift or Ctrl key while clicking on the cells to choose them for copying.
- Clear Selection: If you have selected multiple cells and want to clear them without copying, you can click on the “Clear Selection” option in the ribbon bar or click on any other set.
- Copy: You can use the Ribbon bar’s copy option or the keyboard shortcut CTRL+C to copy the values of selected cells.
- Paste: You can paste selected values into the same or a different set using the paste option in the ribbon bar or by using the keyboard shortcut CTRL+V. First, select the cell in the set where you want to paste the values. Then click on ‘Paste,’ and it will paste all the copied values in sequence into the set.
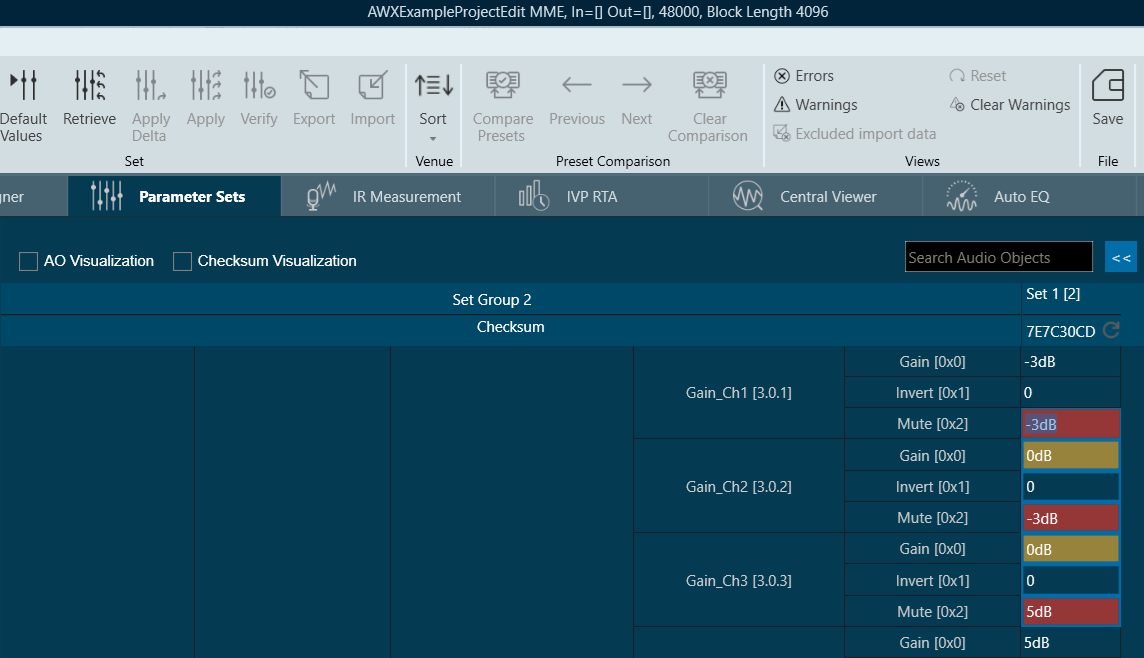
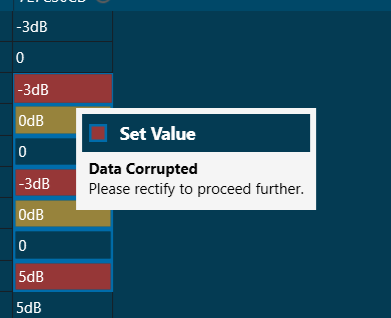
When pasting, values are validated; invalid or autocorrected values will be highlighted in the cells, along with tooltips indicating whether the data is autocorrected or invalid.
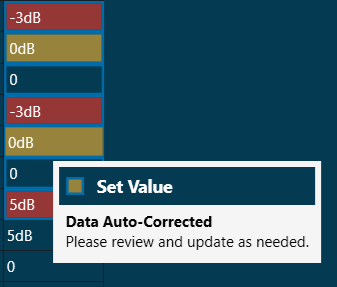
AutoCorrected values can be reviewed and corrected if needed.
Invalid data must be corrected. Without correction, the system will not allow you to move from parameter sets.
|
| Editing |
- Undo: Allows you to undo changes (Ctrl+Z).
- Redo: Allows you to redo several actions (Ctrl+Y).
- Delete: Deletes the current selection.
|
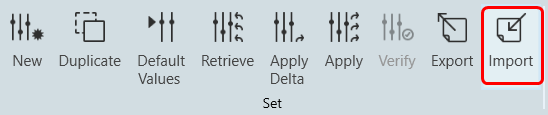
| Set |
- New: Creates a new preset with default values. For more details, refer to Create a Parameter Set.
- Duplicate: Use the “Duplicate” option to create a copy of the set and set group.
- To duplicate a set: Select a set column and click Duplicate. A duplicate set column will be added next to the existing set.
- To duplicate a set group: Select a set group and click Duplicate. A duplicate set group will be added in the parameter set view.
- Default Values: Use the “Default Values” option to reset all the parameters of the selected set to their default values.
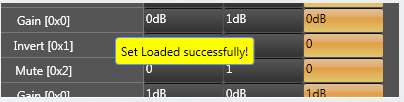
- Retrieve: Retrieve the current set of values from the state variables. For more details, refer to Retrieve Parameter Sets.
- Apply Delta: To send only the Preset parameter values that are updated in the selected set (i.e. the values of changed parameters). The tuning values of the presets are sent to the device via XTP messages. For more details, refer to Apply Delta in Parameter Sets.
- Apply: To send all preset parameter values of the selected set to the device.
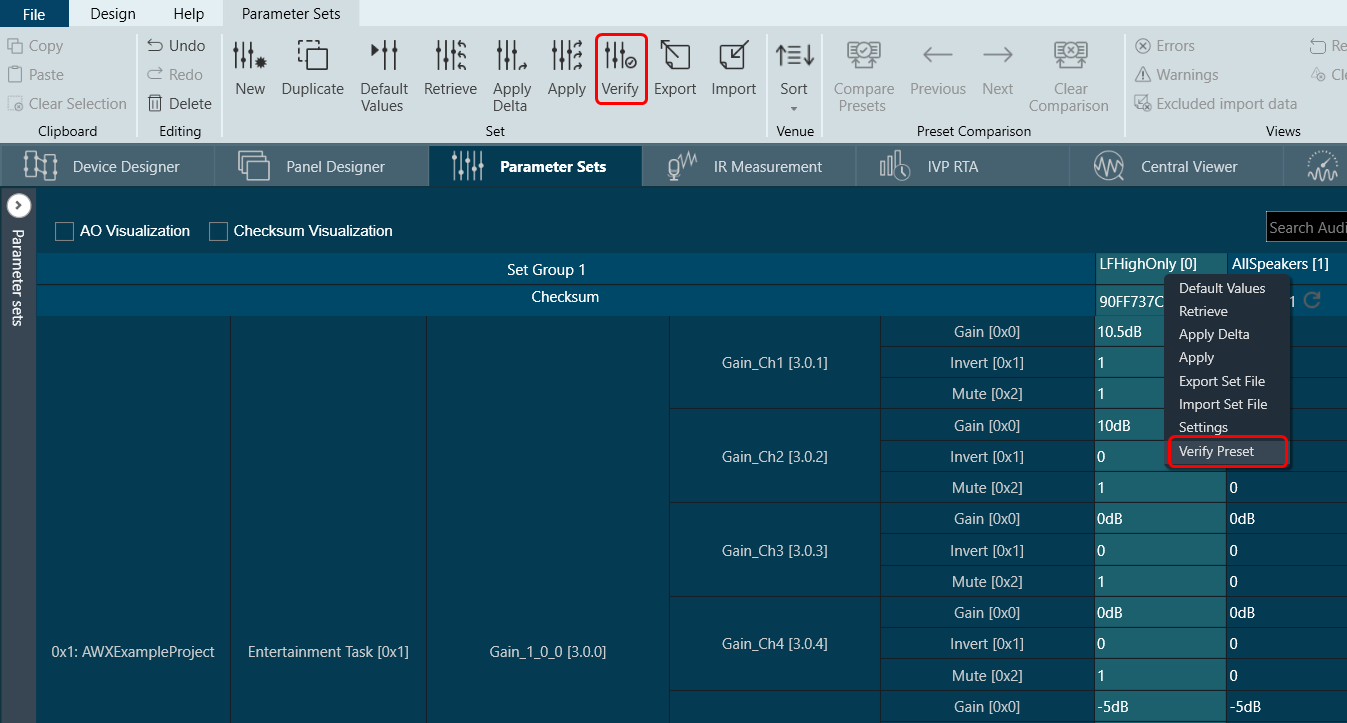
- Verify: To compare the presets loaded on a device with the presets available in the GTT in order to ensure their accuracy. For more details, refer to Verify Parameter Sets.
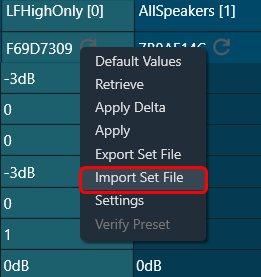
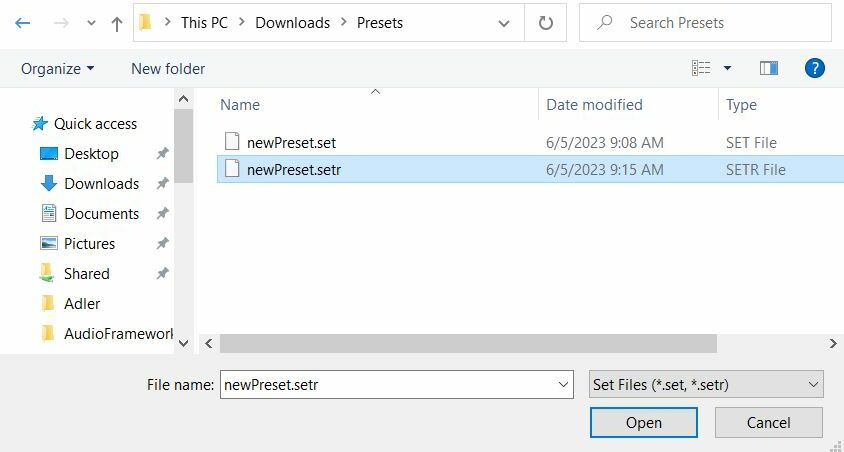
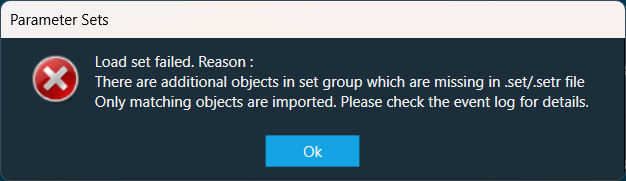
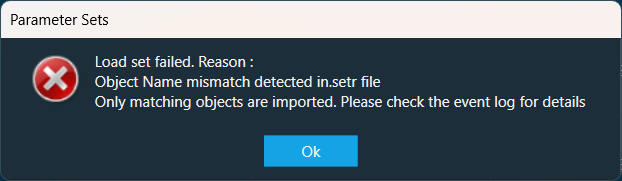
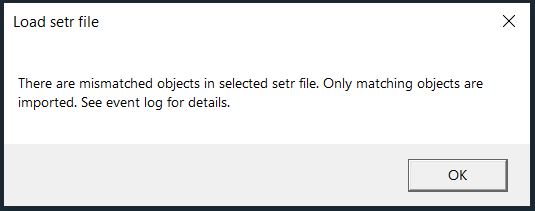
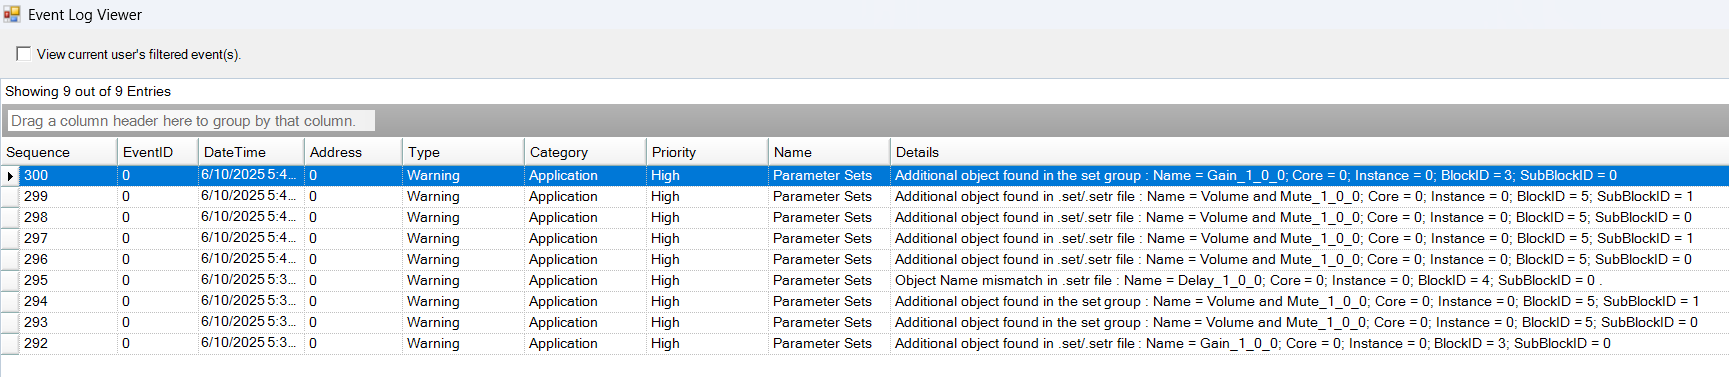
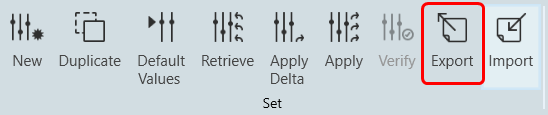
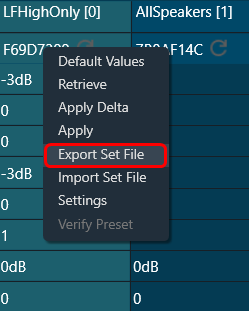
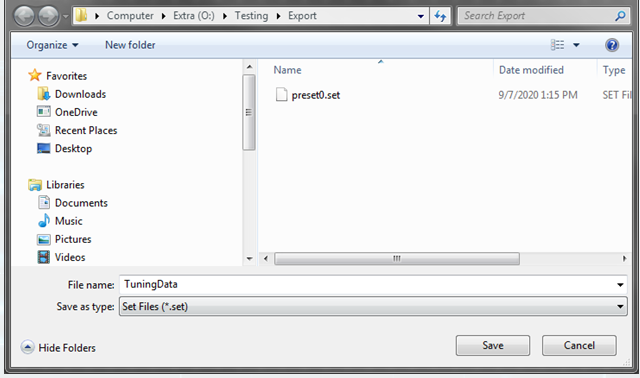
- Export: To export you can export a .set or .setr file, refer to Import and Export Set File.
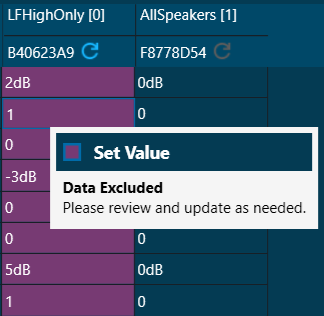
- Import: GTT will highlight values excluded from import, invalid values, and autocorrected values after import. You can use filter options to view these values. The clear warning will remove the highlighted color from these excluded import values, refer to Import and Export Set File.
|
| Venue |
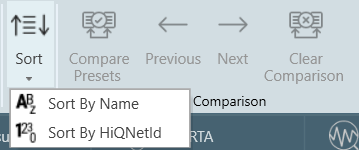
Sort By Name: Allows sorting the parameter sets explorer data in alphabetical order. It will sort all items by Name.
Sort By HiQNetId: Allows to sort explorer data in HiQNetId order.
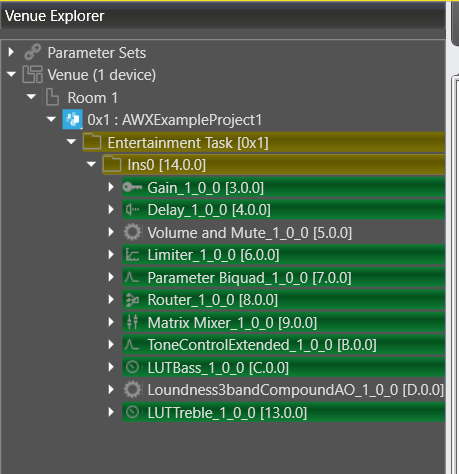
By default, the parameter sets explorer shows data in HiQNetId order.
|
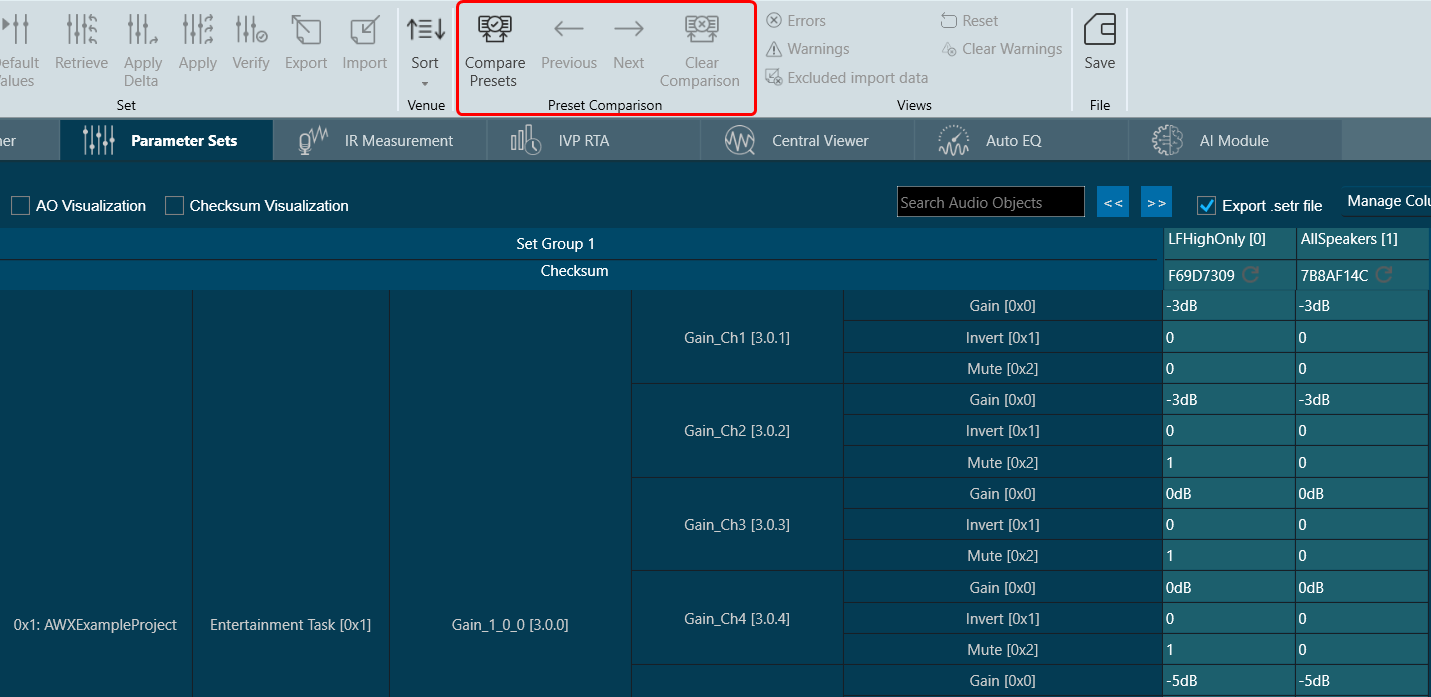
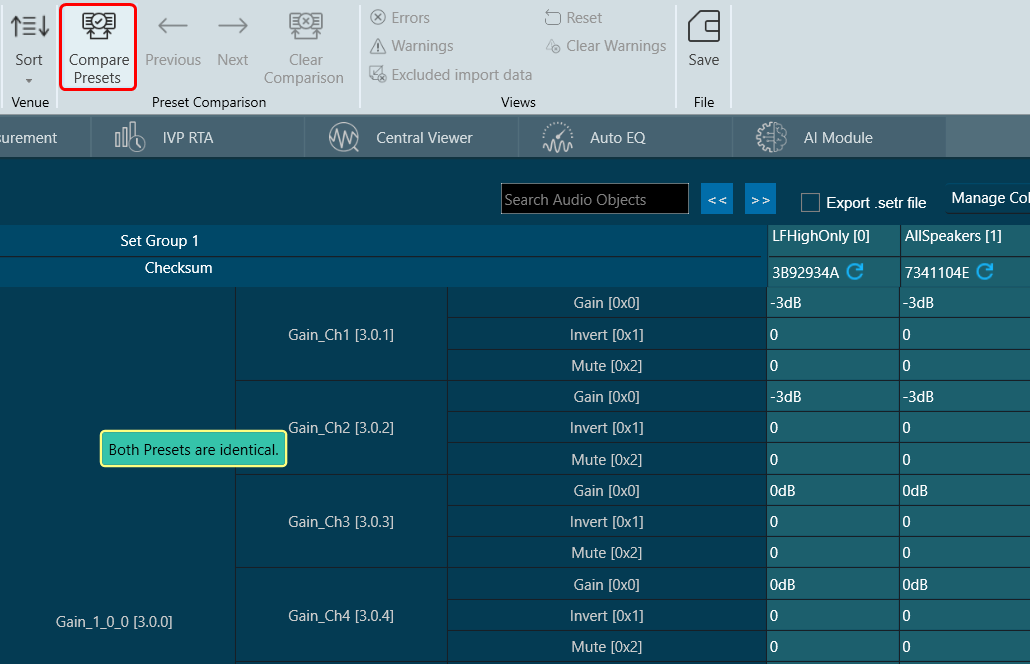
| Preset Comparison |
- Compare Presets: Sequential comparison of 2 selected Presets.
- Next: Navigate to the next mismatch cell value.
- Previous: Navigate to the previous mismatch cell value.
- Clear Comparison: Discard and disable all the preset comparison functionality.
By default, Presets Comparison ribbon buttons will be disabled.
For more details about Preset Comparison, refer to Preset Comparison. |
| Views |
- Errors: To filter and view only invalid values.
- Warnings: To filter and view auto-correct values.
- Exclude import data: To filter and view excluded import values.
- Reset: To reset the view back to the original state.
- Clear Warnings: Remove highlighted color from autocorrected values and clear all warnings.
|
| File |
Save: To save changes made in the parameter sets window.
The Save option will check that all required data is present before allowing the save. When a device is removed or GTT is closed, parameter sets are automatically saved.
When you navigate from the “Parameter Sets” tab to another tab in GTT, a confirmation message will appear, asking if you would like to save any unsaved changes.
If you choose “Yes,” your changes will be saved immediately, ensuring that your updates are applied. If you select “No,” your changes will not be discarded; instead, they will be retained in memory for later use.
Additionally, GTT will automatically save any changes when you close the application.
 |
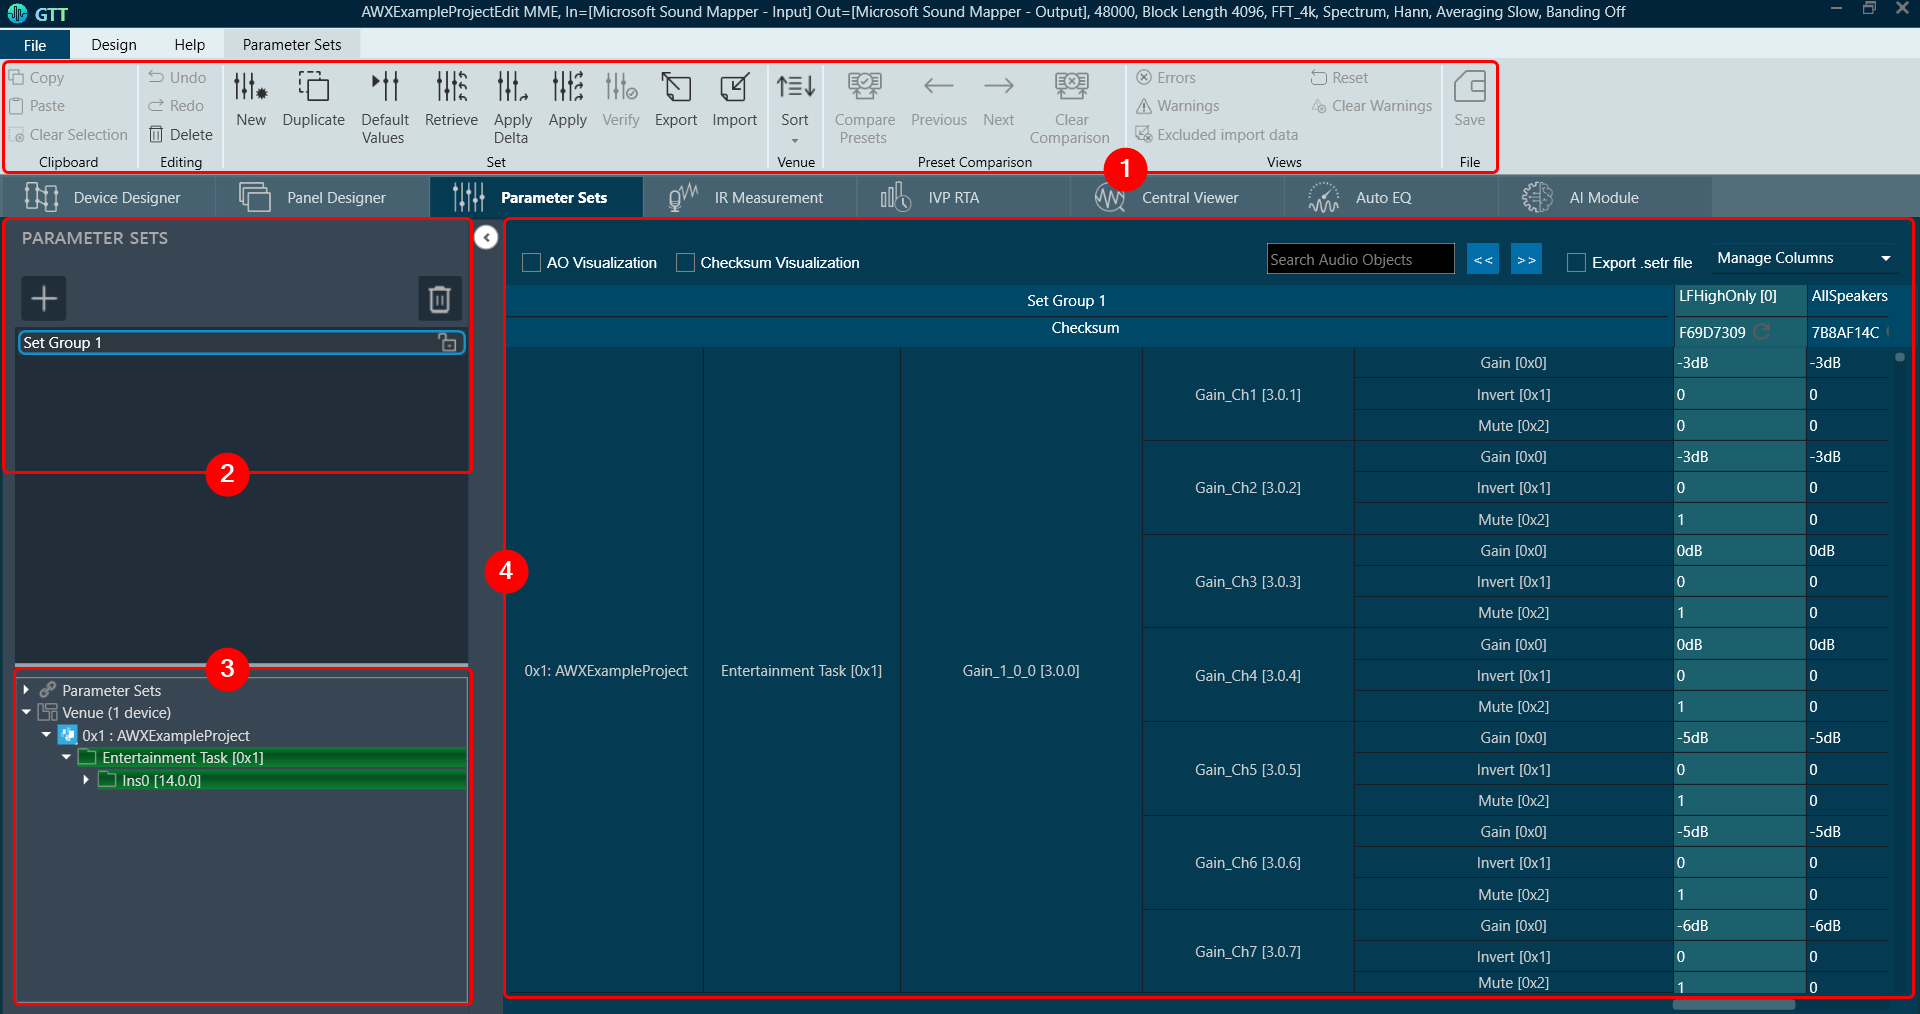
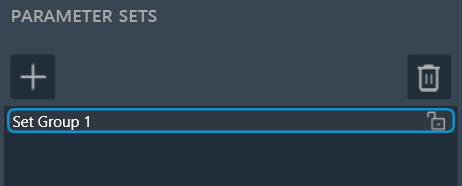
Parameter Sets View
The Parameter Sets section allows you to perform the following actions:
- Add a new parameter set group.
- Provides options to remove the set group.
- Allows to secure a set group.
Securing a set group: Securing set group options prevents unauthorized editing of group data. You can lock individual set groups with a password.
For the locked set group following restrictions are added:
- Deleting a set group, set or any object from a locked set group.
- Renaming the set group or set
- New, duplicate, default values, retrieve, and import.
- Editing the set value
- Dragging a new object to the locked set group.
- Copy and paste the set values.
To lock a specific group, click on the lock icon. A prompt will appear asking for a password. Enter the password and click OK.
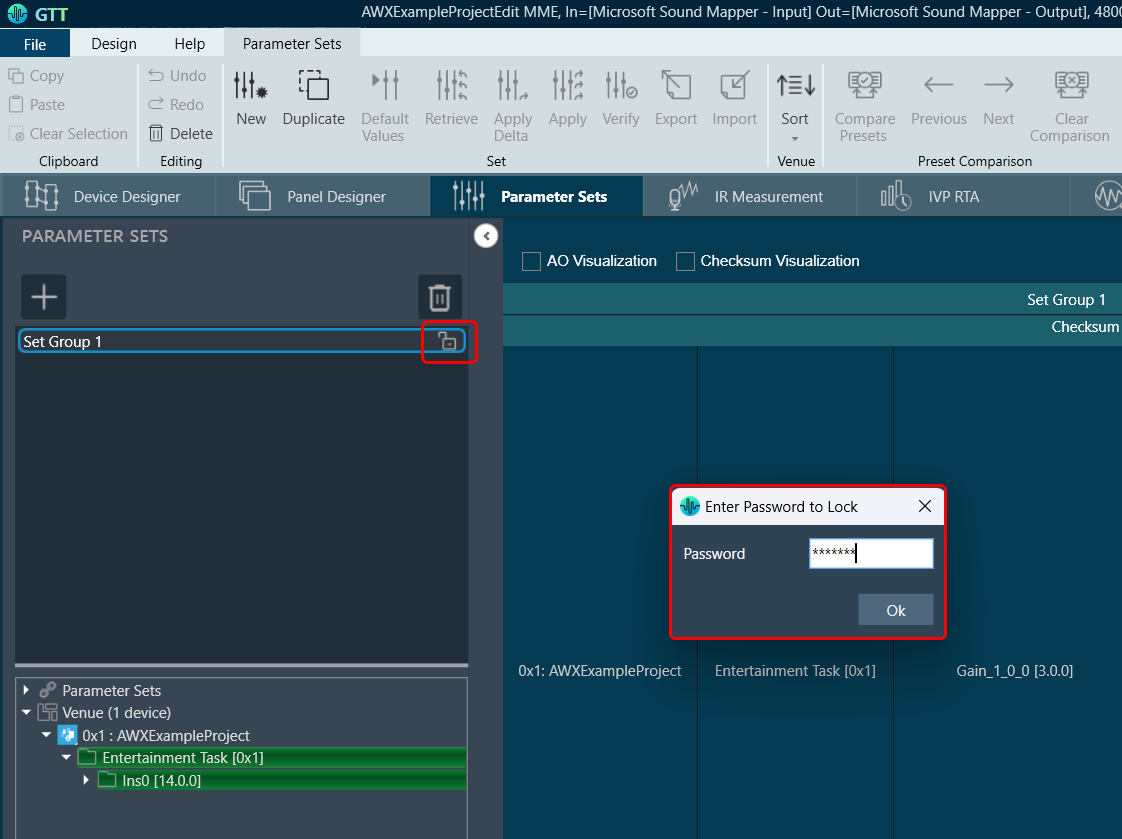
It will display a success message and lock the respective set group.
To unlock the group, click on the unlock icon. It will prompt you for a password; enter a valid password to unlock the set group.
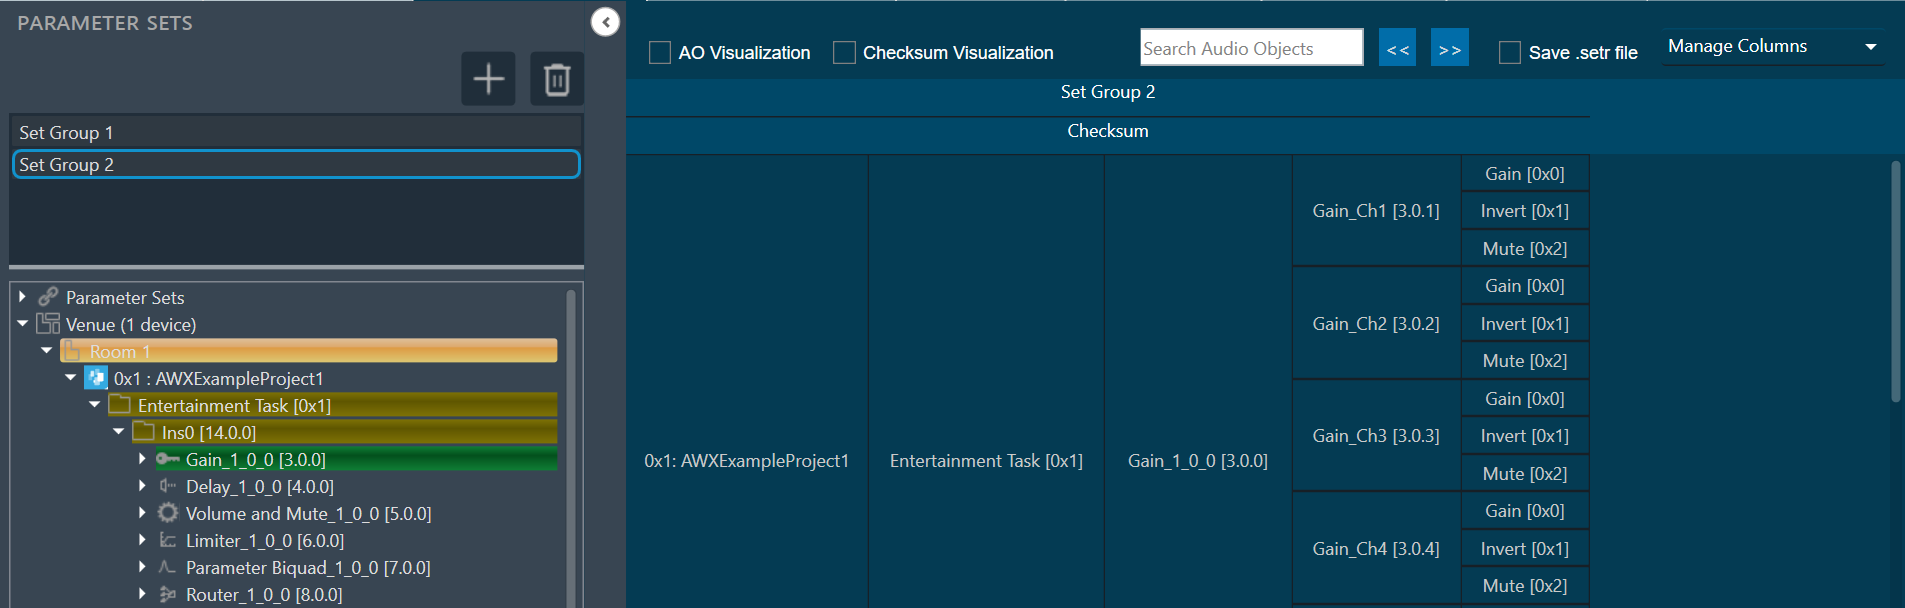
Venue Explorer
In venue explorer allows you to navigate and explore various parameter set groups and audio objects. Drag and drop the desired objects you wish to have presets configured in onto the workspace.
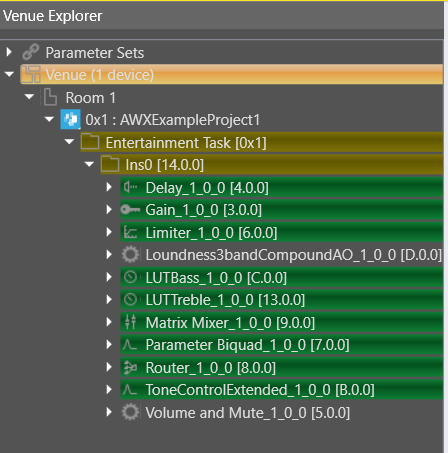
Parameter Sets Explorer Color scheme: Parameter Set uses the following color scheme to represent the usage of nodes in the set group.
- Yellow: To represent partial use of the object state variables.
- Green: To represent complete use of the node.
- No color: To represent, the node is not used in the set group.
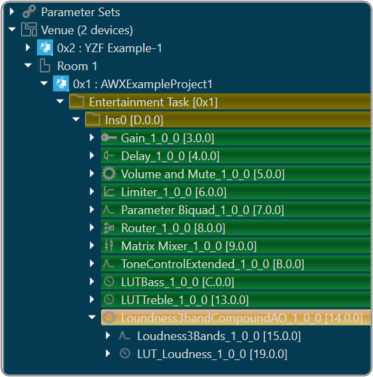
Colors are visible in Explorer only for Parameter sets. Colors are updated when something gets updated in the Set group.
You can easily determine which nodes from the Explorer are a part of Set Group and which ones are not by using the color coding. This will enable to modify the set group further.
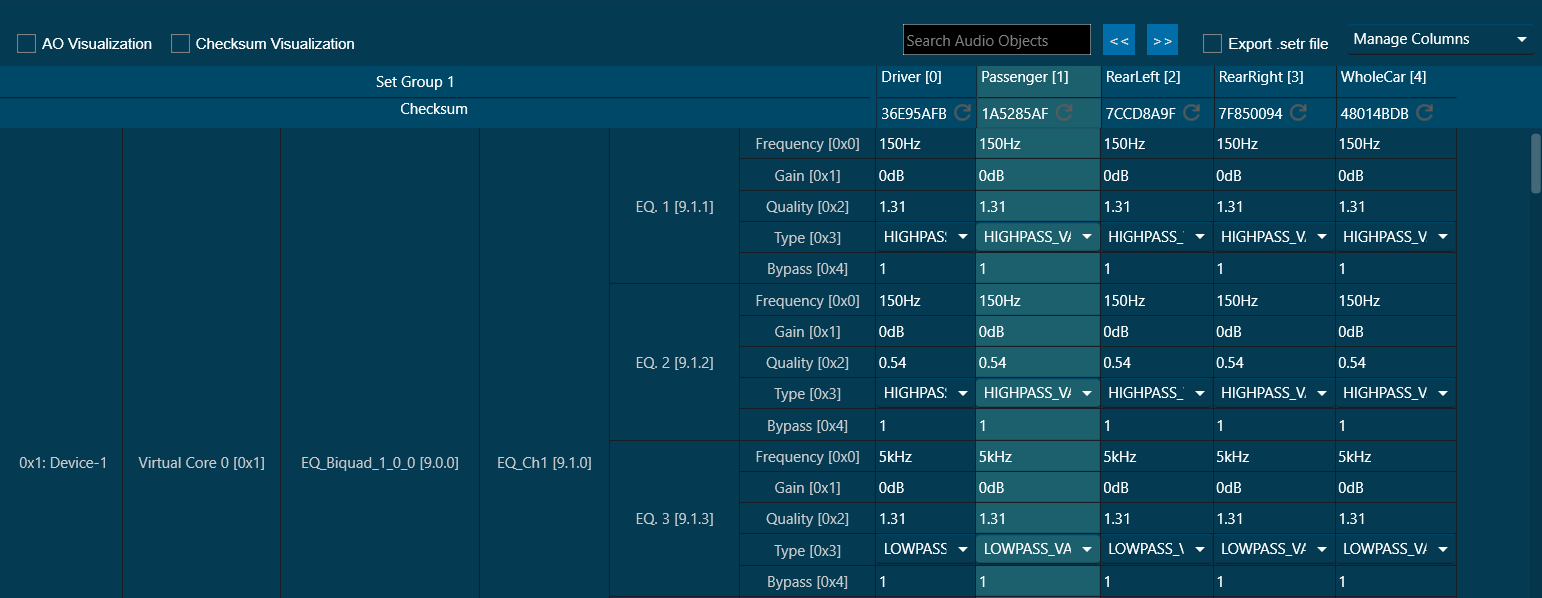
Tuning Panel
The tuning panel shows the tuning data of the audio objects used in the SFD. You can perform the following actions on the tuning panel.
- Modify the tuning data of the audio objects.
- Manage or filter the columns and set groups.
- Search the audio objects.
- Stores the tuning data in set files. These files are in Intel Hex format.
Save the modification or progress of tuning of audio objects.
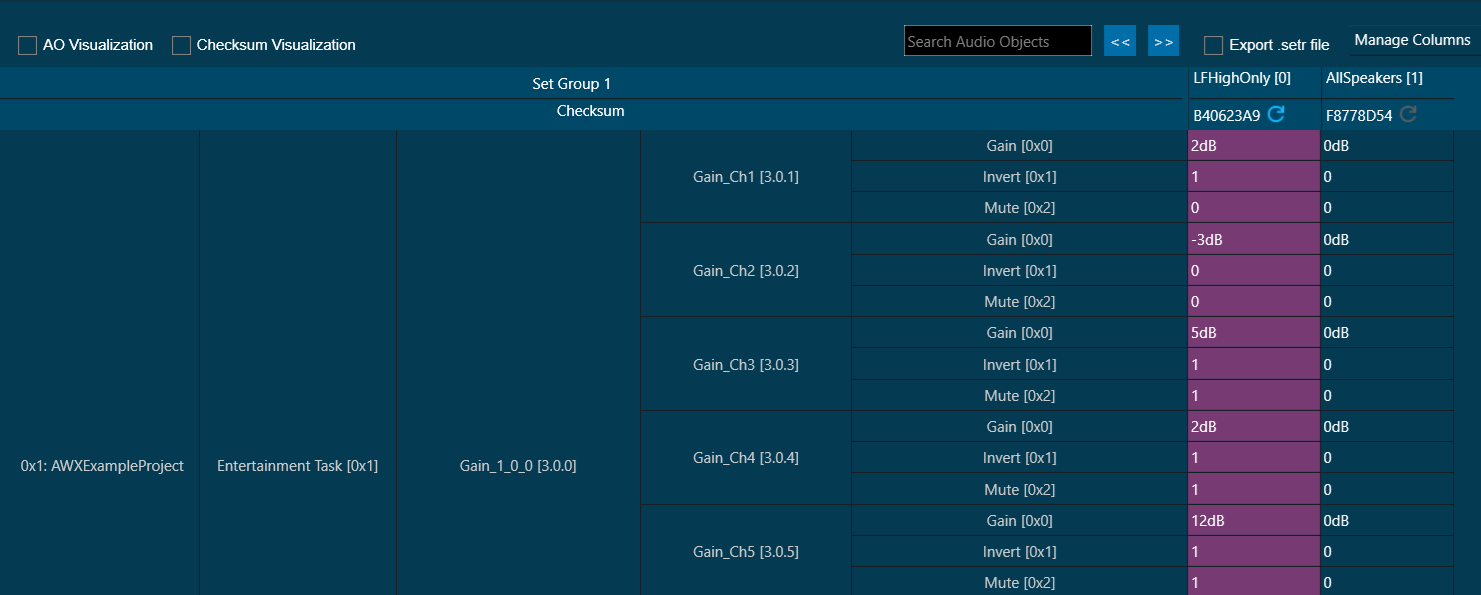
AO Visualization
To view audio objects added in parameter sets, the “AO Visualization” view can be used.


You can view the compact view of the device, cores, and audio objects by checking “AO Visualization” checkbox in the header. On unchecking this checkbox, the default view of parameter sets will be shown. This compact view is specific to each set group, so you can enable this for one set group and view the default view for another.
Operations such as adding new parameters by drag and drop, deleting parameters, and creating new sets are allowed in the AO Visualization view, but the view will be reset back to default.
Search Parameter Sets
A search box is available on the top right of the window to search parameter sets by Audio-object name.
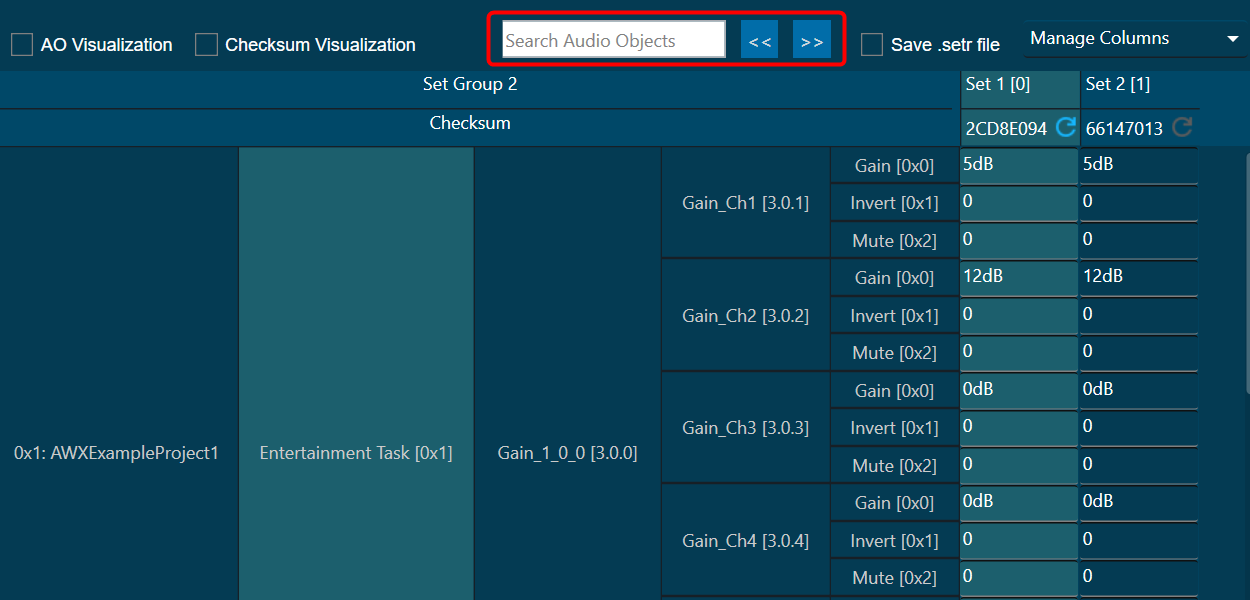
To enable the search, at least 3 characters must be entered. When an audio object’s name is searched, any matching audio objects that contain the key are highlighted in yellow, and a navigation to the first matching row is automatically carried out.
You can use “<< and >>” options to navigate between the highlighted audio objects.

If a row is added or removed from parameter sets, and if a set group is changed, the search results will be cleared.
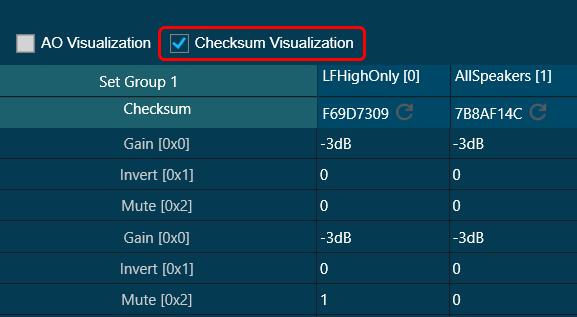
Checksum Visualization
Checksum visualization allows you to view more sets of data by hiding the left side columns.
Parameter Sets Checksum
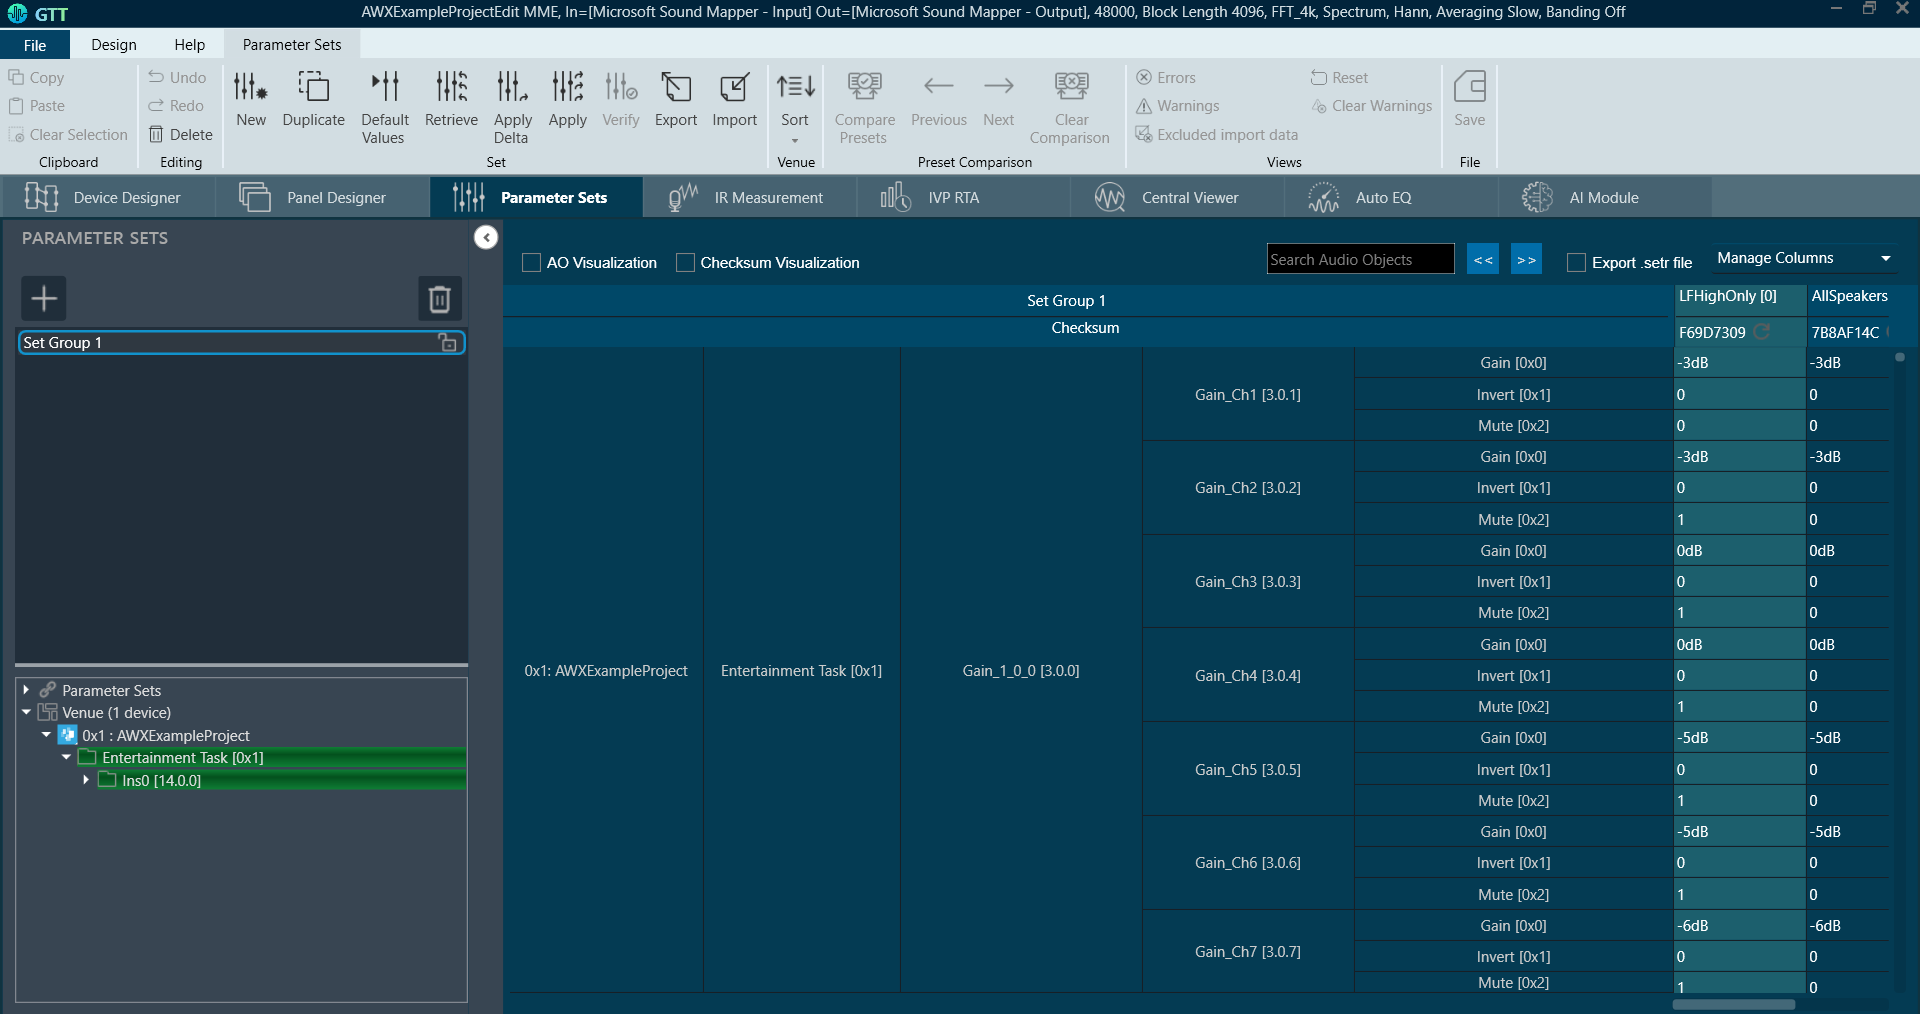
A checksum is an alphanumeric string that serves as a fingerprint for data. Later, this data can be used for comparisons to detect errors in the data. The checksum is significant because it helps to validate the data. This feature allows you to view the checksum of each set and export the checksum along with the set files.
You can use this set checksum to verify exported set files to validate whether the set files data and parameter sets set data is the same or not.
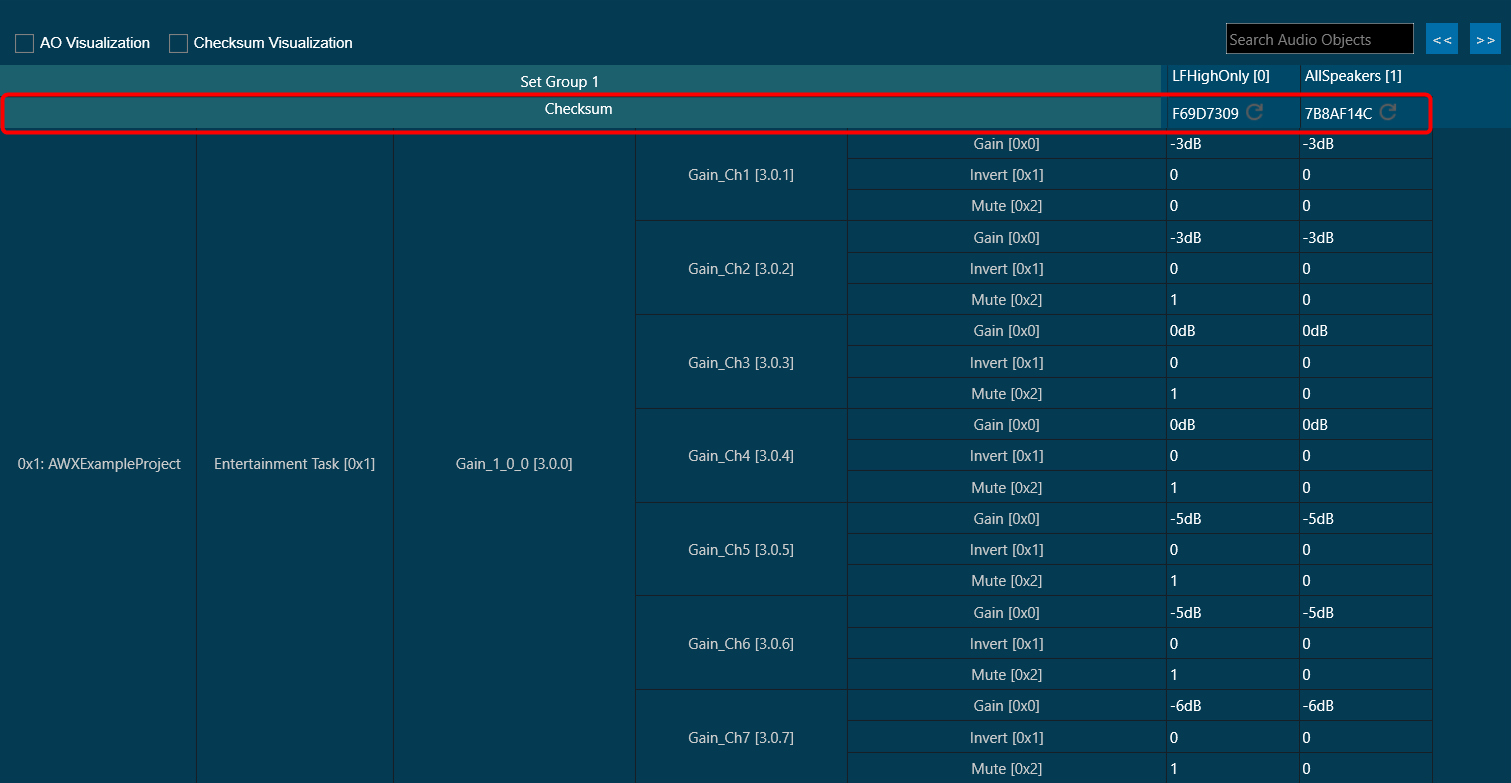
Refresh Checksum
The Refresh checksum option gets enabled when any changes are made in the set data and user data. You can click on the refresh icon to calculate the latest checksum.

Export Checksum in Set file
GTT allows you to export the set checksum in .set and .setr files.
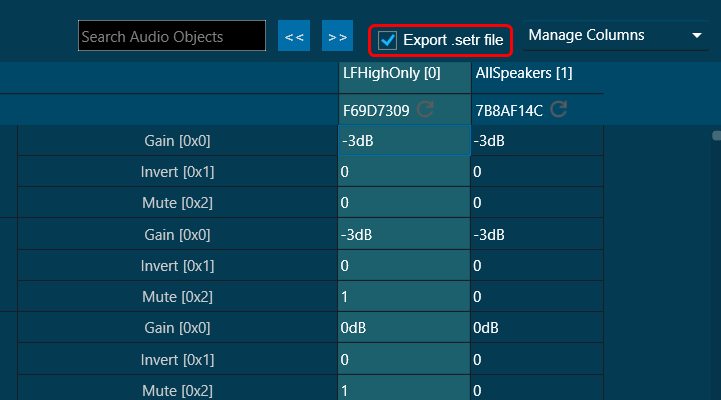
Checksum will not be saved in .set and .setr files in below cases:
– While saving .set and .setr files in the State Variable explorer.
– While exporting .set and .setr files from Export Tuning Data.
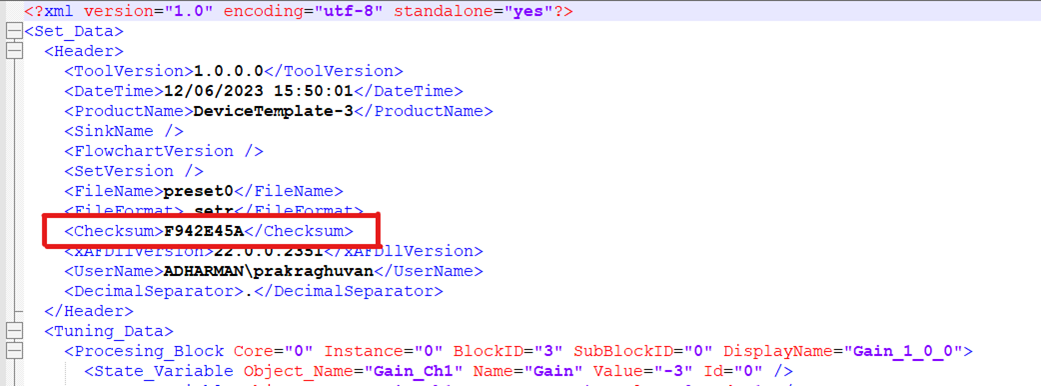
GTT stores the tuning data in set files these files are in Intel Hex format. Due to the complexity to analyze the data stored in set files a human readable set file is generated. This type of file is generated when you check the check box in the parameter sets workspace.
A confirmation message appears when you save a set file using the device context menu or the state variable explorer. This file will have the same file name that set file but with extension “.setr”. The human readable set file is in XML format, this file contains three main nodes:
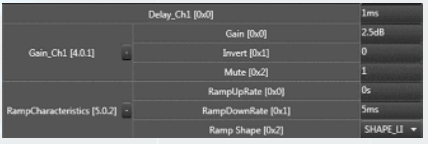
| Data in GTT |
Data in human readable set file |
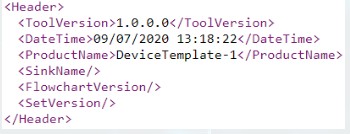
Header: Generic file information
 |
 |
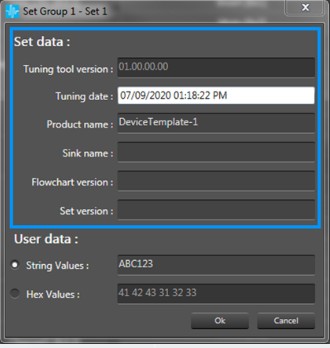
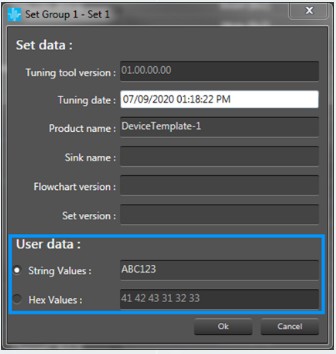
User data: User data defined in preset settings.
 |
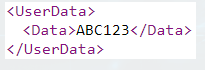 |
Tuning data: Values associated to each state variable for each audio object.
 |
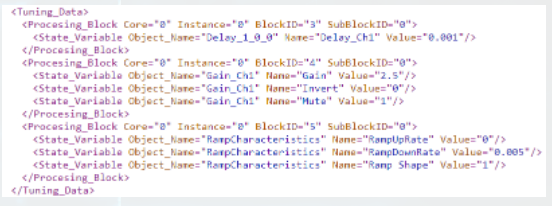 |
Each processing block corresponds to each Audio Object in current configuration.