A signal flow designer can assign labels to audio and control pins of audio objects to make a flowchart design more informative. There are two items available in the context menu of each audio object “Add Audio Pin Label” and “Add Control Pin Label”.
The process of signal flow design involves the labelling of audio and control pins for audio objects, which enhances the clarity of the flowchart design. To facilitate this, there are two options available in the context menu of each audio object: “Add Audio Pin Label” and “Add Control Pin Label.”
Pin labels are not propagated downstream by default, although certain objects, such as Gain, Biquad, or Delay, do have this capability. For a design with four blocks like AudioIn, Gain, Delay, and AudioOut. Label the output channels of the AudioIn block, select all the blocks, and then press the “Connect Blocks” button. This is sufficient to propagate the labels since they will be inherited by the downstream objects.
Pin labelling will only propagate to the immediate next connected audio objects input pin labels if it has different input and output pin labels, and if input and out pin label is same it will propagate it in input and output pin labels
Related Topics
Steps to Add Audio Pin Label
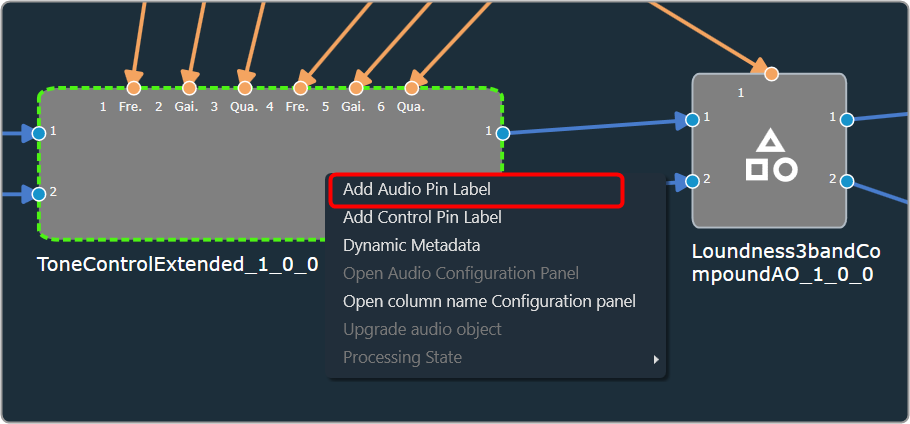
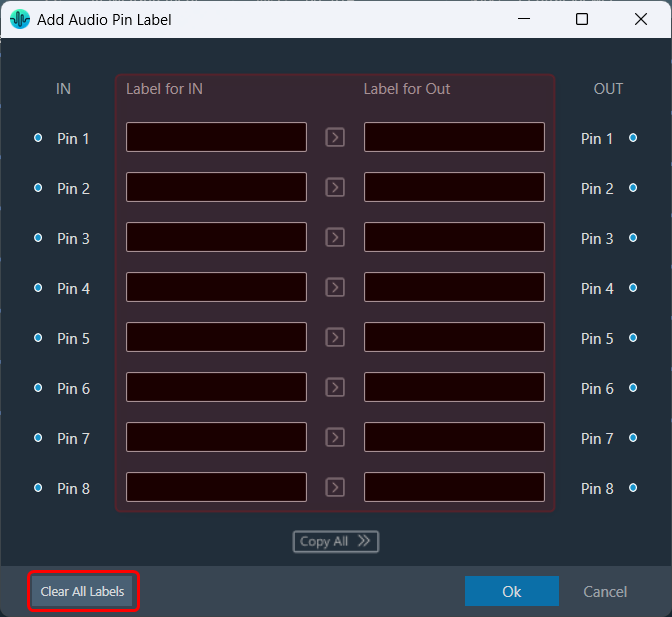
- On the signal flow designer, right-click on the audio object, and select Add Audio Pin Label. This opens the Add Audio Pin Label dialogue box.
- On the pin label dialogue box, enter the input pin and output pin details and click Ok. The label will be displayed on the audio object.
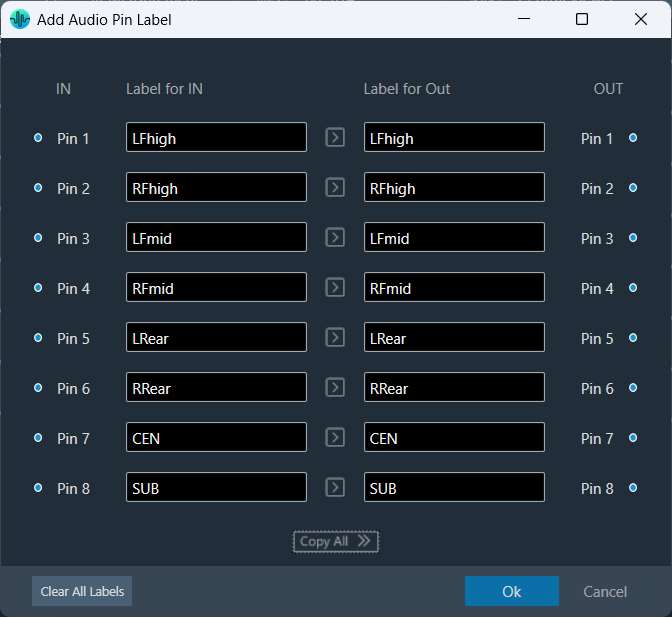
Adding audio pin labels will propagate output pin labels to the next connected audio object input pin labels.
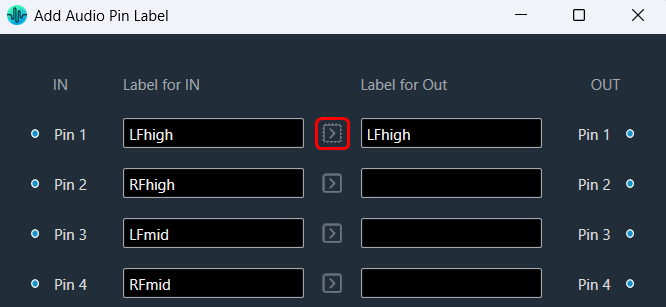
Also, you can use the “Copy” option to easily duplicate the label from each audio input pin to its corresponding audio output pin. This feature streamlines the labelling process, ensuring consistency across your connections and saving you time while setting up.
Simply, click on the “Copy” option for the audio input pin whose label you want to copy; the GTT will copy the audio input pin label to the respective audio output pin label.
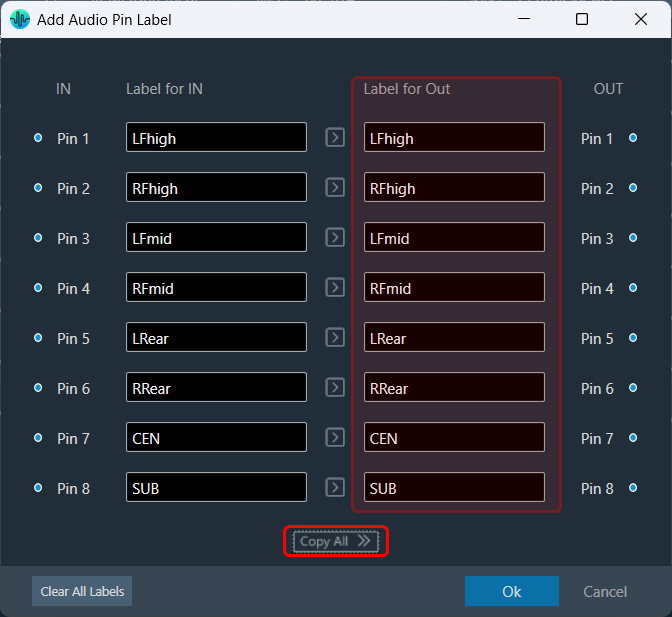
Similarly, you can use the “Copy All” option to copy all the audio input pin labels to the respective audio output pin labels.
The “Copy All” feature will prompt a user confirmation message before proceeding. If you respond with a “yes,” the GTT will copy all audio input pin labels to the respective audio output pin labels.
This ensures that the labelling is consistent and accurate across the board, making it easier to manage their pins effectively.
Selecting the “Clear All” option will display a confirmation message. If you choose “Yes,” all audio pin labels will be permanently removed, and this action cannot be undone.
Steps to Add Control Pin Label
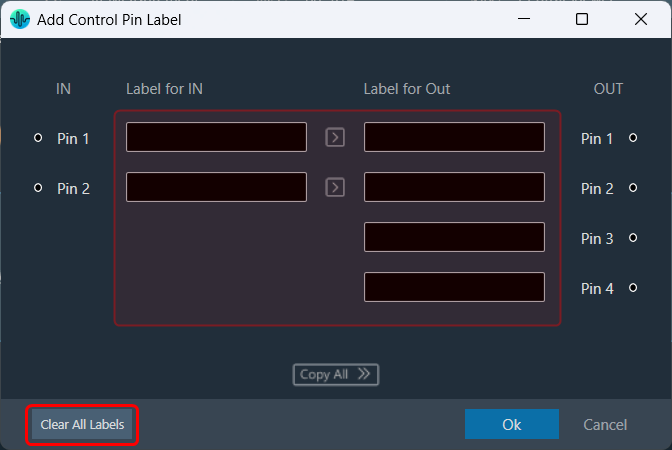
- On the signal flow designer, right-click on the audio object, and select Add Control Pin Label. This opens the Add Control Pin Label dialogue box.

- On the control label dialogue box, enter the input pin and output pin details and click Ok. The label will be displayed on the audio object.
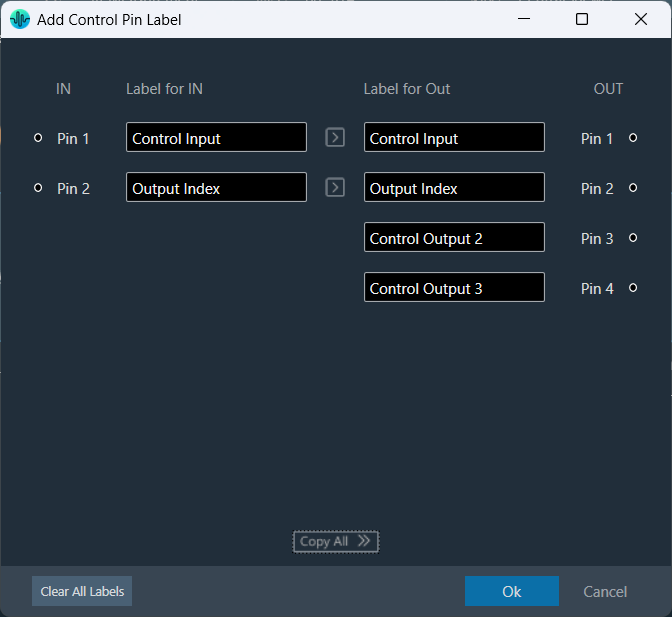
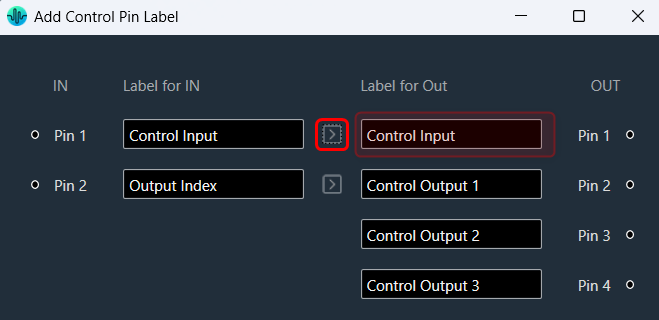
Also, you can use the “Copy” option to easily duplicate the label from each control input pin to its corresponding control output pin. This feature streamlines the labelling process, ensuring consistency across your connections and saving you time while setting up.
Simply, click on the “Copy” option for the control input pin whose label you want to copy; the GTT will copy control input pin labels to the respective control output pin label.
Similarly, you can use the “Copy All” option to copy all the control input pin labels to the respective control output pin labels.
The “Copy All” feature will prompt a user confirmation message before proceeding. If you respond with a “yes,” the GTT will copy all control input pin labels to the respective control output pin labels.
This ensures that the labelling is consistent and accurate across the board, making it easier to manage their pins effectively.
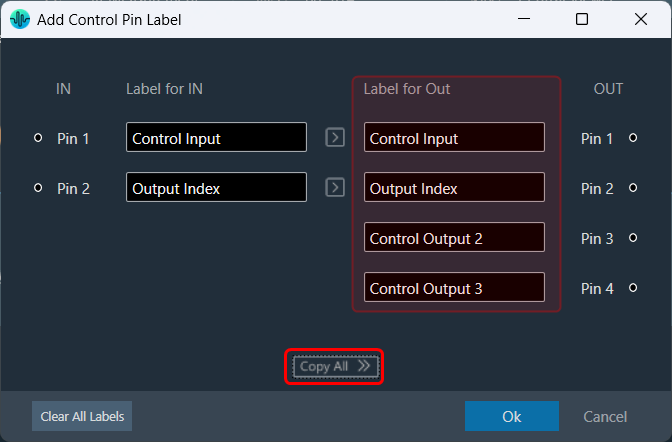
Selecting the “Clear All” option will display a confirmation message. If you choose “Yes,” all control pin labels will be permanently removed, and this action cannot be undone.
Tooltip
A tooltip is a graphical user interface (GUI) element that appears when you hover over pin connections. It typically contains a brief description or additional information about the pin connection. Tooltips can be used to obtain more detailed information on the connection between Audio Objects, Tooltips are available that display the affected AO names and the corresponding pins used.
To access these tooltips, you must connect any two audio objects first, then hover your mouse over the connection presenter (arrow). This will display a tooltip showing the Audio Object Name, Pin No, and Labels (if any) for the connected objects.

Compound Audio Object Instance Pin Labels
The Compound Audio Object (CAO) instance takes pin labels from CAO audio objects such as CompoundAudioIO, CompoundControlIn, and CompoundControlOut, and applies these labels to the CAO instance when extracting or dragging a new CAO type from the toolbox.
It will swap In pin labels with Out pin labels for the CAO instance.
On Compound Audio Object upgrade the Compound Audio Object instance takes the latest CAO type pin labels and updates it in the CAO instance.

