Prerequisites
- Ensure that the required car is set in the Scene tab; for more details, refer to Scene Setup.
- Ensure that the speaker setup is configured in the Speaker Configuration tab. For more details, refer to Speaker Configuration.
- Ensure that the microphone setup is configured in the Microphone Configuration tab. For more details, refer to
Microphone Configuration. - Ensure that you define all measurements, set the mode and parameters, and check the measurement sequence in the
Measurement Definition tab, for more details, refer to Measurement Definition.
Steps to Perform Measurement Session
- Once all the measurement configurations are done as described in the prerequisites, click on the Start
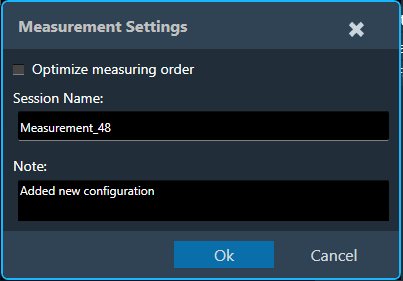
Measurement Session. This will activate the measurement mode. - Enter the session name on the Measurement Setting dialog box, add a Note (optional), and click Ok.
If you want to optimize the measurement order, select Optimize measuring order. The
optimization of the measurement order applies when several sequences with different loudspeakers are defined for
at least one rotating microphone.
– If no optimization is applied, the measurement will be performed independently for each sequence, resulting in
the rotation of the microphone over all the seats within each sequence.
– When optimization is applied, all the measurements that are linked to a seat position are performed one after
the other, regardless of the sequence to which they belong.
For large numbers of sequences, this greatly minimizes the number of microphone repositioning. - The measurement module acquisition window will now open as a pop-up window, allowing access to tuning panels in
the signal flow without obstruction. This enables manual muting and unmuting of necessary speakers through
panels during measurement acquisition, especially in cases where automatic measurement isn’t feasible. - Once the window opens, the following operation will happen.
- In the measurement configuration section, the measurement will start sequentially. After completing
measurements are displayed in green, and aborted measurements are displayed in red.
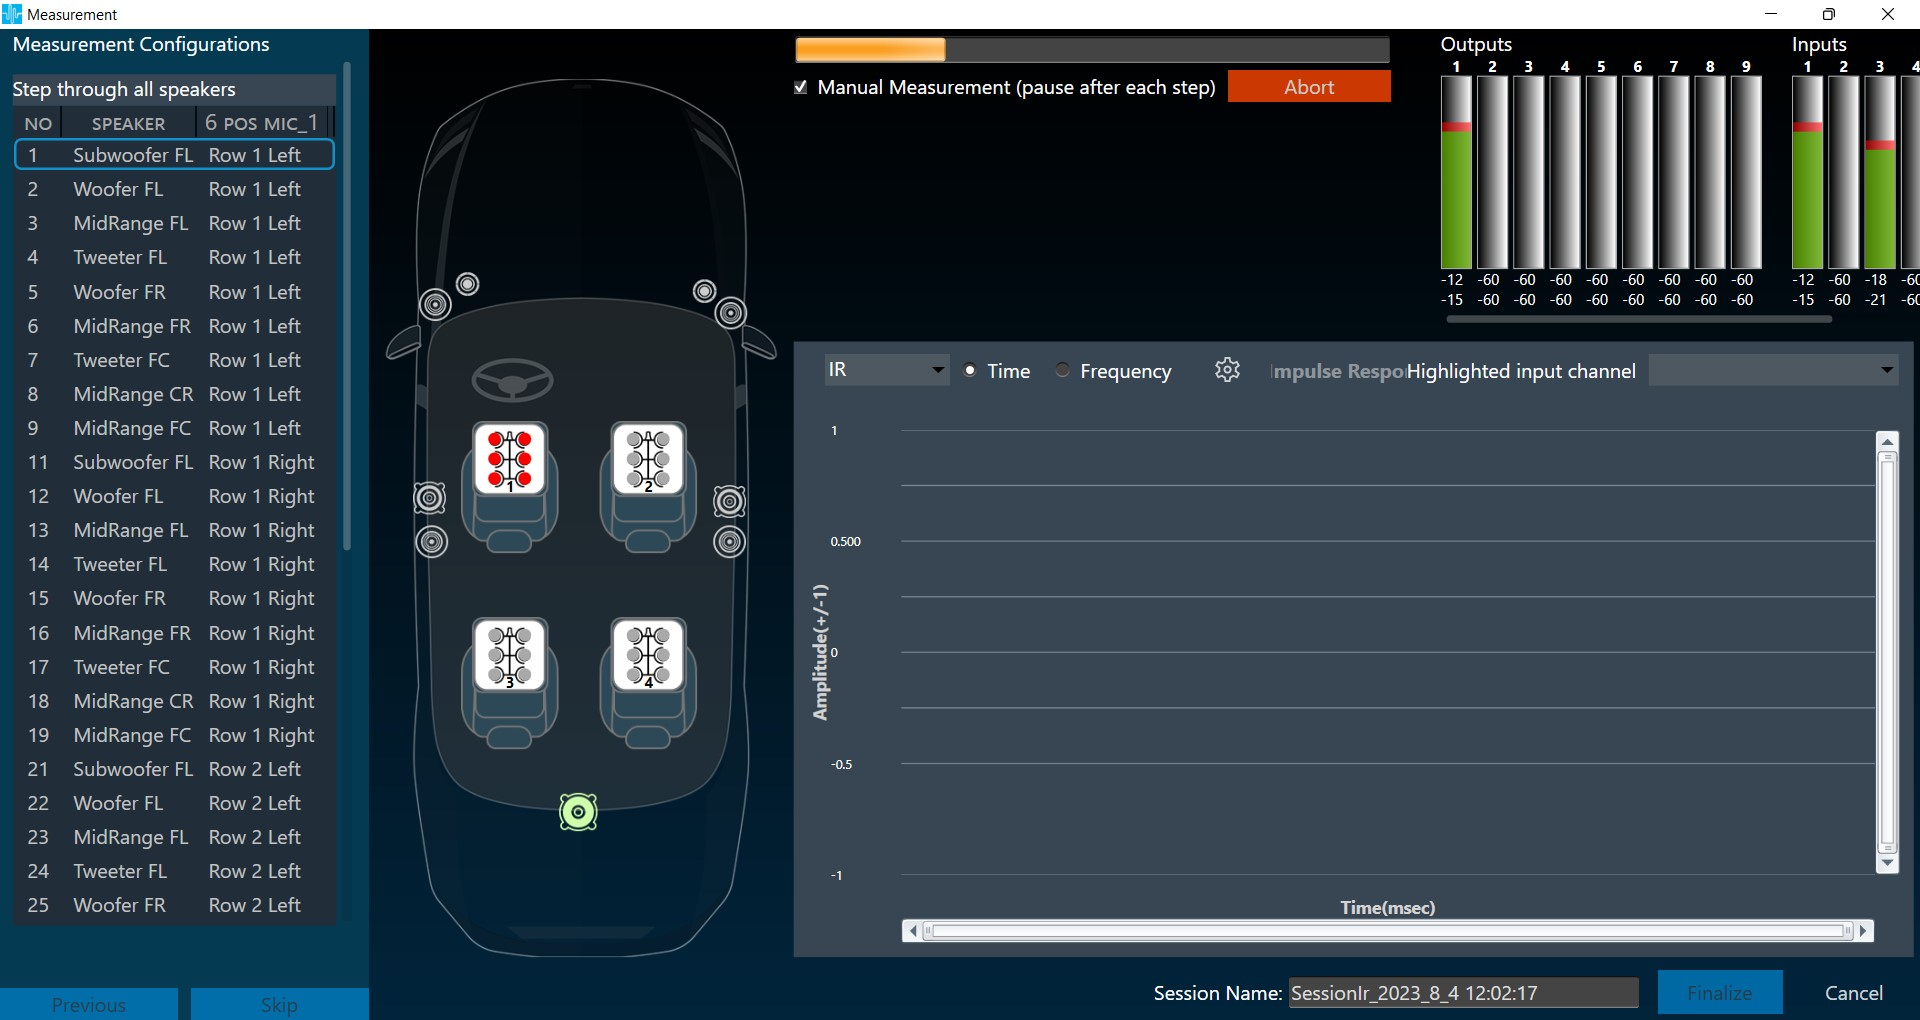
In the example below, two “Step through selected loudspeakers” sequences are about to be performed. Due to measurement optimization, the two driver seat measurements will be performed immediately after each
other, as indicated by measurement numbers 1 and 2.

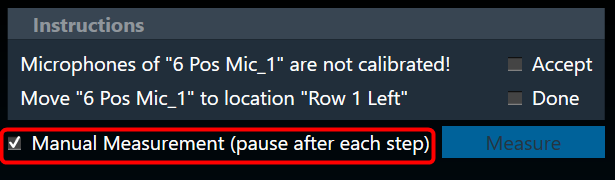
- In the instructions section, a warning is displayed regarding microphone calibration and microphone
relocation.
To begin, select the appropriate checkbox. After confirming all instructions, click Measure to start the measurement.
If you want to stop after each measurement, then select the Manual Measurement (Pause after each
step) option.
This stopped time can be used to further inspect the result in the viewer in the time (max is 5s for IR
and max 10s for recording) or frequency domain as impulse response (IR) or pure recording.
During a pause, you can trigger a repetition of the last measurement or skip the next measurement from the sequence list.
– To repeat the last measurement, click Previous.
– To skip the next measurement, click Skip.
Repeating a measurement automatically disables the automatic measurement mode. It can be re-enabled at
any time.

A pause is automatically activated when the measurement requires user action, e.g., the placement of a
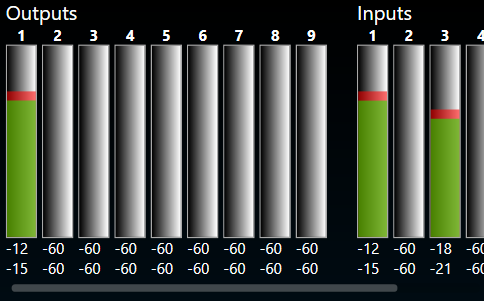
microphone on another seat. - In the Inputs/ Outputs section, the current input and output levels are shown using the meters.
Once the actual acquisition is complete and the measurement is only being post-processed, the message “Capture complete! ” appears in the instructions box.
The result of each measurement is displayed in the Measurement Inspection viewer section.
- In the measurement configuration section, the measurement will start sequentially. After completing
- After completing the measurement, you can navigate between steps by clicking on the previous and skip buttons to view the measurement for the selected step on the chart.
- The chart will be blank if a step was unsuccessful or did not contain information to display.
- On the Measurement Inspection viewer, display the result of each measurement.

- Once all steps of the measurement procedure are completed, click Finalize to store the measurement.
You can rename the session at any point during the measurement. Click Cancel to discard the measurement
Generally, you can exit the Measurement window only when a session is cancelled or finalized.
The following actions are restricted during a measurement session:
- Opening Sound Card Configuration in IR Measurement
- Opening Device Output Mapping in IR Measurement
- Opening Generator Settings in IR measurement
- Opening Reset all in IR measurement
- Opening Import in IR measurement
- Opening Test Sound in IR measurement
- The “Start Measurement Session” button is disabled
- Application Exit
- New Project Import
- New Project Create
- Delete Project
- Open Project
- Save and Go Back in SFD
- Save in Device View
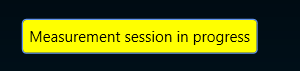
If you try to perform any one of the above actions, a message will be shown “Measurement session in progress”.