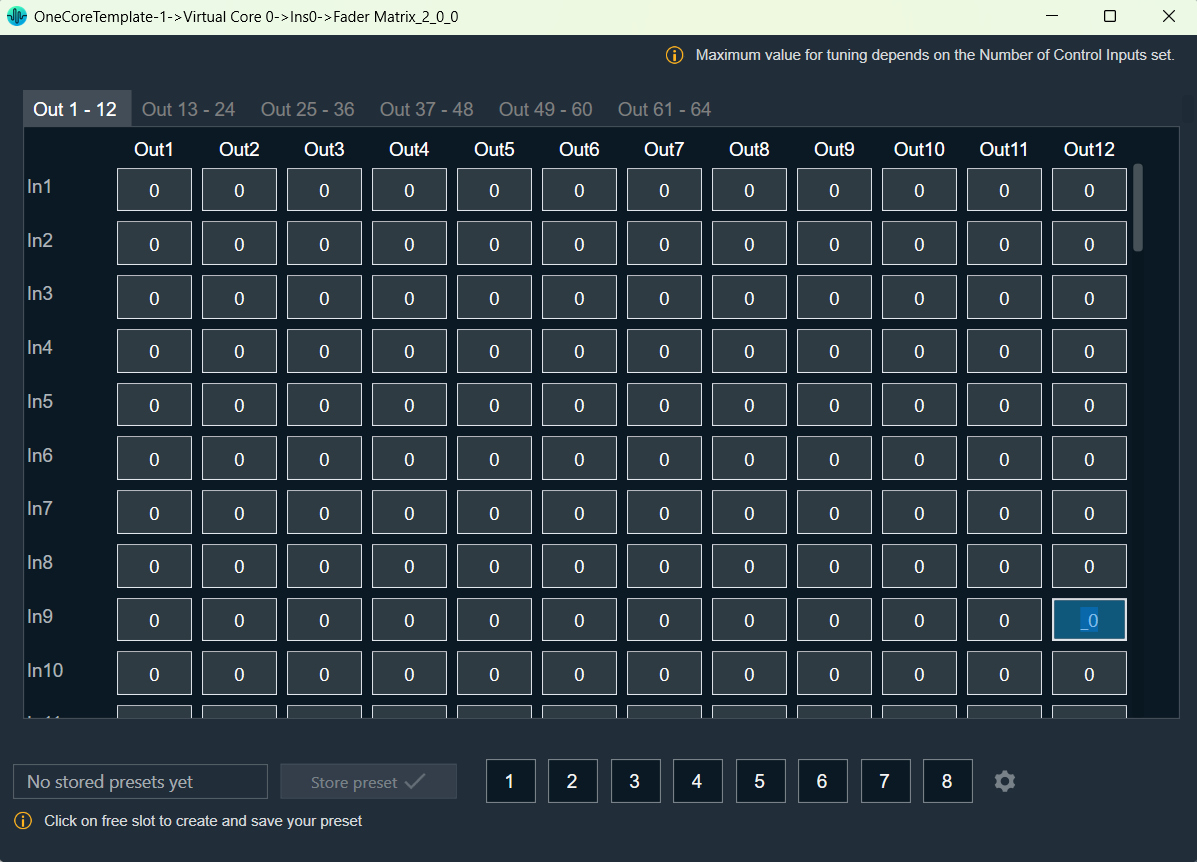
The Fader Matrix panel is a table panel with rows and columns to tune the state variables for the Fader Matrix audio object.
The Fader Matrix Panel features a configurable number of input and output channels, which correspond to the rows and columns, respectively. The dimensions of the Fader Matrix Panel—namely, the number of rows and columns—are determined by the values set for the ‘Audio In’ and ‘Audio Out’ properties of the Fader Matrix Audio object.
The maximum number of input channels, output channels, and control inputs that can be configured is 64.
The Fader Matrix panel window has tabs for grouping output channels sequentially, where each tab displays 12 channels.
Tuning Fader Matrix AO
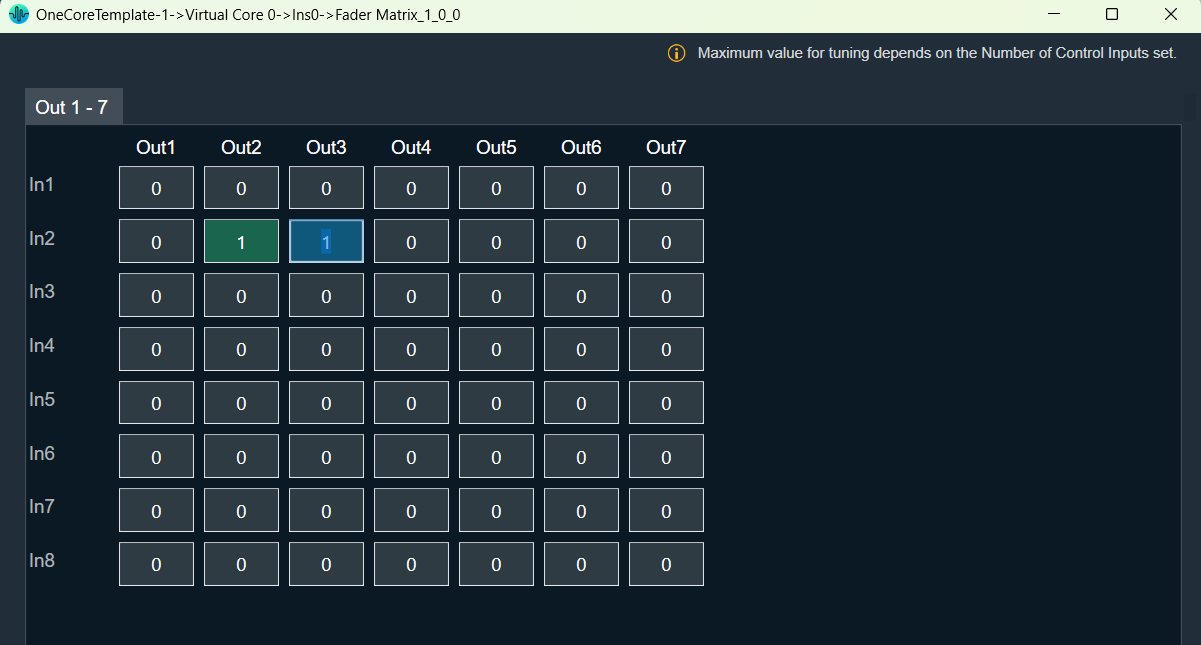
The minimum value that can be tuned for the Fader matrix audio object is 0, which is the default value.
The maximum tuning value is determined by the ‘Number of Control Inputs’ property of the fader matrix audio object. The tuned cells are highlighted in green to distinguish them from untuned cells. Additionally, you can perform Cut, Copy, Paste, Delete, Undo, and Select All operations on the text values of the fader matrix panel cells using a context menu.
Cell Selection Methods
- Single cell selection method: You can select a single cell using the mouse by left-clicking or by pressing the tab key on your keyboard. Once selected, the cell will be highlighted, as shown in the example below. The text within the selected cell can be edited.
- Multiple cell selection methods: There are two ways to select multiple cells.
- Method 1: By clicking and dragging with the mouse. This method is useful when you are selecting a small range of cells.
- Method 2: By using keys on the keyboard. This method is useful when rendered outside of the view area when the grid scrolls either vertically or horizontally.
| Method 1 | Method 2 |
To select multiple cells using the mouse, follow the steps below.
The selected cell will be highlighted as you can see in the example below. |
To select multiple cells that are rendered outside of the view area when the grid scrolls either vertically or horizontally, you can use the method below for selecting multiple cells.
If you want to select a cell that is rendered outside of the view area when the grid scrolls either vertically or horizontally, you can use the method below for selecting multiple cells.
The selected cell will be highlighted as you can see in the example below. |
Selecting arbitrary cells is not allowed. Selection is always in the form of a matrix.
The selected region is reset and not tracked when changing tabs.
Copy and Paste Functionality
You can copy and paste the factor matrix table data into Excel or vice versa. There are several methods for copying and pasting data.
- Method 1: To copy panel cell data to Excel.
- Method 2: To copy data from Excel to the factor matrix table.
| Method 1 | Method 2 |
To copy panel cell data to Excel.
|
To copy data from Excel to the factor matrix table.
|
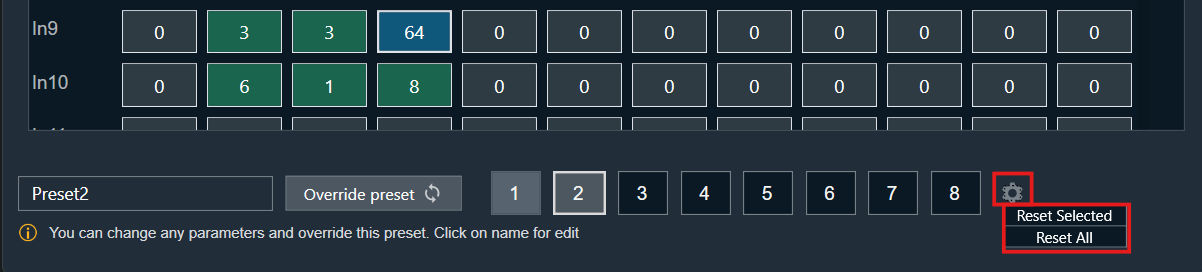
Preset Store Functionality
You can save and retrieve a specific configuration using the Store Preset option on the panel.
To do this, configure the tuning parameters, choose an available preset slot, enter a name for the slot, and click on Store Preset. This will save the current tuning data for the selected slot.
If you do not enter a name of the slot, then it will take the default name “New Preset”.
You can switch between preset slots and apply their values by simply clicking on them. Additionally, after clicking to override the preset, you can modify the tuning values in that tab or change the preset name.
To reset the selected preset or all the preset values.
- Click ResetSelected to clear the preset that is currently selected.
- Click Reset All to clear every preset in the corresponding native panel.