Using the following options, you can configure the graph areas to perform various types of measures.
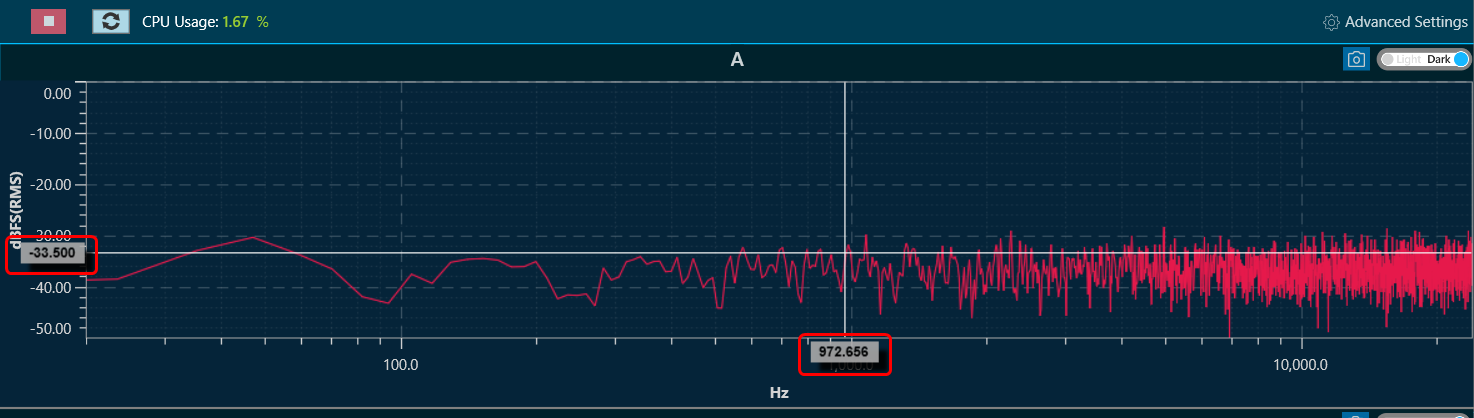
Cursor Measurement
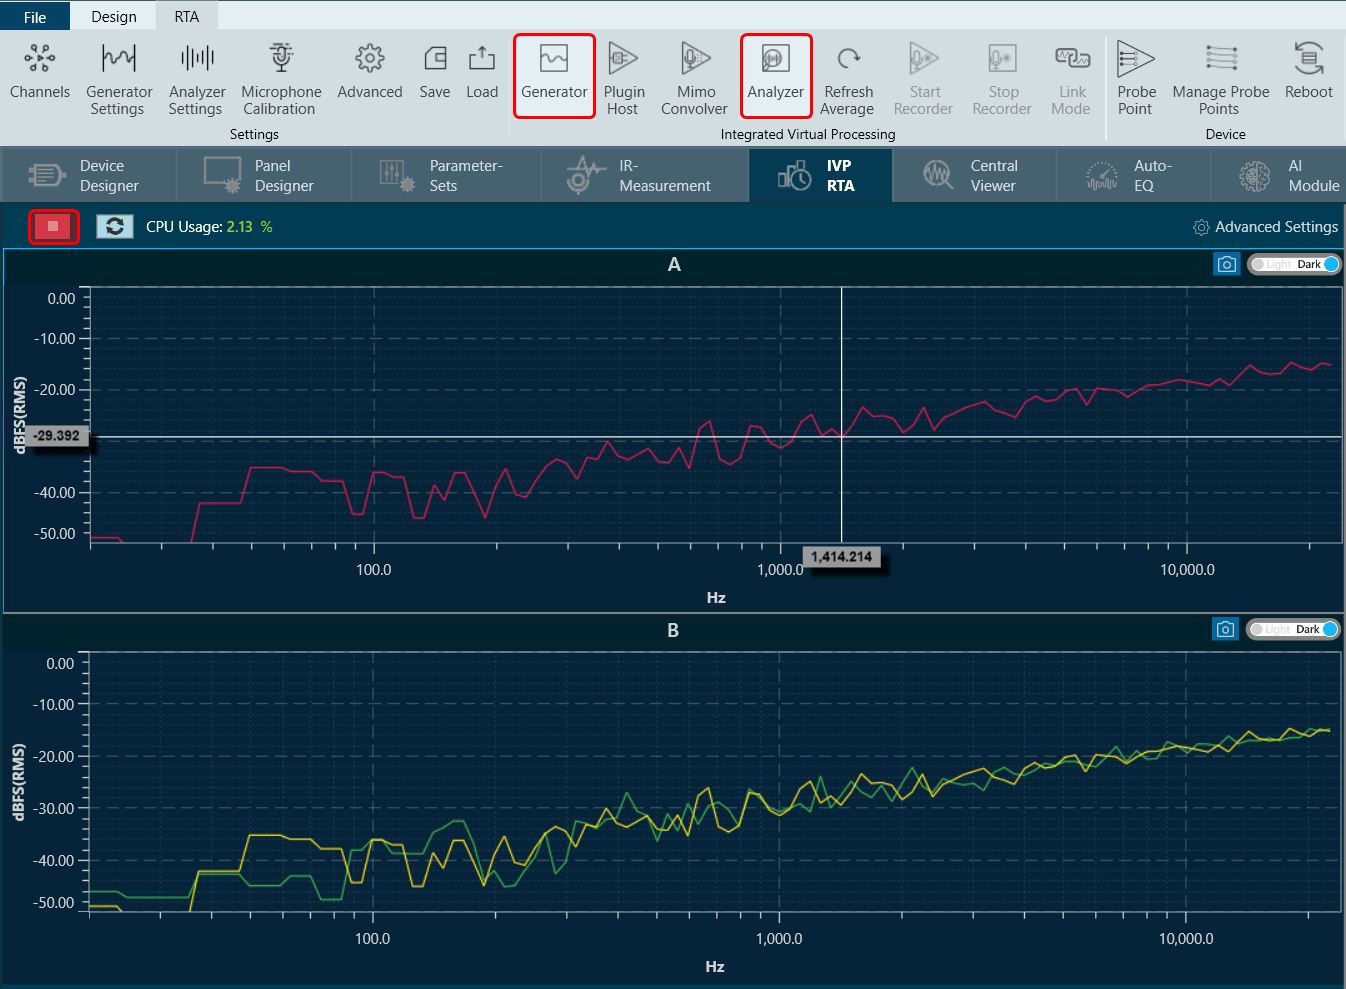
When hovering the mouse over any of the curves or plots on the graph, the horizontal and vertical values of the X and Y positions pointed to will be displayed. It is important to note that while the X value will follow the mouse pointer, the Y value will show the value of the closest trace.
Add Marker
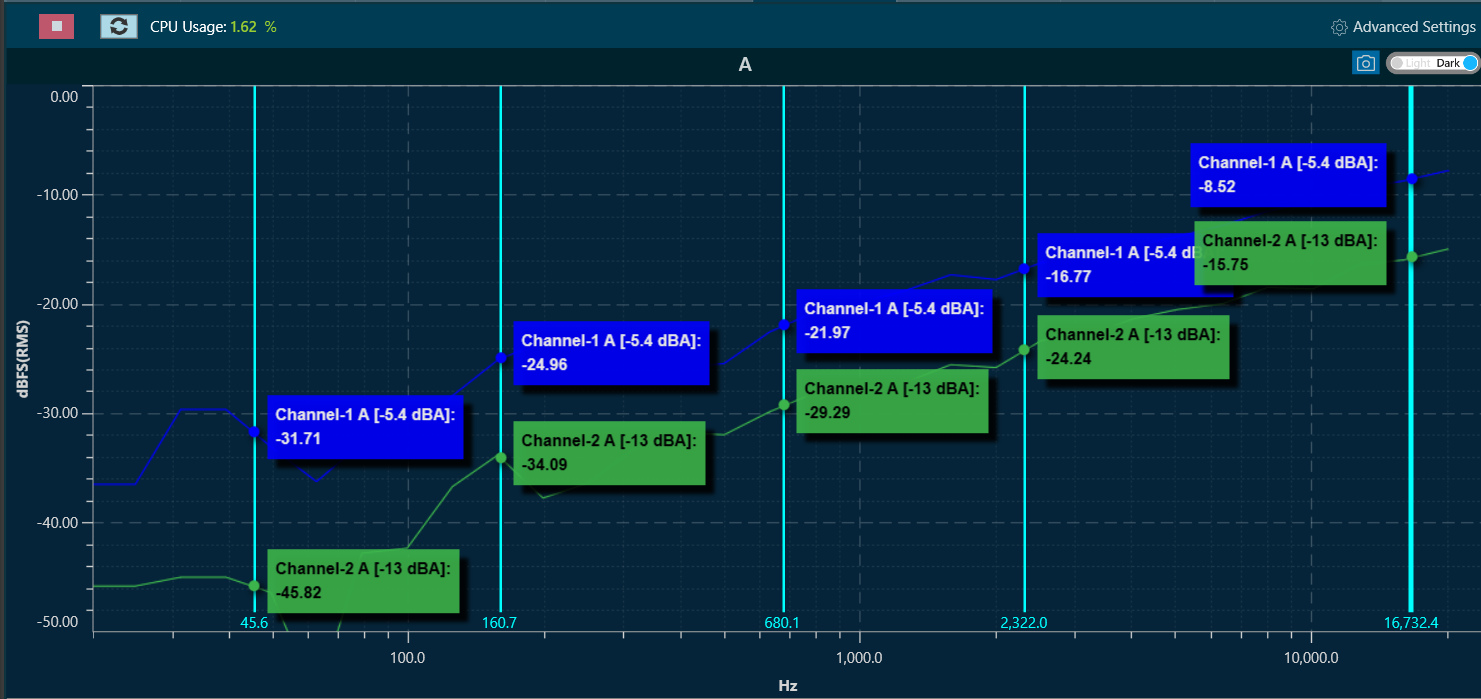
You can mark the curves for value inspection. Press CTRL + click, to create a marker. This marker will display the values of the traces as tooltips on top of the charts. It will show the values of all the traces.
A maximum of 5 markers can be placed on the chart.
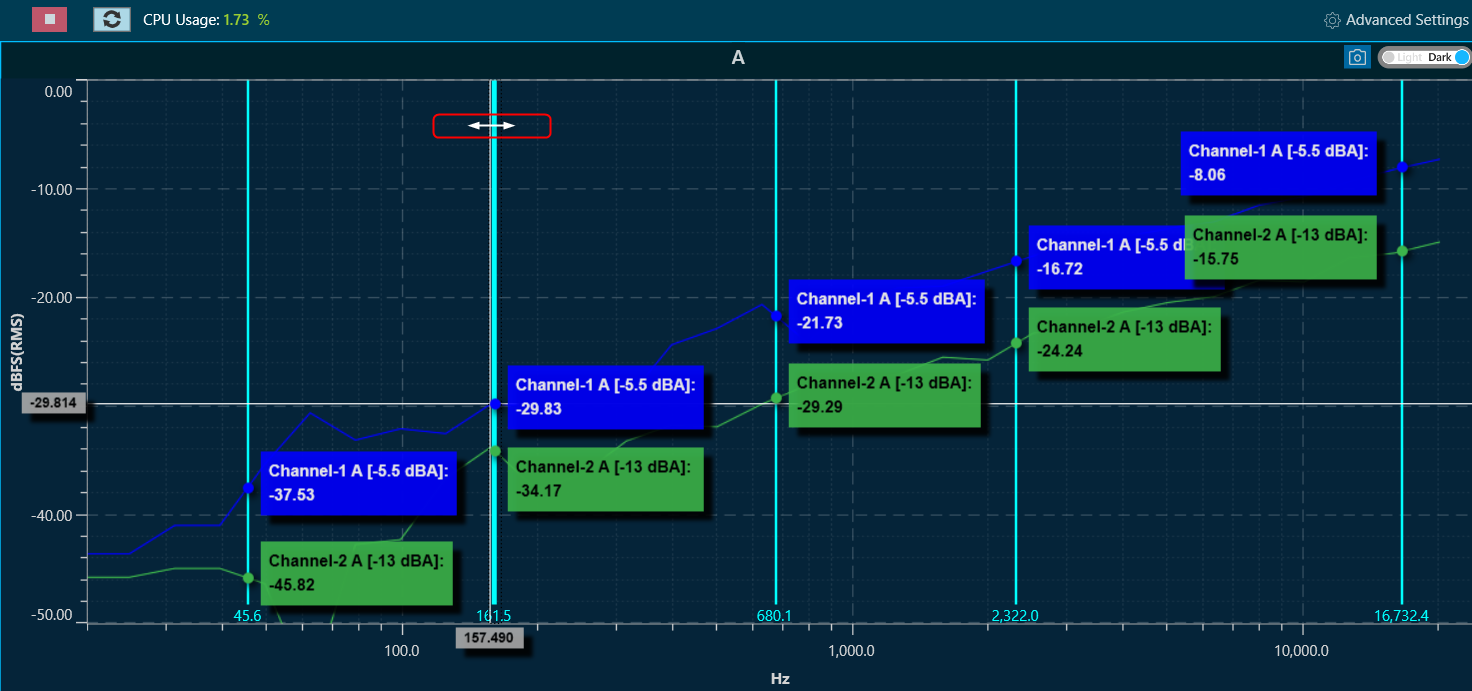
To remove a marker, select the marker by clicking on top of it. The line of the marker will become wider, indicating it has been selected.
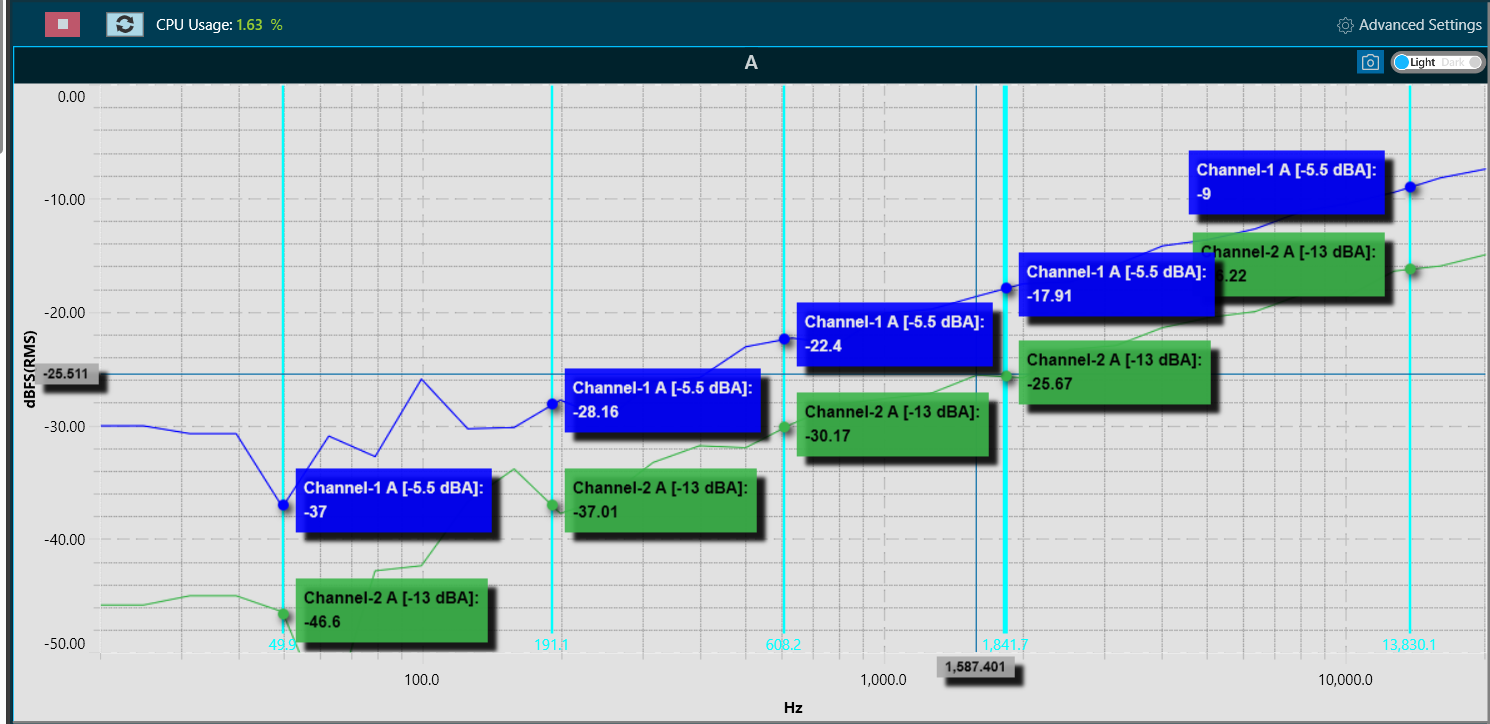
Add Delta Marker
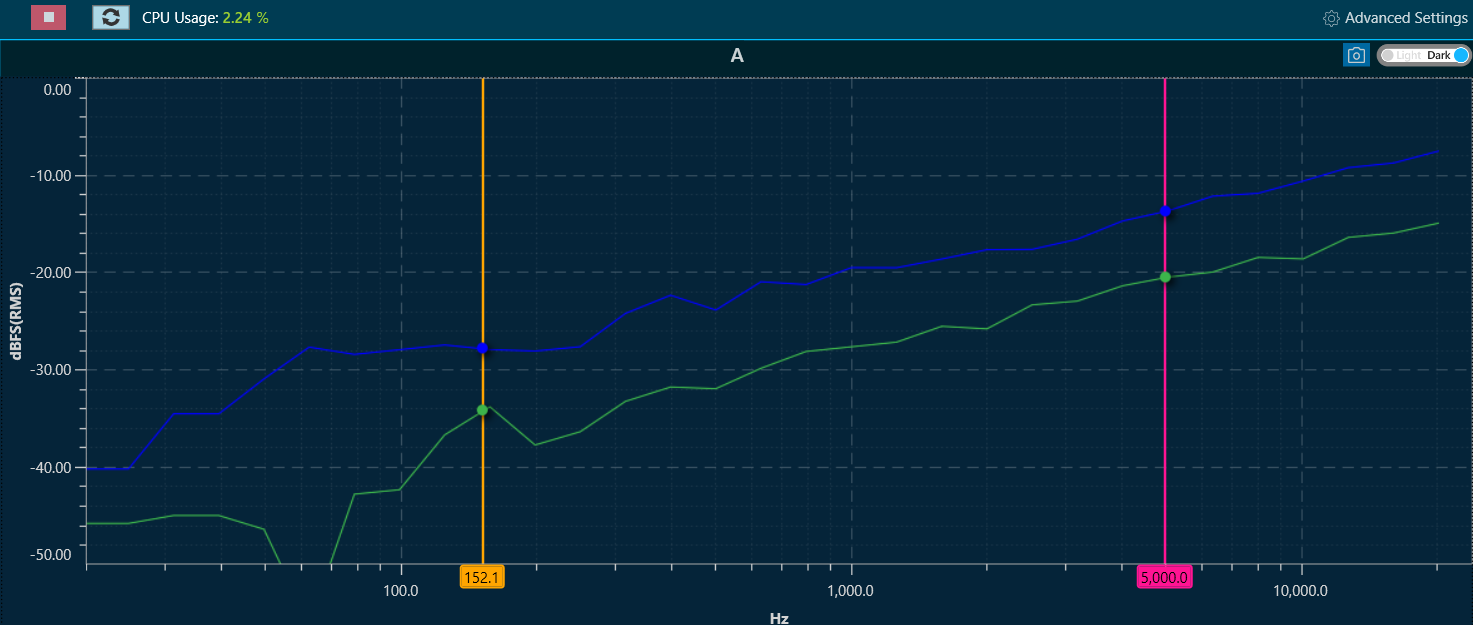
The Delta marker feature helps in createing differential values for selected curves.
To add delta markers, press ALT + click on the chart, and enable measurements from traces where delta values are desired.
The selected traces will display the following information:
- The value at the first marker.
- The value at the second marker.
- The delta (difference) between the markers.
The values are indicated by the trace color and highlighted with the marker color. Delta markers can be dragged to the desired X position.
To disable Delta markers, press ALT + Click again.
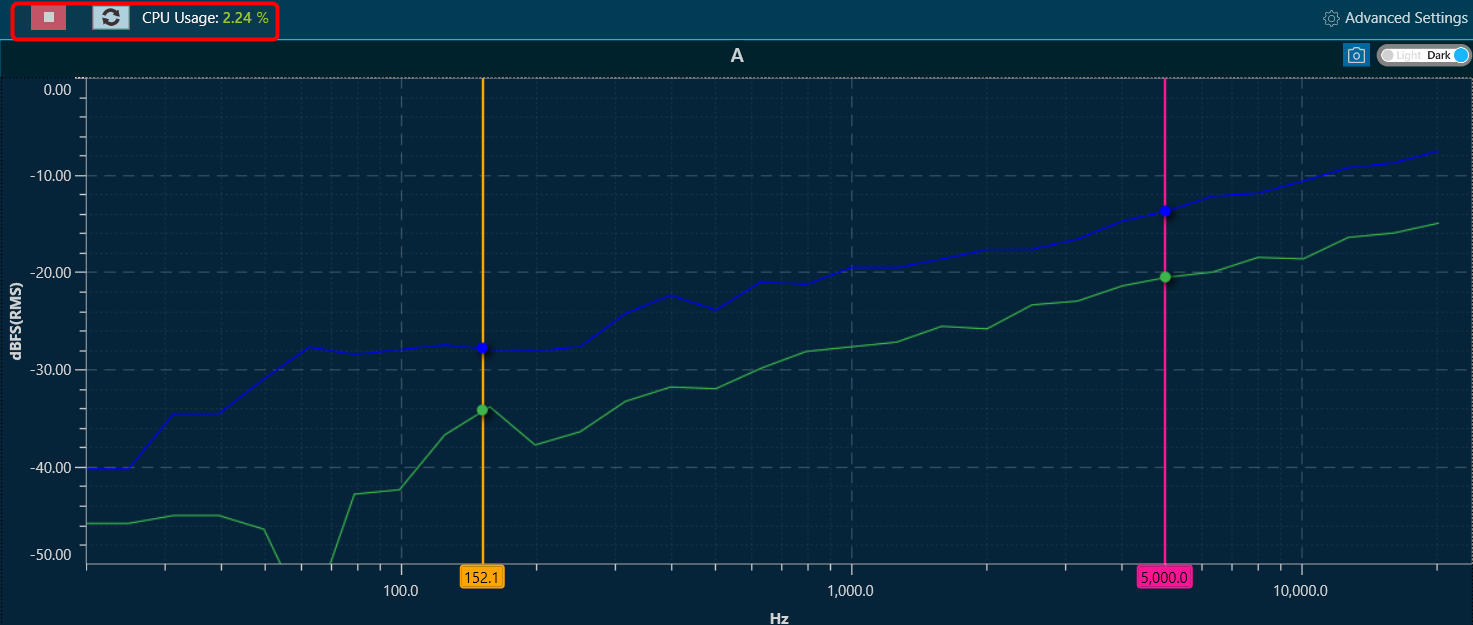
Refresh Spectrum
In the spectrum and multiplexer modes, the spectrum refresh button will update all curves displayed, excluding the traces. This functionality allows for the resetting of averaging time periods, which is particularly significant for “forever” averaging.
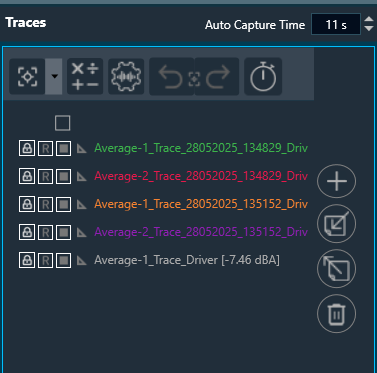
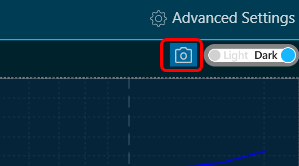
Capture Graph Image
The Export Image feature allows you to export the graphs and certain other details based on the export setting configuration. The exported image file will be available in .png or .jpeg format.
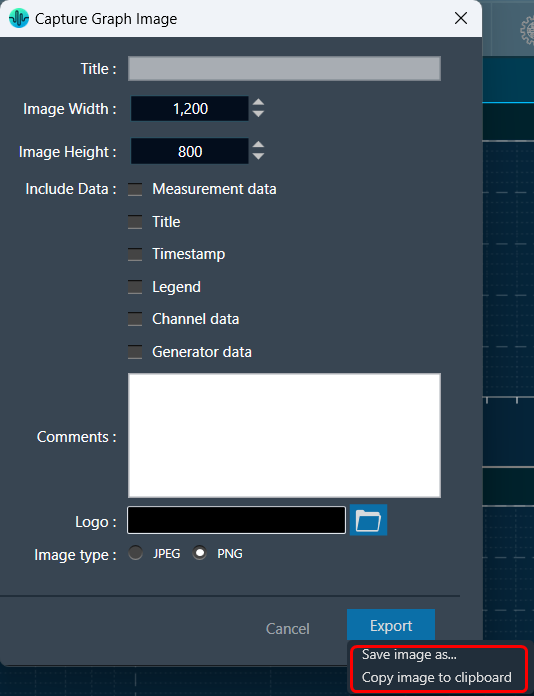
Once you click on the “Export to Image” option, the export setting window for the image will open.
This export setting window includes the following options:
- Title – Enter the image name.
- Image Width – Change the image width.
- Image Height – Change the image height.
- Include Data – Select the option to add various types of data such as Measurement data, Title, Timestamp, Legend, Channel data, and Generator data in the image.
- Comments – Enter the specific comment, that you want to be added to the image.
- Logo – Add the desired logo to the image.
- Image type – Select the image type JPEG or PNG.
Once you configured export settings, click the Export button. The context menu will show you two options, export the image or copy to the clipboard.
- Save image as – option will be opened to save the image to a file.
- Copy the image to the clipboard – will allow you to paste the graph image somewhere else.
Not possible to copy the image to the clipboard for graph B in case of link mode.
The exported image will have the following sections based on the export setting window configuration.
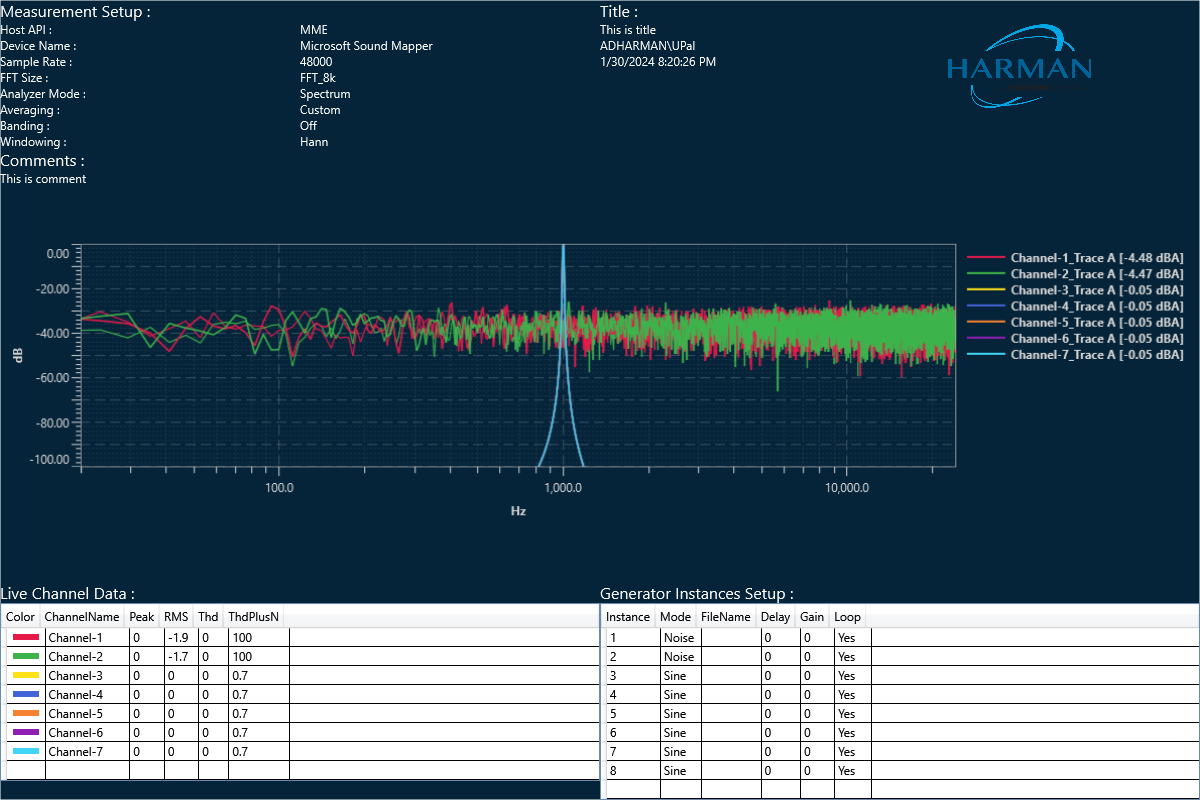
The graph is always present in the exported image. Based on the export setting configuration additional sections like – Measurement information, Title, Time, User details, Logo provided, Live channel data, and Generator instance details are also present in the exported image.
If you select the “Channel data” checkbox, then in the “Legend” live channel entries will not appear, only traces will appear. Otherwise, all items will appear in Legend.
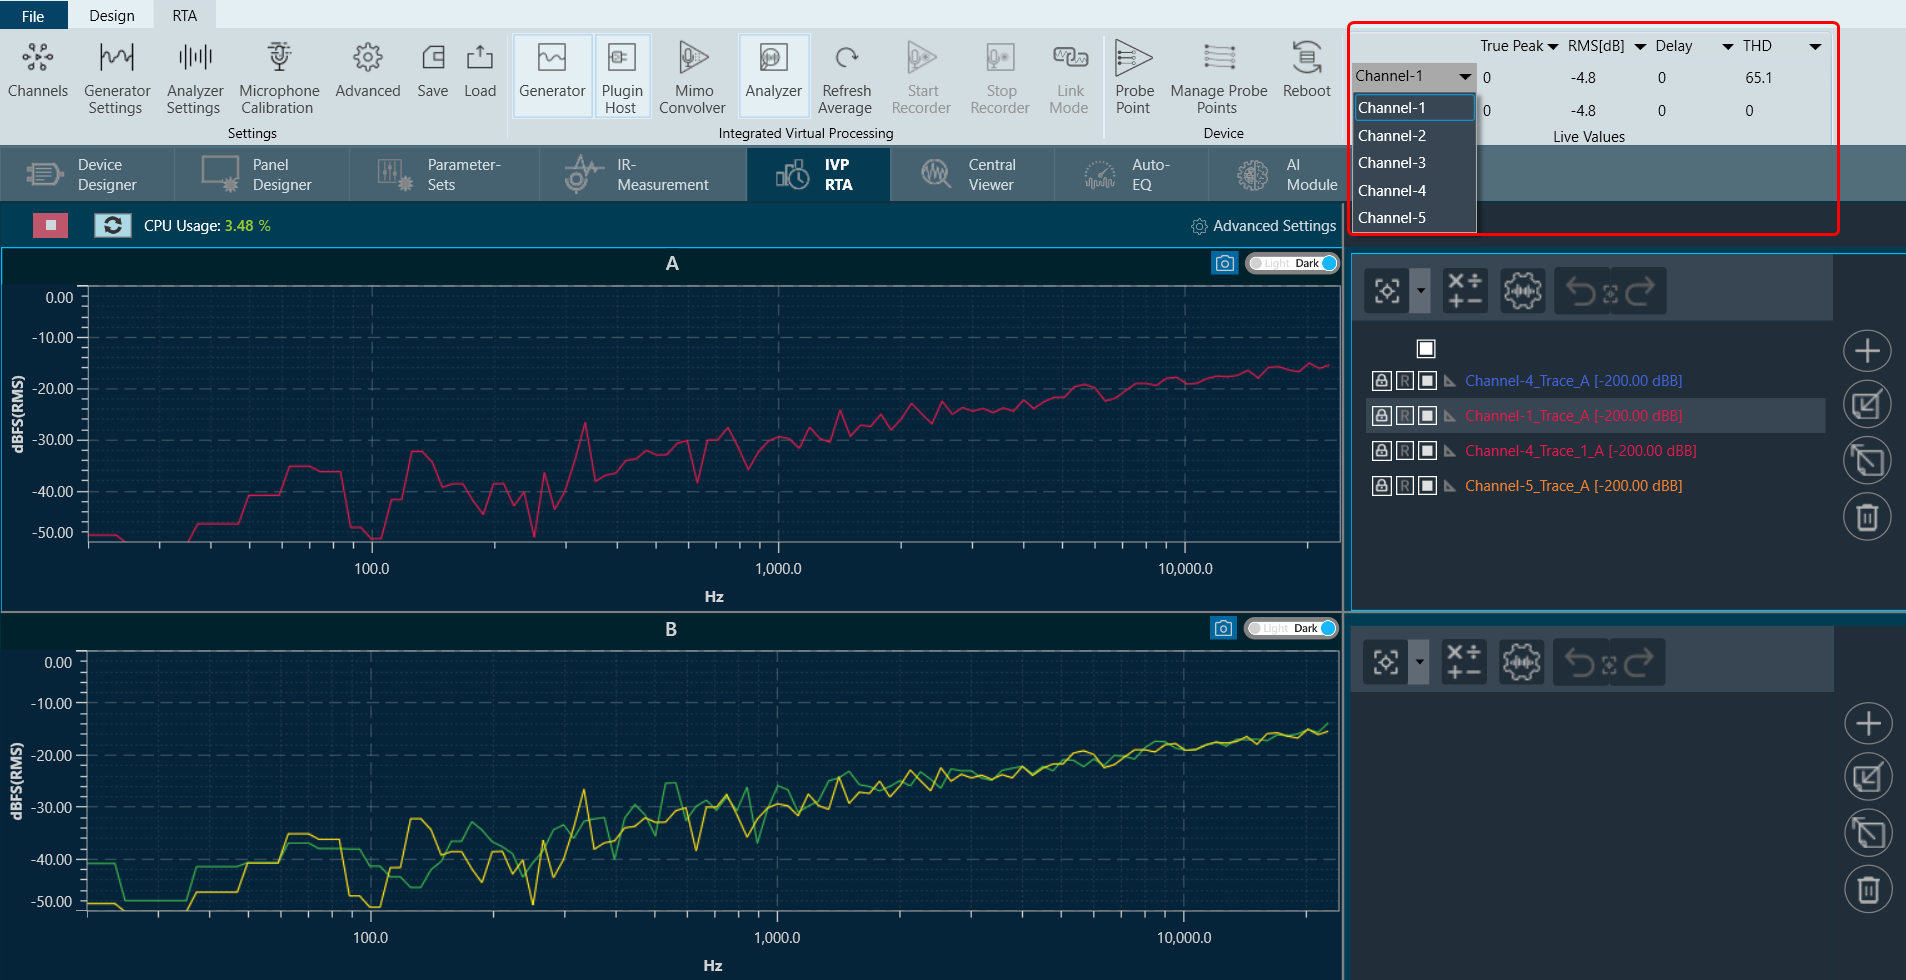
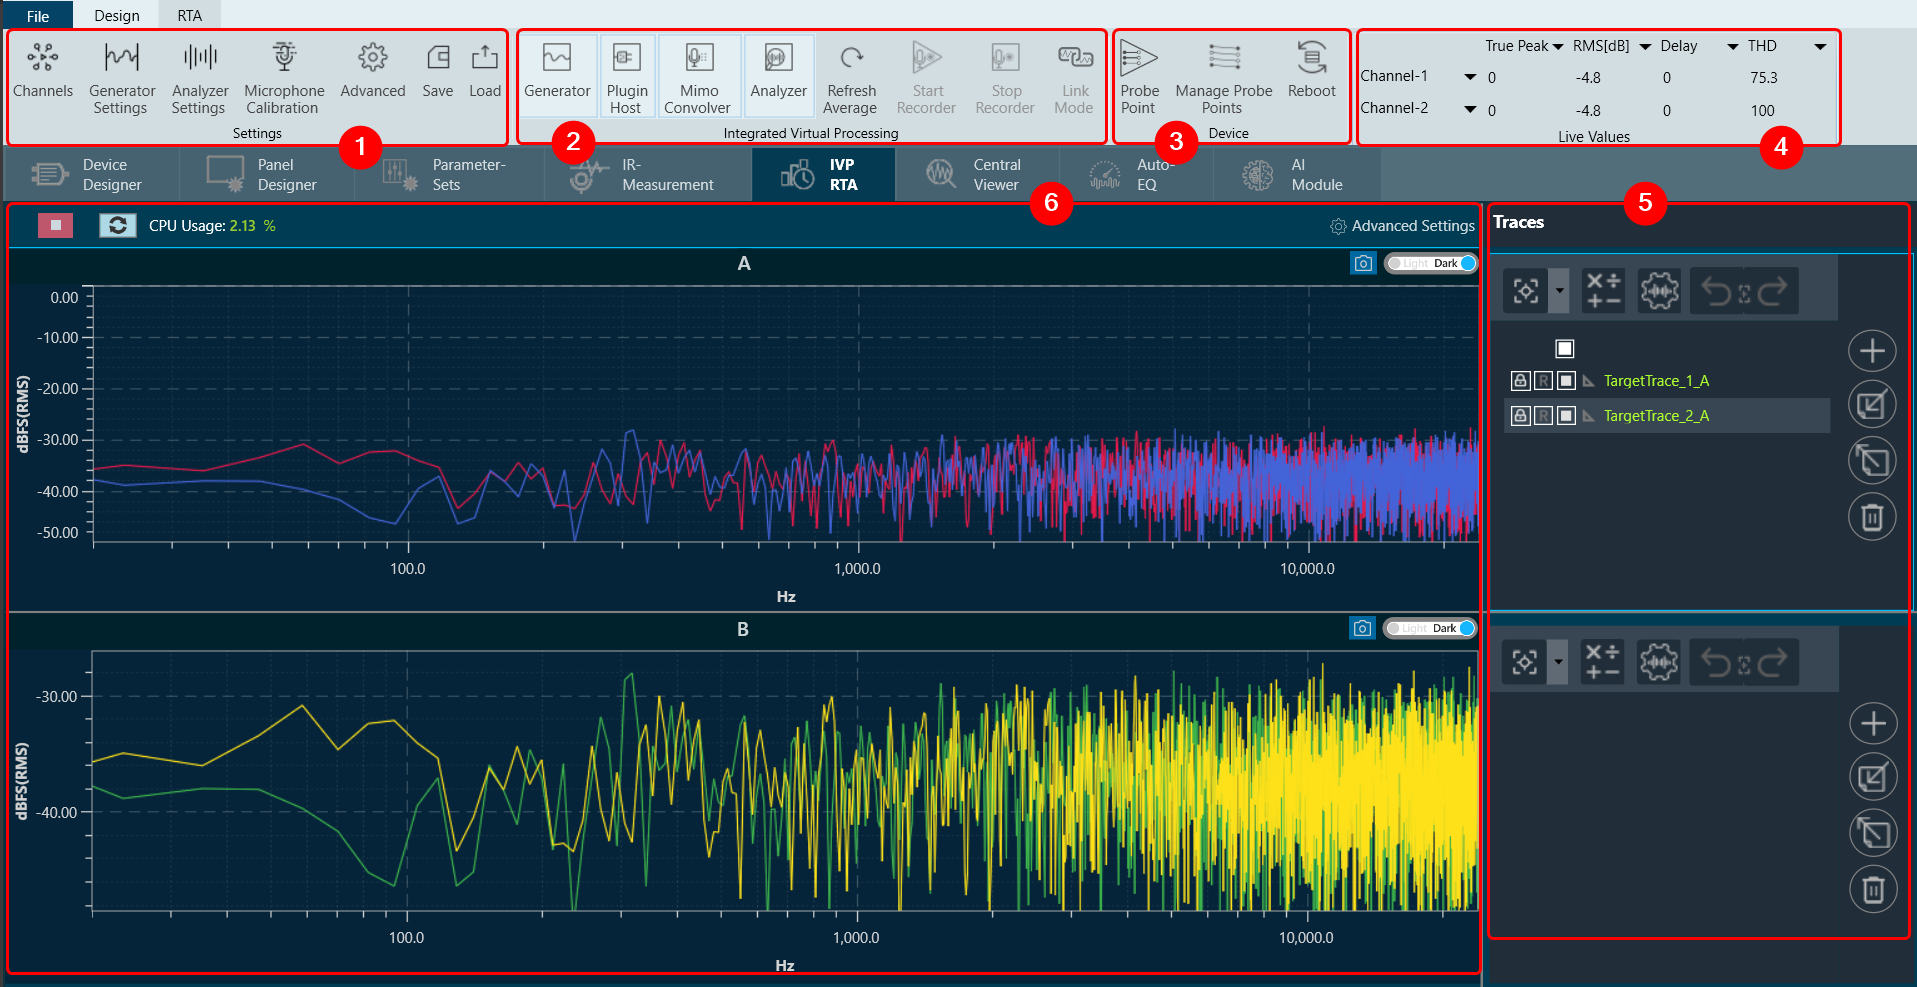
Graph Theme
There is a Toggle button (dark/light theme) in the charts in the RTA graph. Once the Toggle button is clicked, the corresponding custom theme can be selected, and the background of the graph gets changed and vice versa.

| Dark Theam
|
| Light Theam
|
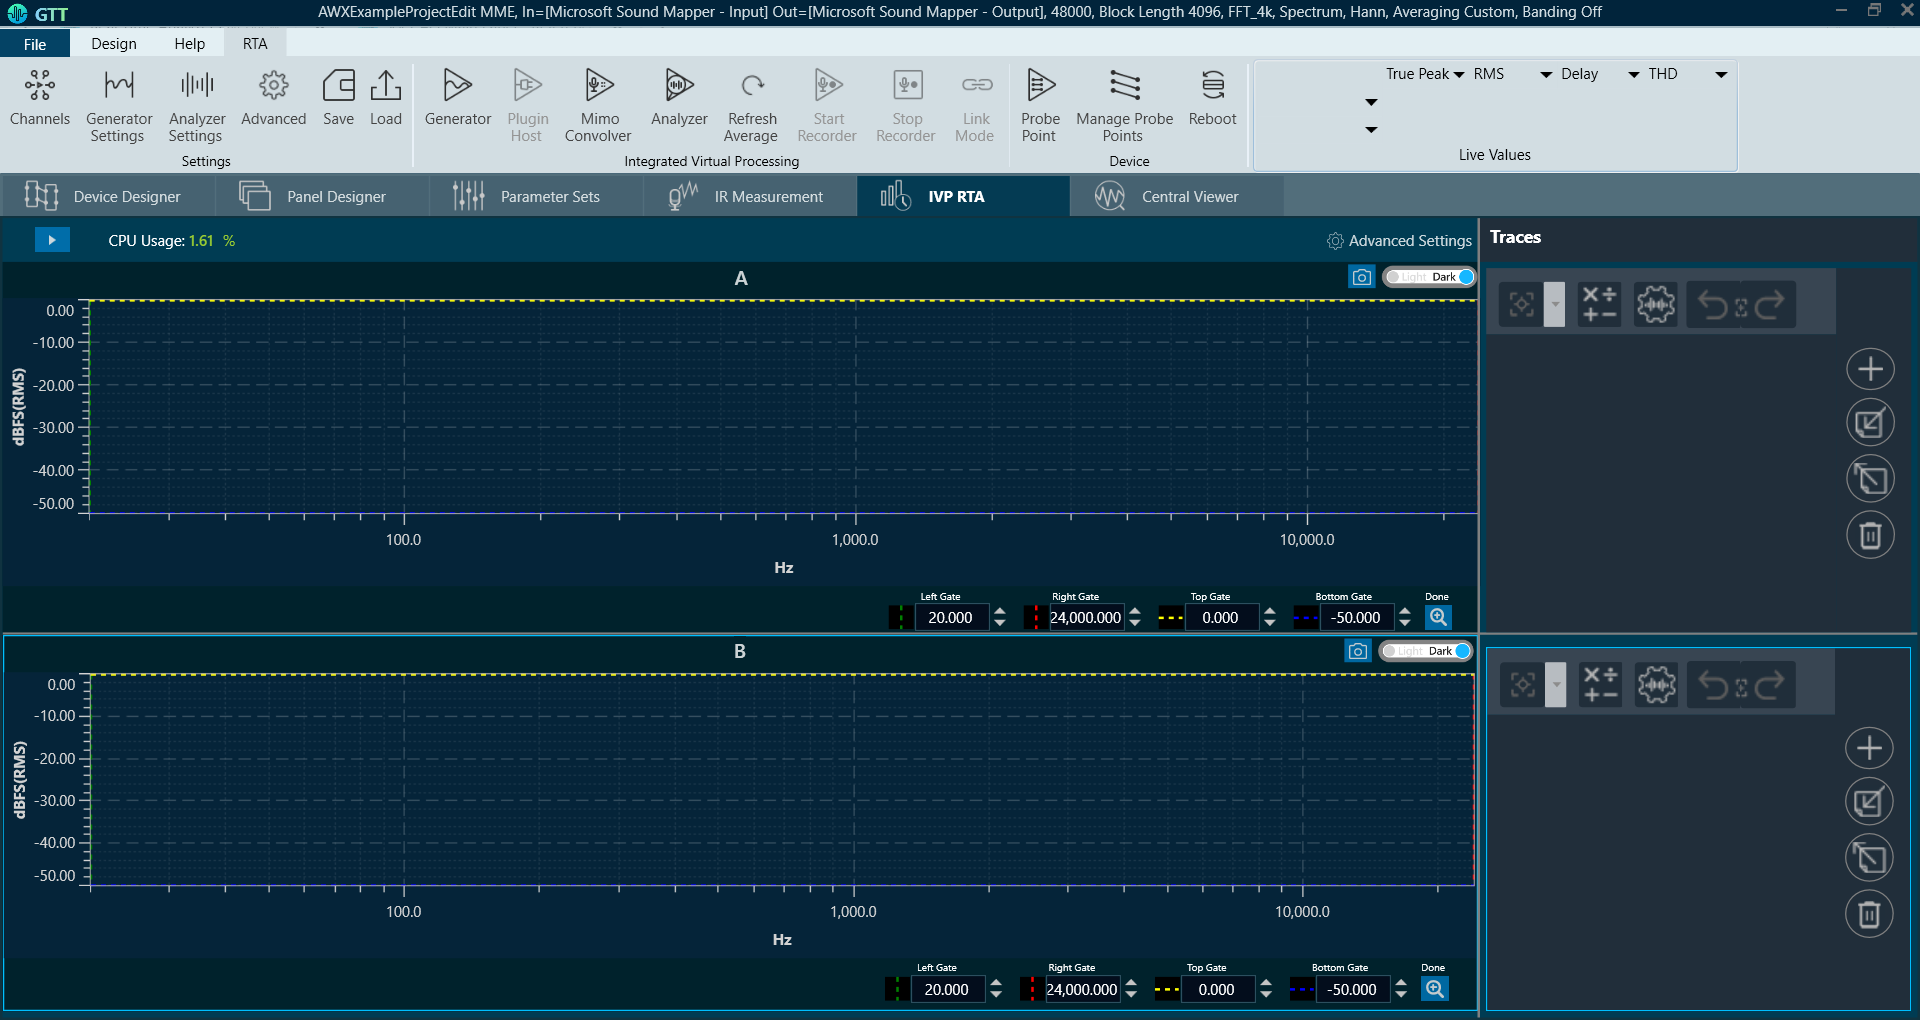
Zoom To Gates
The Zoom To Gates feature allows you to zoom to a specific area in the chart using four gates (two horizontal and two vertical) which you can position by selecting and dragging them to the desired position or if you prefer by placing the value of the position in the chart in the text boxes.
By default, when there are no Curves in chart the values from gates are the limit of visible range of current chart. Only for old projects with that has a loaded curve, the gates will set on the limit of visible range included data.
The Gates are supported for Time, Spectrum, Multiplexer, Phase, Delay and IR modes.
When you move each gate, the current position will be reflected in each value referred to the bottom of the chart identified with a color.
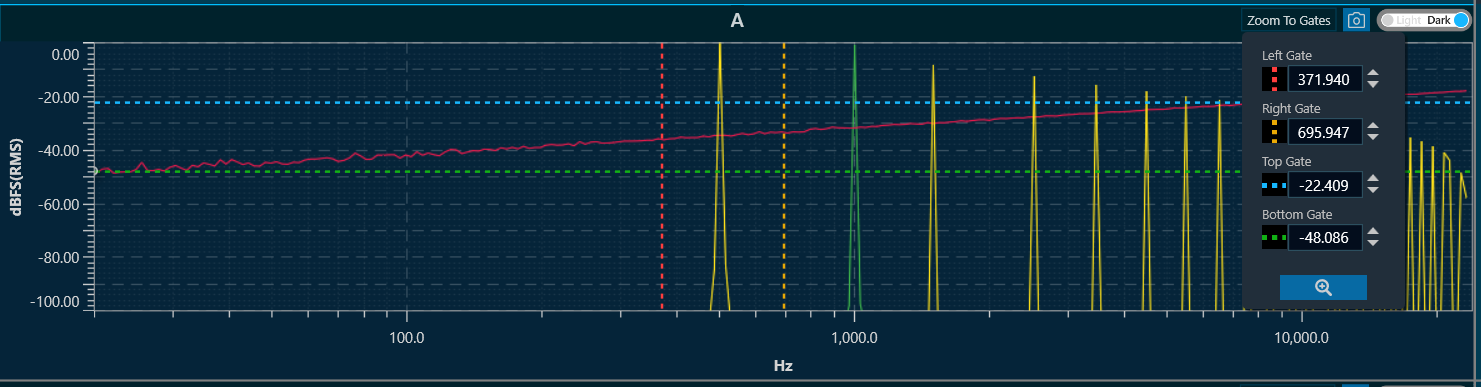
To zoom in on the area between the four lines: Click on the button at the end of the text boxes with the current position values of the gates “Done” and the chart area will automatically position the gates within the limits of the chart and the zoom to the area will have been performed.
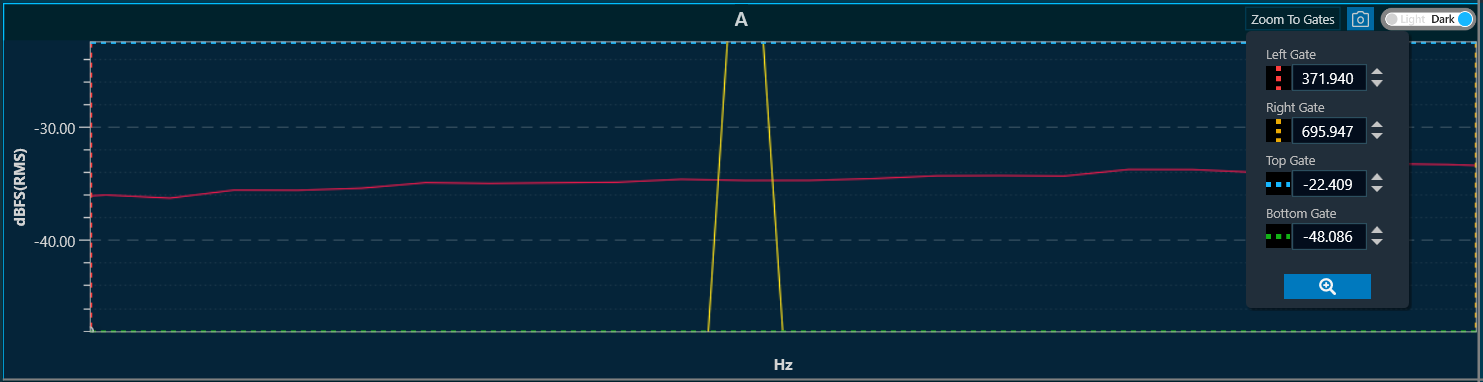
To return to the default value you only have to double click on any area of the chart.
All gate values will be persistent across projects, meaning you can save their last configuration to be exported or used later with specific values.