Launching Native Panel from Signal Flow Designer

To launch a native panel from the Signal Flow Designer, it is assumed that you have already created a signal flow. For more information on how to create a signal flow, refer to Create a Signal Flow.

Steps to launch Native Panel from Signal Flow Designer

  1. On the Signal Flow Designer window, double-click on any audio object to open a Native Panel.

    Use the interactive widgets on the Native panel to make the desired changes to audio object properties.

    If there is any modification to Signal Flow Designer, a popup message will appear asking to save the changes.

    When Native Panels is open, you cannot make any changes to the Signal Flow Designer window.

  2. Select the free preset slot numbers, enter the name of the slot, and click Store preset. This saves and stores the current tuning data to the selected slot.

If you do not enter a name of the slot, then it will take the default named “New Preset”.

You can switch between presets and apply their values to the native panel by simply clicking on them. You can also change the values in the native panel and/or the preset name after you’ve clicked it to override the preset.

Common Operation in Native Panel

The following are common operation in native panel.

Passing pin labels to native panels


The native panels display the corresponding names of the pin labels assigned to an audio object in SFD, thereby ensuring visibility.
This feature applies to the listed native panels.

  • Delay
  • Gain
  • EQ/Biquad
  • FIR, FIRMIMO, FastConv
  • Limiter
  • Mixer
  • Router

On the Router panel first three characters of the out-pin labels will be displayed as a channel out names.

Look-up Table (LUT) panel has a separate mechanism to change the names of the channel.

Editing labels in native panels


You can modify Native panels pin labels. Double-click on a label, a text box will appear, enter the new name. The provided name will be updated both on the panel itself and on the corresponding pin in SFD.

For audio objects that have a configurable number of channels, the new value will be set for both the input and output pins. However, for other audio objects, the value will be updated separately for the input and output pins.

Depending on the panel, the displayed text may be trimmed if it exceeds the available space. This feature applies to all native panels except for the Biquad panel and the LUT panel.

Resizing Native Panel


When the native panel window is resized, the controls are resized to fit the window.
Following are the native panel which support resizing:

  • Parameter Biquad,
  • Crossover Biquad and
  • Tone Control Extended Panels

Native Panel Presets


Preset or Tuning sets can be used to store the tuning data set of the native panel. This control is available in every Native panel.

Creating a Preset

Follow the below steps to create a preset:

  1. On the native panel, tune audio objects signal flow.
  2. Select a free preset slot (numbers), enter a slot name in the text box.

    If you do not enter a preset name, it will take the default name of the New Preset.

  3. Click on Store Preset to save and store the preset.
    The preset will be stored in the slot you had chosen. The blue color indicates that the preset is applied to the respective native panel.

You can create several presets and switch between them to apply their values to the native panel by simply clicking on them. Once they are clicked, you can also override the preset by changing the tuning data of inner audio objects or the preset name.
Graphical user interface, application Description automatically generated

Resetting the Presets

Follow the below steps reset a preset:

  1. On the Preset section, select the slots, and then click on the settings icon.
  2. Click on Reset Selected to reset the selected preset slots.

If you want to reset all presets of the respective native panel, click Reset All.

Edit Compound Audio Object Instance

You can view or modify the Compound Audio Object instance using the “Open Signal Flow” option. The Open Signal Flow option enables to view signal flow of CAO instance that is added to Main Signal flow. The view allows you to customize and save the Block Id and Display names of inner audio objects in CAO instances.

Steps to open CAO instance signal flow:

  1. On the Signal Flow Designer window, right-click on CAO instance, and select Open Signal Flow option.

    When the Compound Audio Object version is updated, it will be highlighted in a different color in the Signal Flow Designer. In order to save the signal flow, the upgraded Compound Audio Object.

    Navigation to CAO instance Signal-flow will be allowed only if password validation is successful for password protected CAO templates and if CAO template is editable.

  2. On the CAO instance signal-flow window, select the respective audio object and edit the Display Name and Block Id, if required.

    Except for Display Name and Block Id, all audio object properties on the CAO instance signal-flow window are fixed.

    Customized Display name /Block ID will be assigned only if it is unique across Main signal-flow.

    Block Id cannot be assigned for Compound Interface objects – Compound Audio IO , Compound Control In, Compound Control Out.

  3. Click Save to save all updated Display Names and Block Ids.
  4. Double-click on audio objects to open the native panel (if available). The native panel allows to tune audio objects. Audio objects can be tuned for CAO instance without additional custom panel creation.
  5. Once you made all the changes in the CAO instance signal-flow window. Click Go Back to navigate to the primary Signal Flow Designer window.

Customized Display Name and Block Id will be updated in all device associated data, making it identifiable in DDF/State Variable Explorer/ Venue Explorer/ Custom Panel address editor.

Set password for Compound Audio Object

Adding a password to a compound audio object (CAO) can ensure its security. During the creation or modification of a CAO, it is possible to add a password, although this step is not mandatory.

It is important to remember the password in order to access and view the signal flow of the Compound Audio Object (CAO).

To enhance the security of the CAO, it is advisable to periodically change the password at specific intervals. This measure can help prevent unauthorized access and ensure the continued protection of the CAO. The signal flow should be saved after entering or updating the password.

Click on the edit CAO option to view the signal flow. If the CAO contains a password, an authentication dialog box will be displayed. Enter the valid password to view the CAO Signal flow.

Create Preset for Compound Audio Object

Preset or Tuning sets can be used to store the tuning data set of a CAO template signal flow. These stored tuning sets can be applied on instances of CAO template.

Preset control feature is available for all saved CAO templates. It can be used to store the tuning data set of CAO template.

To create Preset

  1. On the Compound Audio Object editor, tune audio objects signal flow.
  2. Select a free preset slot (numbers), enter a slot name in the text box.
  3. Click on Store Preset to save and store the preset. The preset will be stored in the slot you had chosen. The blue color indicates that the preset is applied to CAO inner audio objects.
    Graphical user interface, application Description automatically generated

You can create several presets and switch between them to apply their values to the CAO template by simply clicking on them. Once they are clicked, you can also override the preset by changing the tuning data of inner audio objects or the preset name.

Only after Compound Audio Object is saved, the Preset control feature will be available for configuration.

If you do not enter a preset name, it will take the default name of the New Preset.

Set presets are available for application, only on exiting Compound Audio Object editor view.

Reset Presets

To Reset Presets

  1. On the Preset section, select the slots, and then click on the settings icon.
  2. Click on Reset Selected to reset the selected preset slots.

    If you want to reset all presets of the respective native panel, click Reset All.

Apply Presets on CAO Instances

If presets are available in CAO templates, you can apply these presets to CAO instances in the main signal flow.

  1. On the Signal Flow Designer window, right-click on compound audio object instance, go to Apply preset tuning data, and then select the required presets displayed in sub-menu.
  2. Click Ok to apply the tuning data of a preset to all inner audio-objects of the selected compound audio object. After applying the tuning data a successful message will be displayed.
    Graphical user interface, diagram Description automatically generated with medium confidence

 Apply preset tuning data option will be available only when signal-flow is in saved state.

Presets will be exported/imported along with a Compound audio object template.

Export a Compound Audio Object

Import a Compound Audio Object

To Import Compound Audio Object

  1. On the Signal Flow Designer window, click on the Import Compound Audio Object option.
  2. Browse the location of Compound Audio Object and click Open. The imported Compound Audio Object added in the toolbox.

If the same Compound Audio Object is already in the toolbox, you can overwrite it or import it as a new Compound Audio Object.

The Compound Audio Object in the Toolbox can be dragged and dropped into the Device Signal Flow, just like a basic audio object.

If device signal flow is designed with Compound Audio Objects, it is carefully considered to bundle them in a project file (.gttd).

When importing a Compound Audio Object (CAO), if a CAO with the same name already exists, you will see the following confirmation message:

When importing a Compound Audio Object (CAO), if a CAO with the same name already exists, you will see the following confirmation message:
 – Yes: To override the existing CAO and update its name.
 – No: To create a new copy of the CAO.
 – Abort: To cancel the action and prevent the CAO from being imported.

Export a Compound Audio Object

It is very convenient to share the Compound Audio Object by exporting it to a .cao file. Compound audio objects are just like any other audio object in the Signal Flow Designer toolbox. Except that they are complex and not part of the audio library.

To Export Compound Audio Object

  1. On the Signal Flow Designer window, select the compound audio object under the Compound Audio Object category in the toolbox and click Export through the context menu.
  2. On the dialog box, click Ok to export the Compound Audio Object.
    • If the “Editable on import“ option is checked, it means you can edit the Compound Audio Object on import.
    • If you uncheck the “Editable on import“ option, a new Compound Audio Object will be created while editing the Compound Audio Object on import.

  3. Navigate the location, and click Save the Compound Audio Object. The exported file is saved in .CAO format.

Create a Compound Audio Object

Creating a Compound Audio Object is very simple. The designer has to select an audio object from an existing signal flow and extract audio objects into a Compound Audio Object. The application will replace the extracted audio objects with the Compound Audio Object in the signal flow.

To create Compound Audio Object:

  1. Open a project and go to Signal Flow Designer window.
  2. Select the audio objects in the Signal Flow Designer window and click on Extract. This opens the Compound Audio Object window.

    Extract can be performed only when valid audio objects are selected. Currently, the GTT Version does not support FIR MIMO, EOC, RNC, Audio IO, Control IN, and Compound Audio Object extraction.

    Extract functionality will be enabled only if Signal Flow is saved.

    On Compound Audio Object window the selected audio objects are surrounded with the interface objects like AudioIO and Control IO.

    The interface objects are used to configure Compound Audio Object’s pins (AudioIO, ControlIO). Also, you can tune inner audio objects just like basic audio objects.
    A screenshot of a computer Description automatically generated with medium confidence

  3. Click Save and enter the Compound audio object Name and Description.
  4. Select a free preset slot number, enter a name in the text box and then click on Store preset to save and store the preset.Graphical user interface Description automatically generated
    The preset will be stored in the slot you had chosen. The blue color indicates that the preset is applied to CAO inner audio objects.
  5. Click Go Back after creating the Compound Audio Object.In the Signal Flow Designer window, you will see that the selected audio object has been replaced with the new compound audio object and the same audio object is listed under the Compound Audio Object category in the Toolbox.

    Block Id cannot be assigned for Compound Audio Object instances.

Rename a Compound Audio Object

Once you added a Compound Audio Object in the Toolbox. You can rename the Compound Audio Object as per requirement.

To rename Compound Audio Object:

  1. Go to the Toolbox in Signal flow designer window, select the compound audio object under the Compound Audio Object category, and click Rename from the context menu.
  2. On the textbox, enter the desired name of the compound audio object, and click Ok.

A successful message will appear after the modifications have been made.

CAO renamed will update CAO type name in all devices and projects.

Compound Audio Object

The Global Tuning Tool allows you to combine audio objects into a single large component that can be reused. This is known as a compound audio object.

By grouping audio objects into CAO, designers can keep their signal flow elegant. Complex reusable audio objects and their connections can be saved as CAOs, allowing for faster signal flow generation when using these CAOs.

CAO stands for Compound Audio Objects.

Device will not know anything about Compound Audio Object. When the user sends signal flow to the device, GTT will scan the signal flow and replace Compound Audio Objects with the inner basic objects. It will establish all the connections so that when the signal flow reaches the device, it is expanded. This will ensure no further implementation is needed on the device to process CAO.

GTT has the ability to identify the author of a CAO, which will be provided to access the features such as editing and exporting. The compound audio object also allows for versioning, enabling authors to keep track of the different versions of CAOs they have created. GTT can validate the version of the CAO used in the signal flow.

It is carefully considered to bundle them in a project file (.gttd), so that CAO present in the signal flow can be exported and imported. GTT provides the majority of the existing CAO interfaces, so you will have no difficulty learning to create CAO.

Relative Topics

View Audio Object Metadata

In the Signal Flow Designer, you can view static metadata and dynamic metadata of an audio object.

Static Metadata


Static metadata refers to the metadata information of an audio object that does not change frequently. By default, every object available in the toolbox has the static metadata. Right-click on the audio object in the toolbox section to view the static metadata details.

On the metadata dialog box, the following metadata information displayed.

Dynamic Metadata


Dynamic metadata includes metadata information of an audio object that changes frequently or is generated in real-time. Every audio object instance in the signal flow designer has dynamic metadata. Right-click on the audio object in the signal flow designer to view the dynamic metadata details.

On the metadata dialog box, the following metadata information displayed.

Metadata will also show which core types of the audio object supports.  If the CoreTypes node is blank, this indicates all core types are supported.

Pin Labelling

A signal flow designer can assign labels to audio and control pins of audio objects to make a flowchart design more informative. There are two items available in the context menu of each audio object “Add Audio Pin Label” and “Add Control Pin Label”.

The process of signal flow design involves the labelling of audio and control pins for audio objects, which enhances the clarity of the flowchart design. To facilitate this, there are two options available in the context menu of each audio object: “Add Audio Pin Label” and “Add Control Pin Label.”

Pin labels are not propagated downstream by default, although certain objects, such as Gain, Biquad, or Delay, do have this capability. For a design with four blocks like AudioIn, Gain, Delay, and AudioOut. Label the output channels of the AudioIn block, select all the blocks, and then press the “Connect Blocks” button. This is sufficient to propagate the labels since they will be inherited by the downstream objects.

Pin labelling will only propagate to the immediate next connected audio objects input pin labels if it has different input and output pin labels, and if input and out pin label is same it will propagate it in input and output pin labels

Related Topics

Steps to Add Audio Pin Label


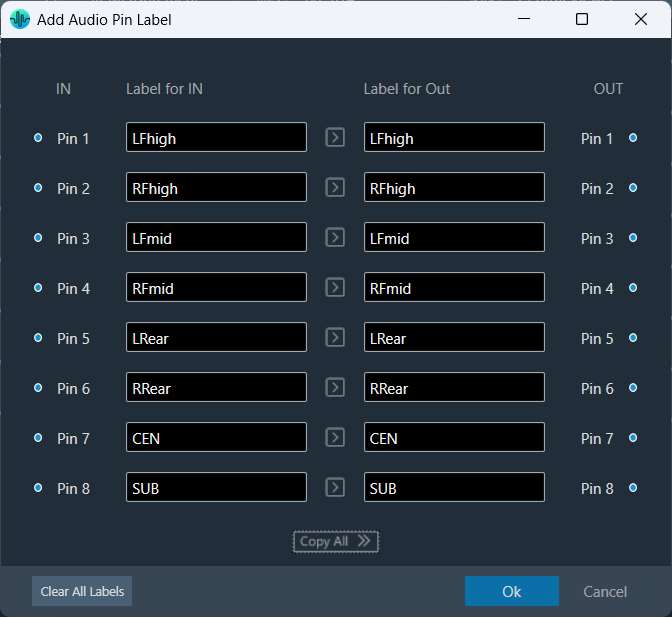
  1. On the signal flow designer, right-click on the audio object, and select Add Audio Pin Label. This opens the Add Audio Pin Label dialogue box.
    A picture containing graphical user interface Description automatically generated
  2. On the pin label dialogue box, enter the input pin and output pin details and click Ok. The label will be displayed on the audio object.

Adding audio pin labels will propagate output pin labels to the next connected audio object input pin labels.

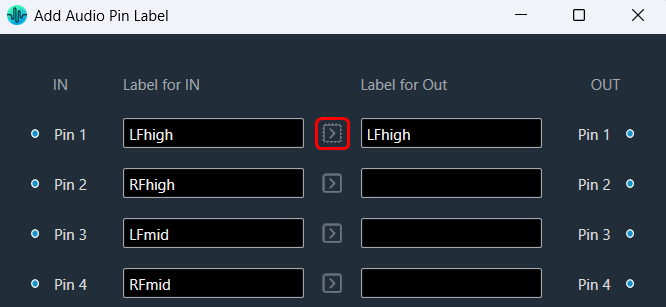
Also, you can use the “Copy” option to easily duplicate the label from each audio input pin to its corresponding audio output pin. This feature streamlines the labelling process, ensuring consistency across your connections and saving you time while setting up.
Simply, click on the “Copy” option for the audio input pin whose label you want to copy; the GTT will copy the audio input pin label to the respective audio output pin label.

Similarly, you can use the “Copy All” option to copy all the audio input pin labels to the respective audio output pin labels.
The “Copy All” feature will prompt a user confirmation message before proceeding. If you respond with a “yes,” the GTT will copy all audio input pin labels to the respective audio output pin labels.
This ensures that the labelling is consistent and accurate across the board, making it easier to manage their pins effectively.

Selecting the “Clear All” option will display a confirmation message. If you choose “Yes,” all audio pin labels will be permanently removed, and this action cannot be undone.

Steps to Add Control Pin Label


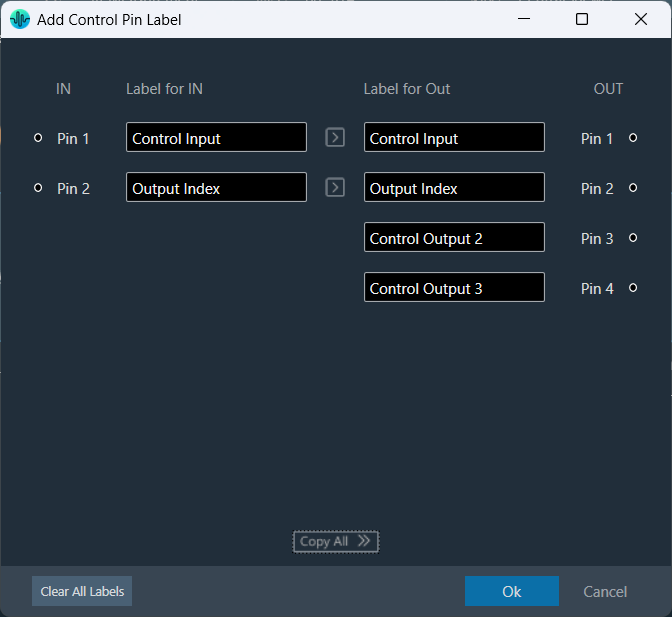
  1. On the signal flow designer, right-click on the audio object, and select Add Control Pin Label. This opens the Add Control Pin Label dialogue box.
  2. On the control label dialogue box, enter the input pin and output pin details and click Ok. The label will be displayed on the audio object.

Also, you can use the “Copy” option to easily duplicate the label from each control input pin to its corresponding control output pin. This feature streamlines the labelling process, ensuring consistency across your connections and saving you time while setting up.

Simply, click on the “Copy” option for the control input pin whose label you want to copy; the GTT will copy control input pin labels to the respective control output pin label.

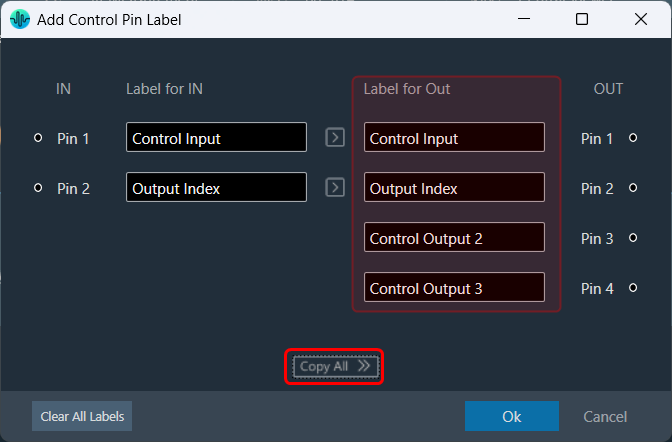
Similarly, you can use the “Copy All” option to copy all the control input pin labels to the respective control output pin labels.
The “Copy All” feature will prompt a user confirmation message before proceeding. If you respond with a “yes,” the GTT will copy all control input pin labels to the respective control output pin labels.
This ensures that the labelling is consistent and accurate across the board, making it easier to manage their pins effectively.

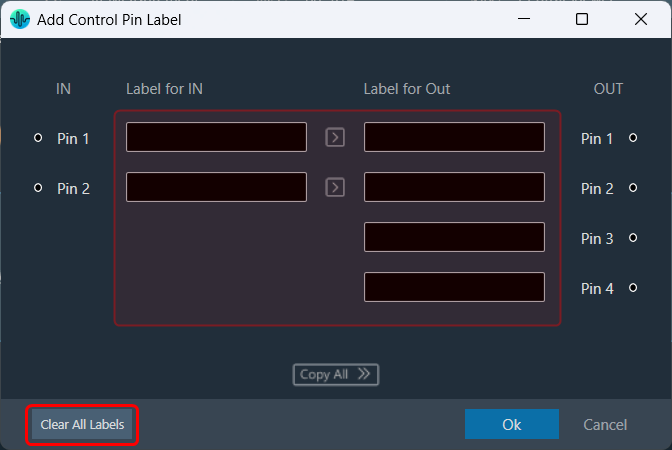
Selecting the “Clear All” option will display a confirmation message. If you choose “Yes,” all control pin labels will be permanently removed, and this action cannot be undone.

Tooltip


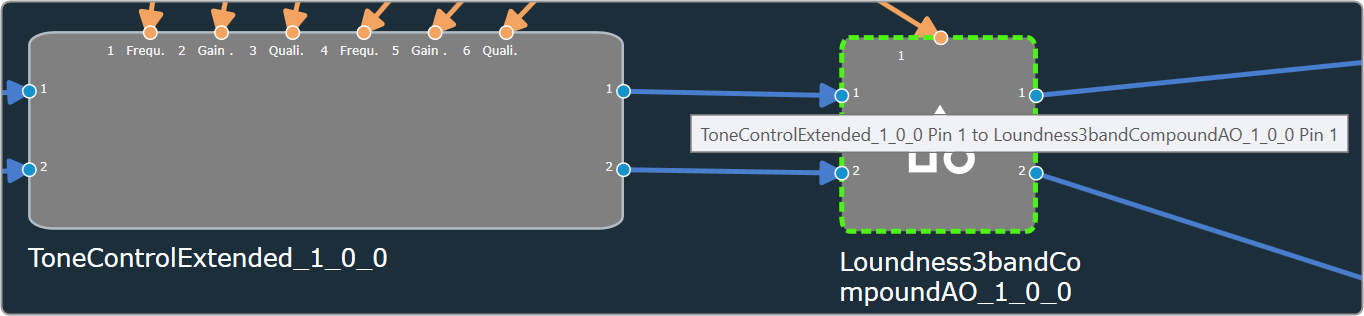
A tooltip is a graphical user interface (GUI) element that appears when you hover over pin connections. It typically contains a brief description or additional information about the pin connection. Tooltips can be used to obtain more detailed information on the connection between Audio Objects, Tooltips are available that display the affected AO names and the corresponding pins used.

To access these tooltips, you must connect any two audio objects first, then hover your mouse over the connection presenter (arrow). This will display a tooltip showing the Audio Object Name, Pin No, and Labels (if any) for the connected objects.
Graphical user interface Description automatically generated with medium confidence

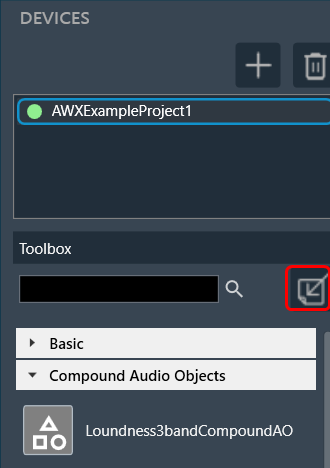
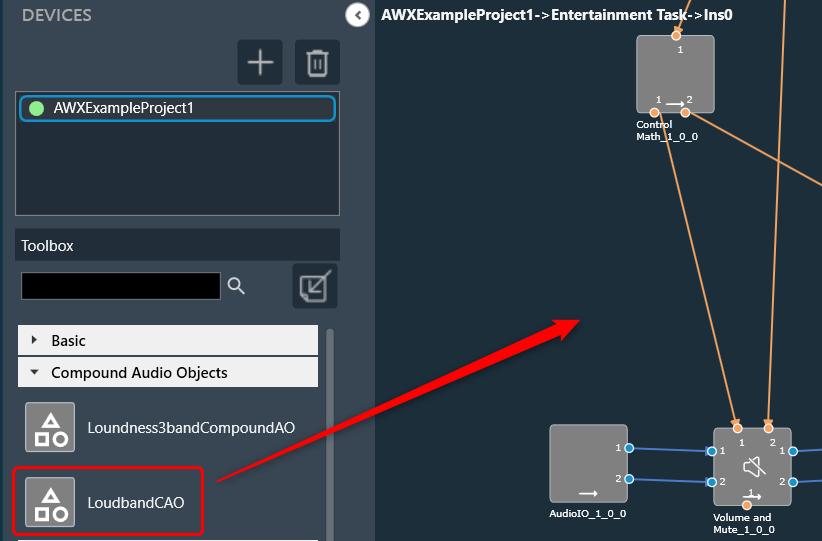
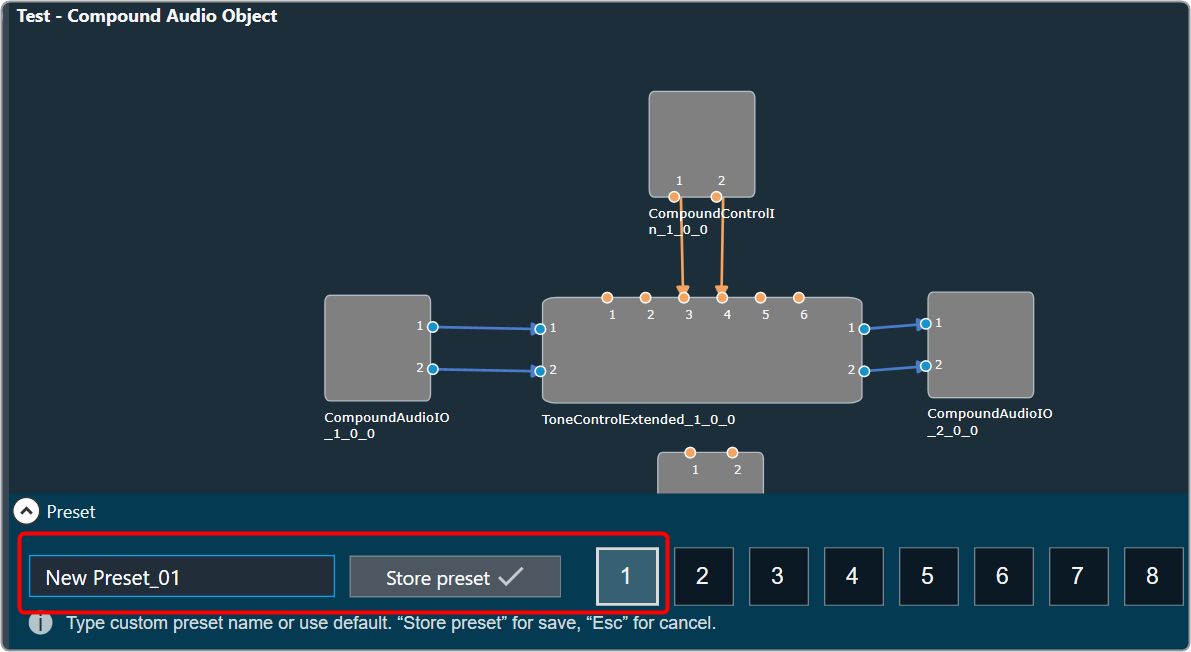
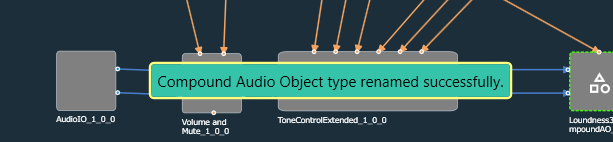
Compound Audio Object Instance Pin Labels


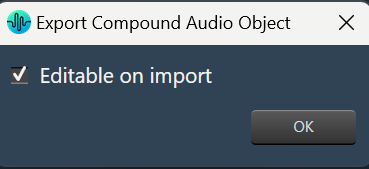
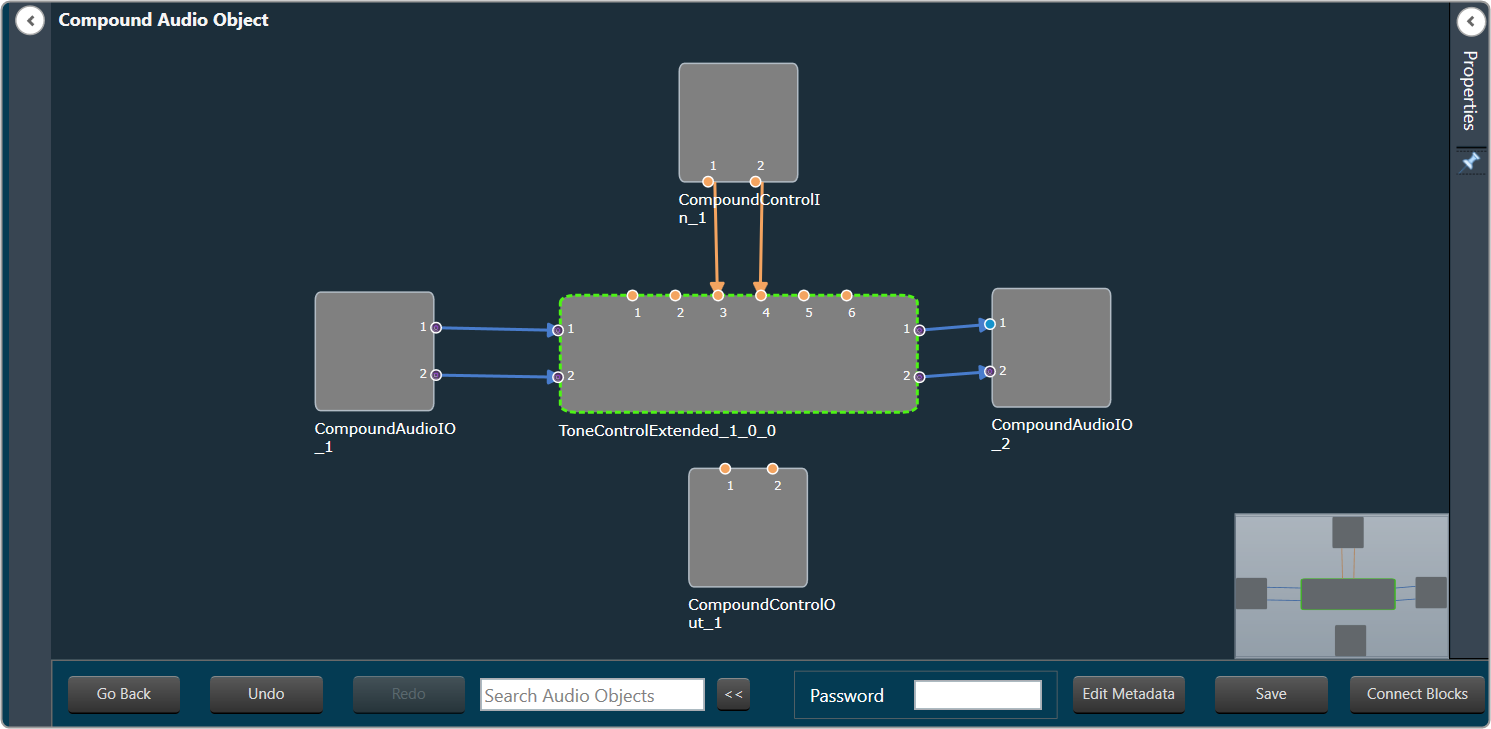
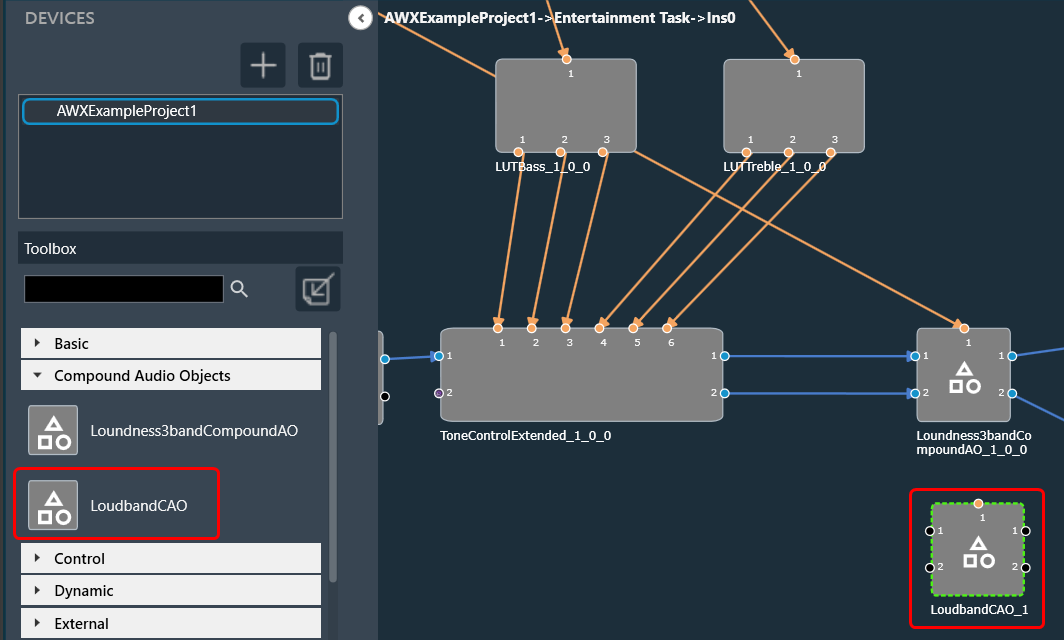
The Compound Audio Object (CAO) instance takes pin labels from CAO audio objects such as CompoundAudioIO, CompoundControlIn, and CompoundControlOut, and applies these labels to the CAO instance when extracting or dragging a new CAO type from the toolbox.

It will swap In pin labels with Out pin labels for the CAO instance.

On Compound Audio Object upgrade the Compound Audio Object instance takes the latest CAO type pin labels and updates it in the CAO instance.